This post will try to help and guide you to correctly care for your Bluestone areas in the winter months. Although Bluestone is a low maintenance type of natural masonry paver, there are some products and methods which are better for caring for it and ensuring it’s long lasting beauty.
When shoveling snow off of your Bluestone, always use a plastic shovel to avoid scratching the stone. Try to avoid removing ice with metal shovels and tools. Metal shovels and tools will permanently scratch the stone. Use as little de-icing product as is necessary.
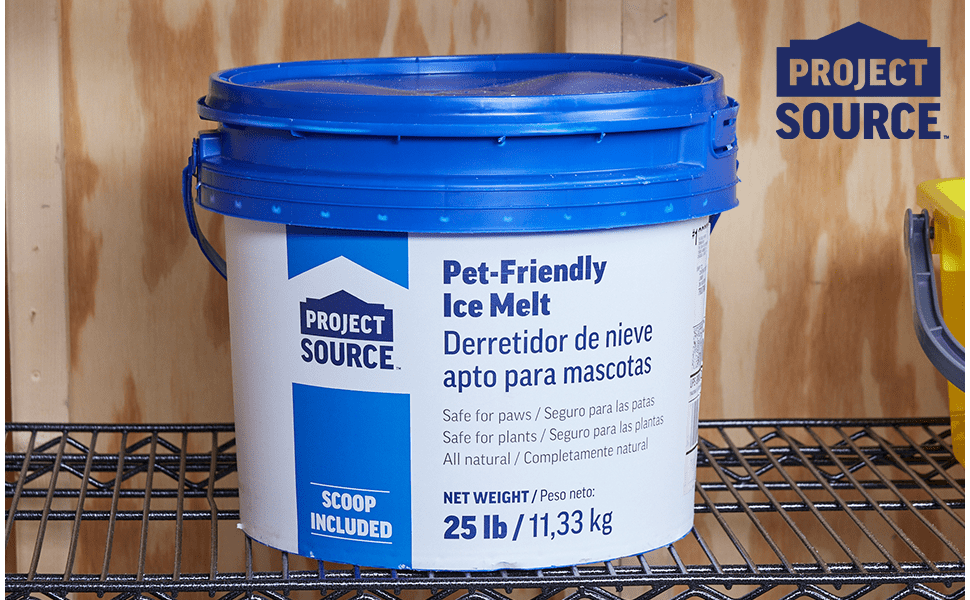
Sometimes, main entrances to buildings and walkways are going to need to be salted with a de-icing product. We generally recommend trying to avoid using salt, but sometimes it is necessary for these types of high traffic areas. Below are some different types of salt to use or avoid.
Magnesium Chloride- Available in flake & pellet form with an effective melting point of -13 degrees Fahrenheit. Use only as much product as is necessary. This product is safer to use for Bluestone, concrete, pets and the environment and should reduce spalling. Leaves no reside and no tracking.
Calcium Chloride- Available in pelletized form with an effective melting point of -25 degrees Fahrenheit. Use only as much product as is necessary (a little amount goes a long way). Again, this product is safer to use for Bluestone, concrete, pets and the environment and should reduce spalling.
Potassium Chloride– This is a pelletized form of salt which has an effective melting point of 20 degrees Fahrenheit. Use only as much as is necessary to melt ice. This product is safer for the environment and is more pet friendly.
Sodium Chloride (Rock Salt/ Halite)- This product is NOT recommended for Bluestone. Although it has good melting ability, it possesses a lower freezing point than pure water which accelerates the freeze/ thaw cycle of the stone. This acceleration of the freeze/ thaw cycle can cause surface spalling and deterioration of the stone and surrounding pointing.
Some other products to consider are Safe Paws or Morton Safe-T-Pet. These two products are safer for animals and the environment and can be found at pets stores.
If you have any other questions or concerns about caring for your Bluestone areas feel free to call (215-646-3500) or email us (info@robinsonflagstone.com ) and we can personally try to trouble-shoot any problems you may be having.
https://robinsonflagstone.com/wp-content/uploads/2022/12/Magnesium-Chloride.png600970Tom Ruanehttps://robinsonflagstone.com/wp-content/uploads/2023/02/Logo-3-300x300.pngTom Ruane2022-12-23 08:58:582023-02-19 17:20:55Snow & Ice Removal on Bluestone
In this post I will be going over how to install a flagstone patio. This project was a “Dry-Set” flagstone patio. I used quotation marks for the phrase dry-set because there will be Portland cement and some water used with this setting method.
Materials
Used:
Average 1 ½” Thick Flagstone
Concrete Sand
2A Modified Crushed Stone
Shovels
Garden Hoe
Brick & Block Trowel
Rubber Mallet
Tamper
Level
Wheel Barrow
5 Gallon Buckets
Portland Cement
Sponge
Grinder with Diamond Wheel
Polymeric Sand
Broom
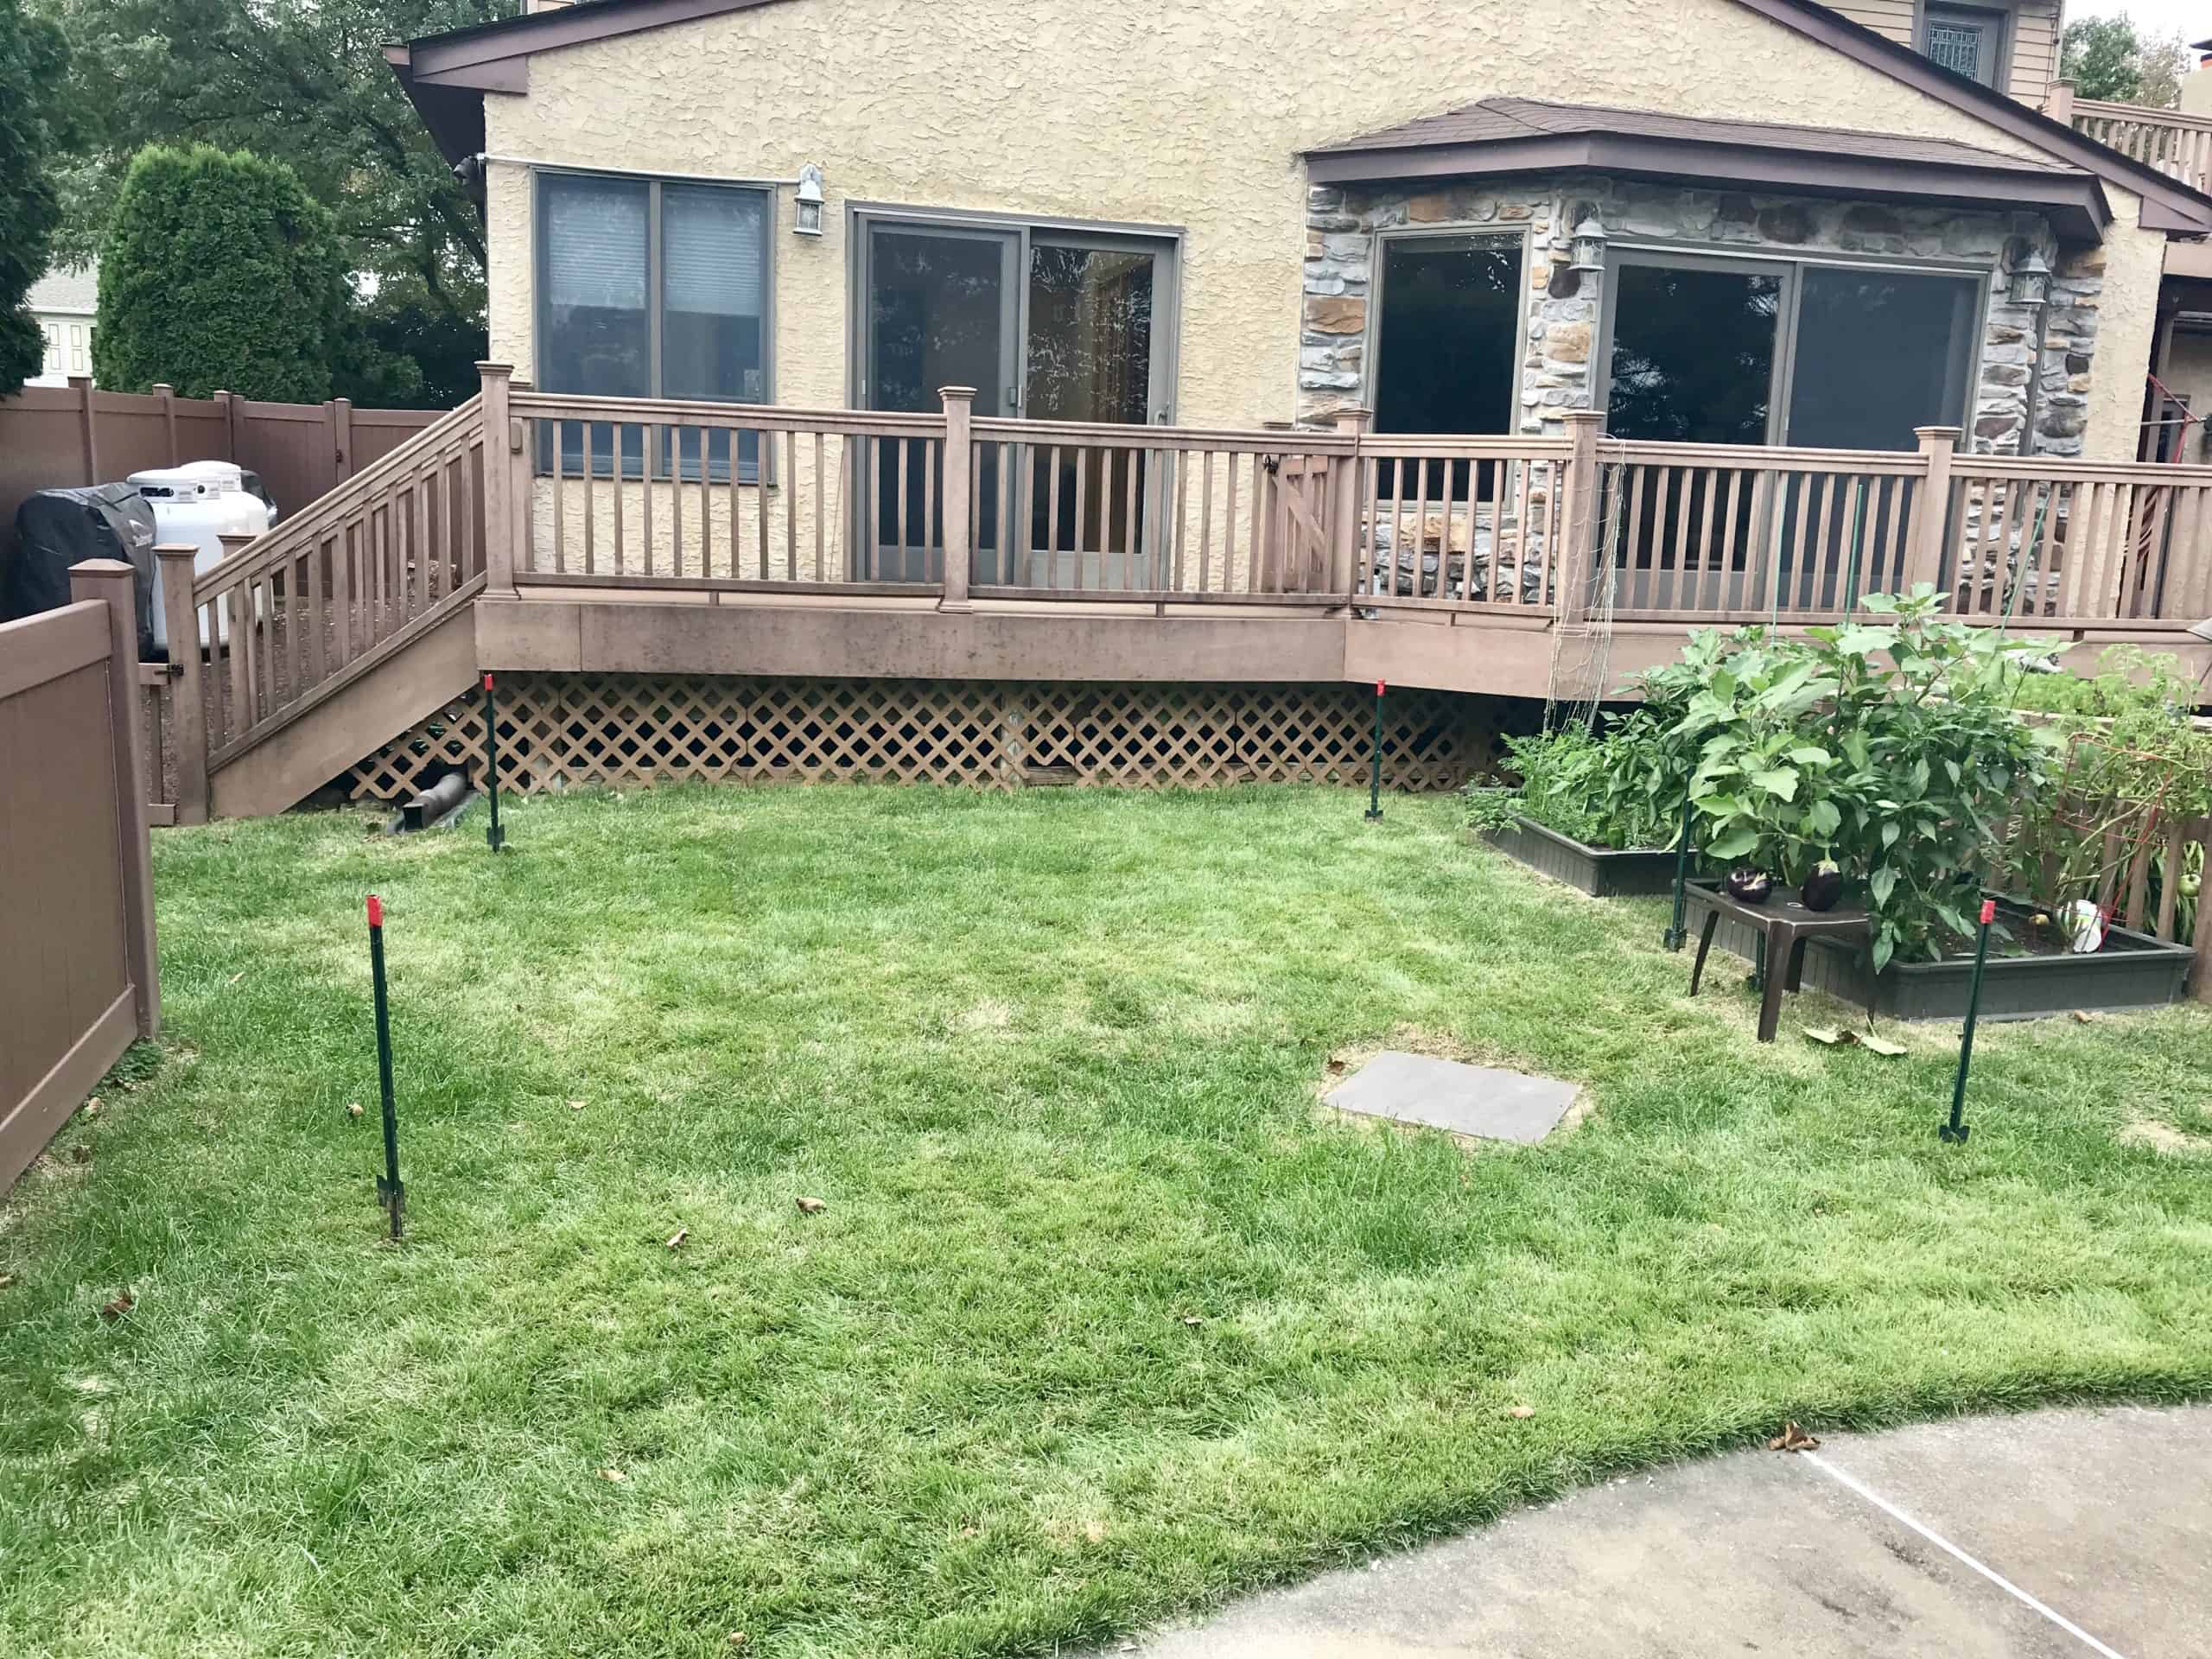
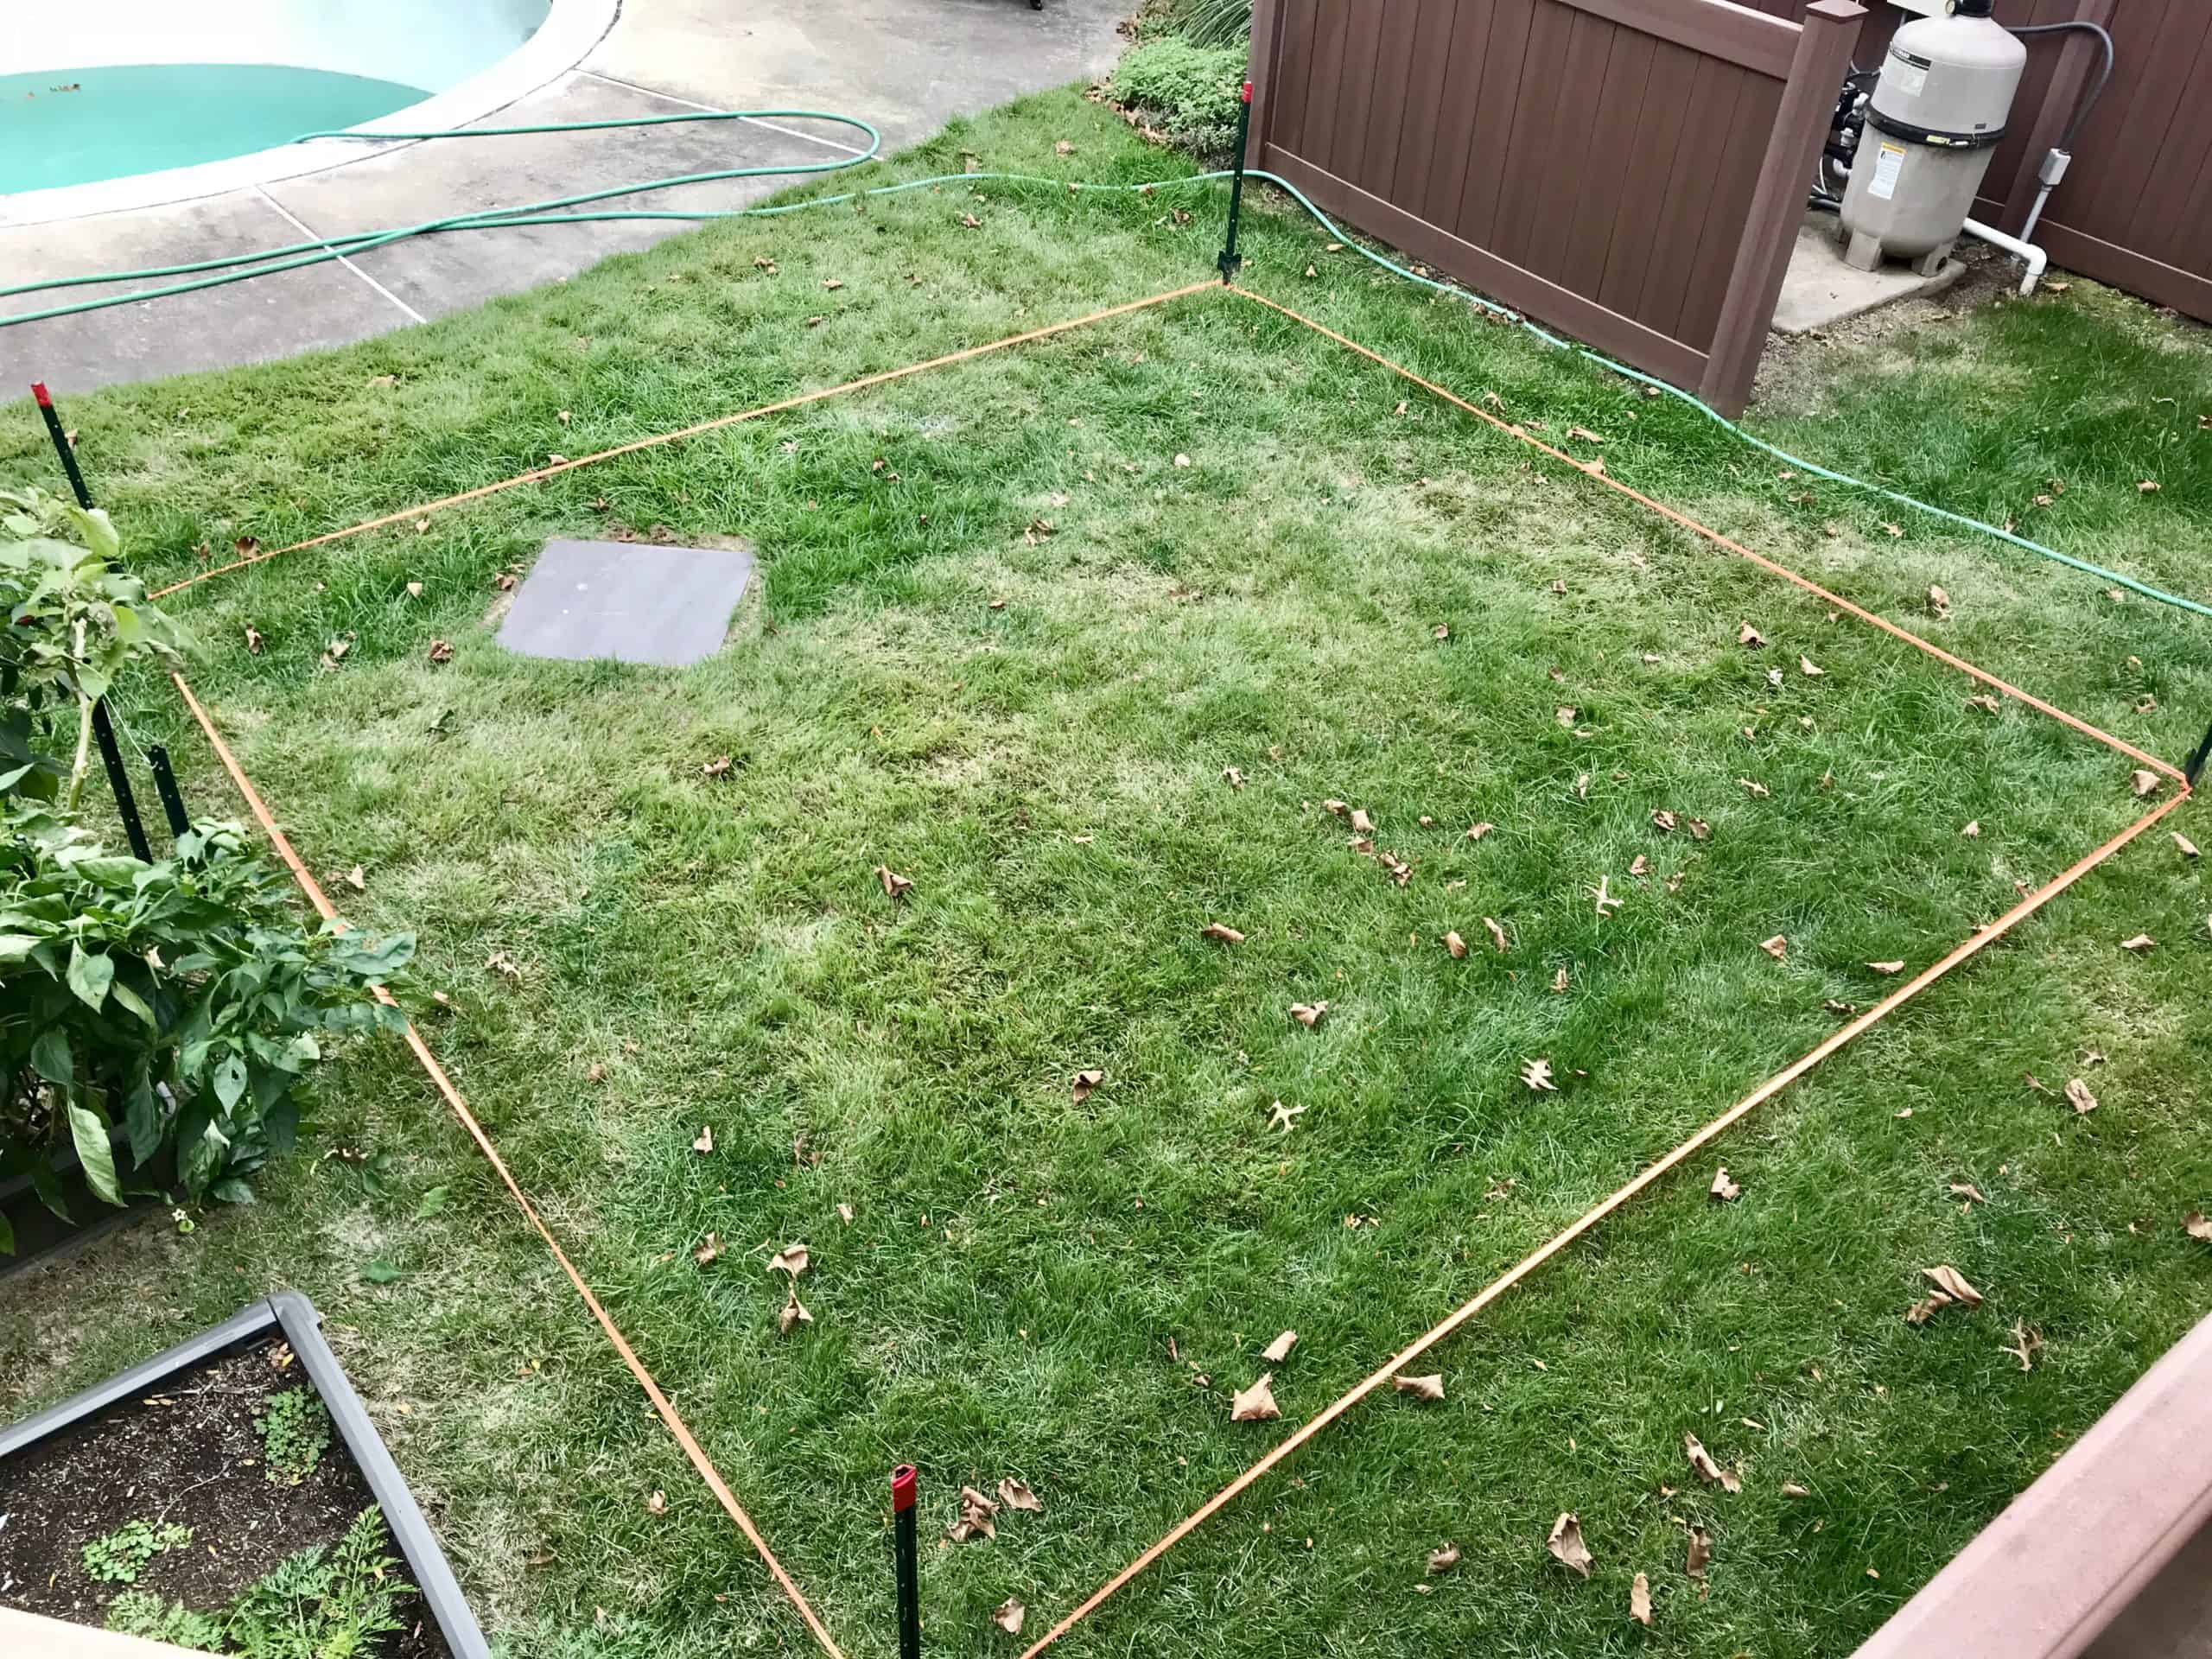
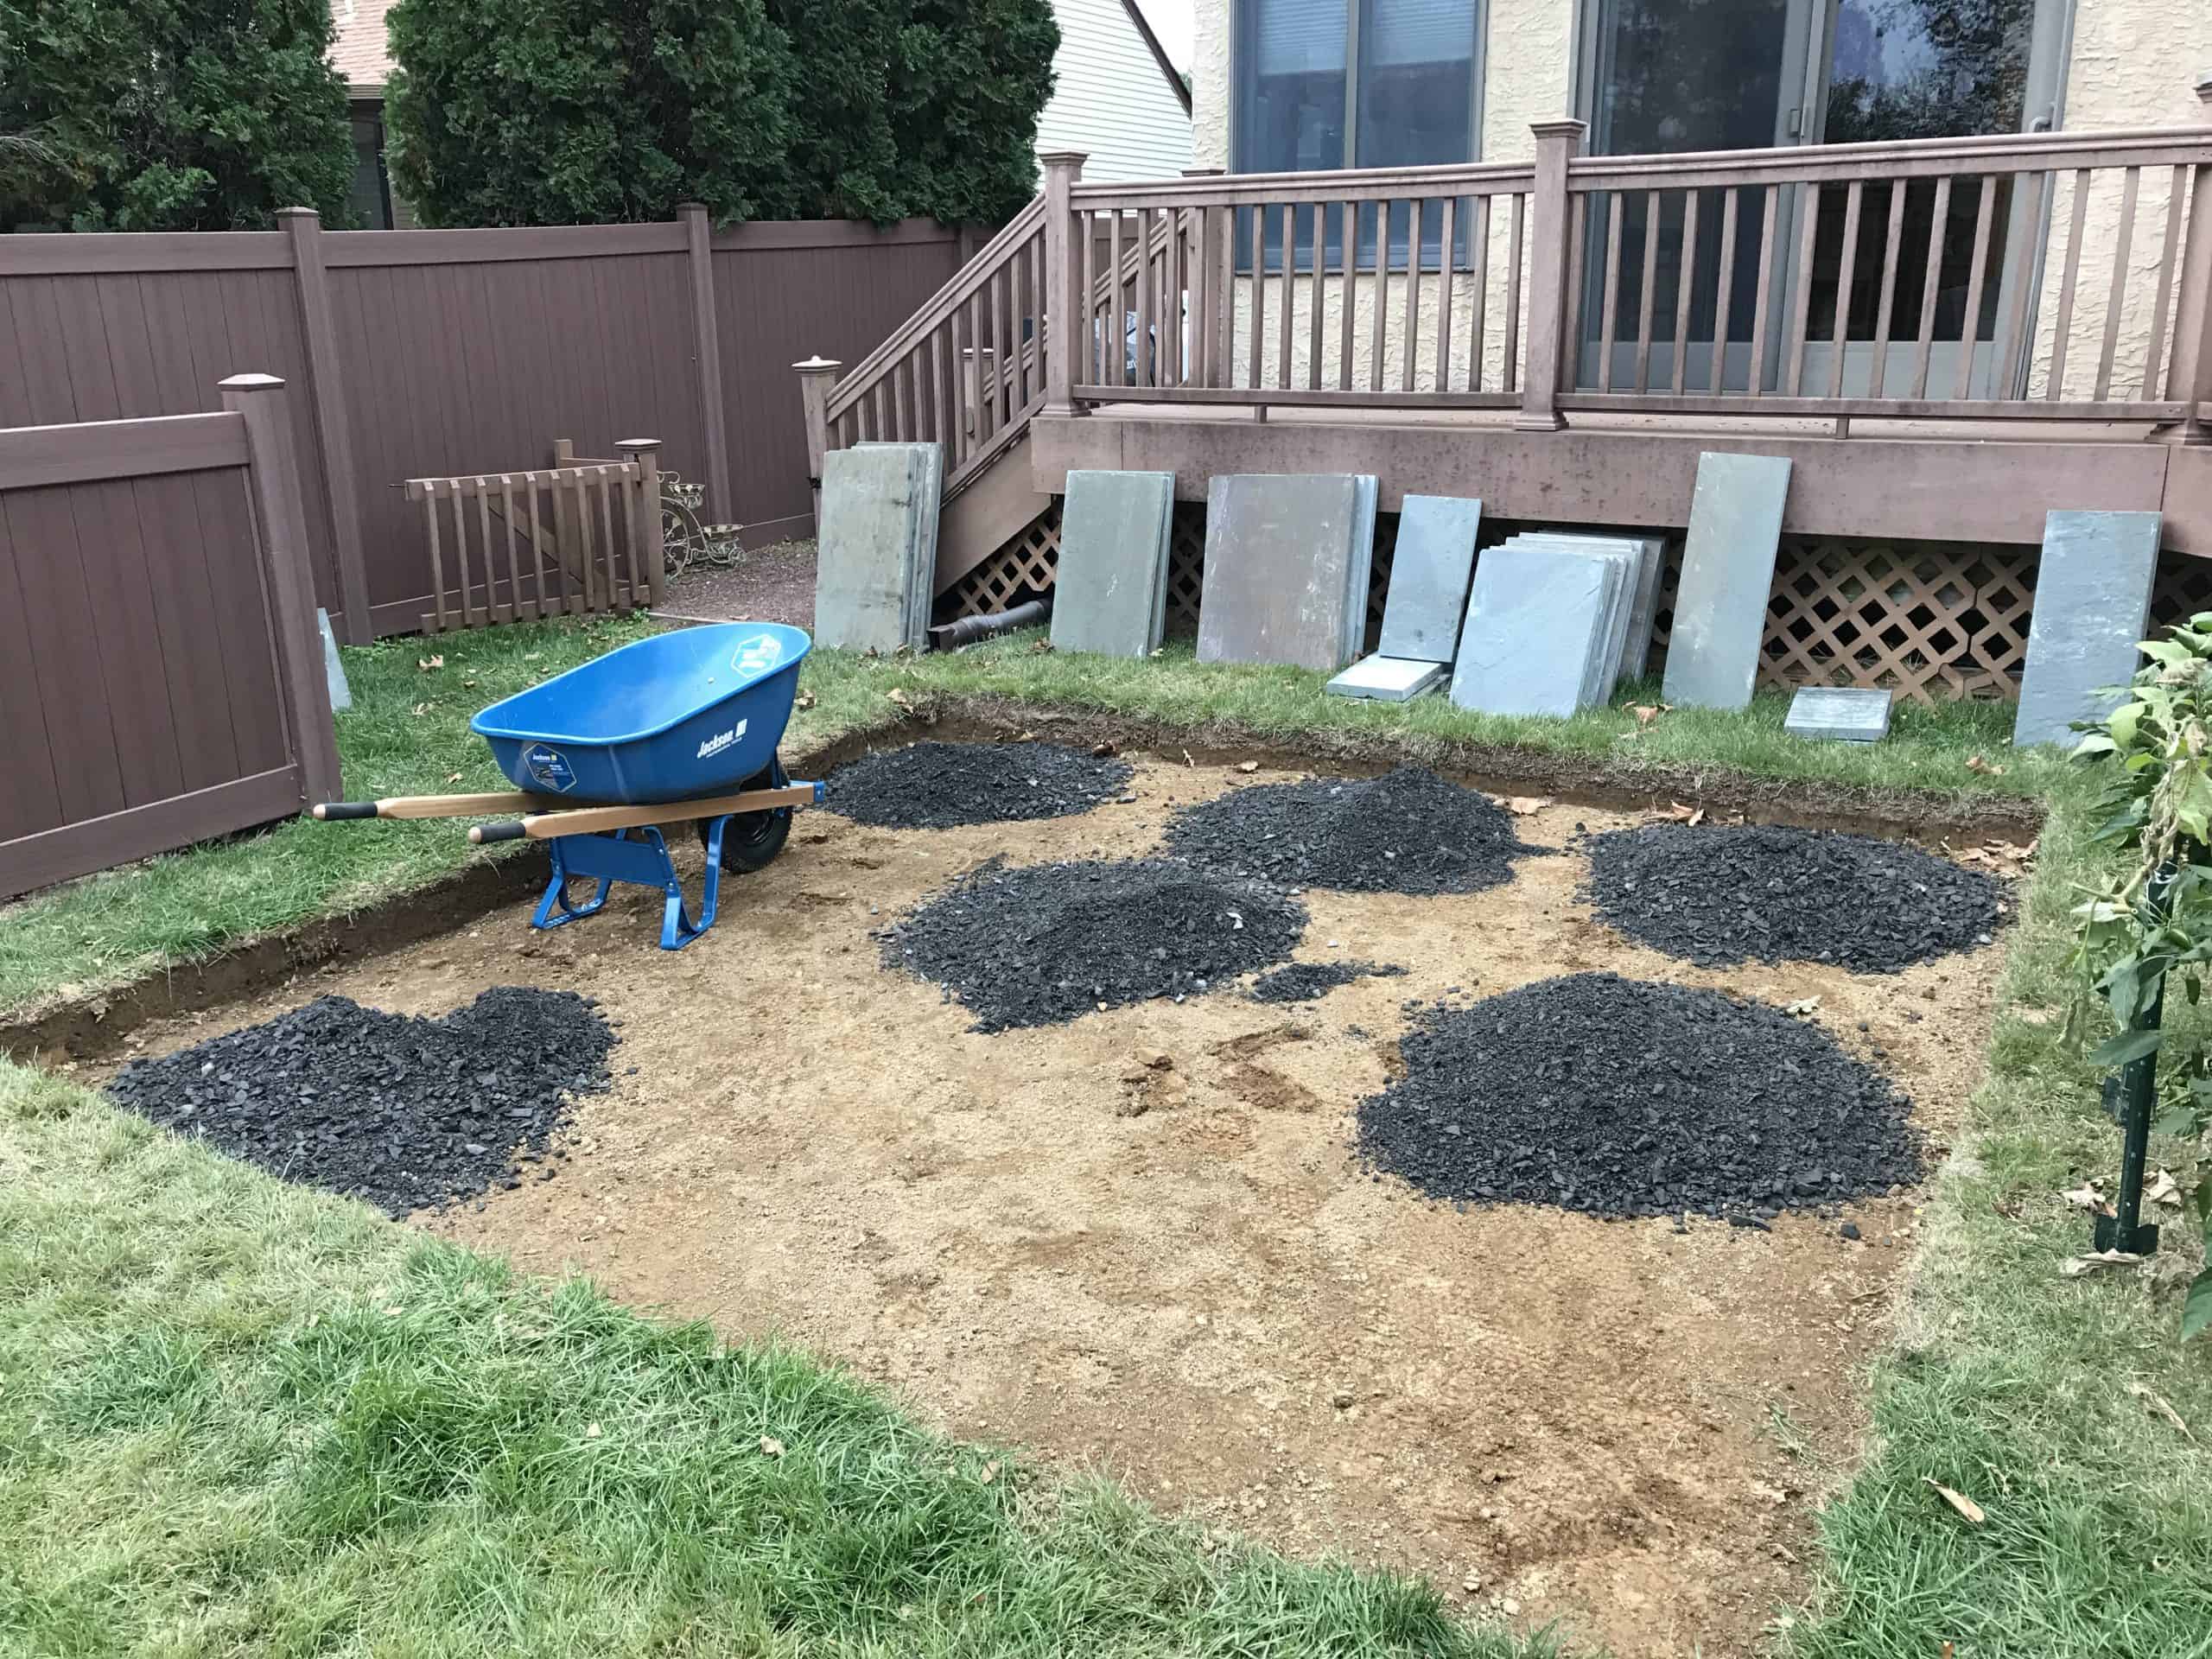
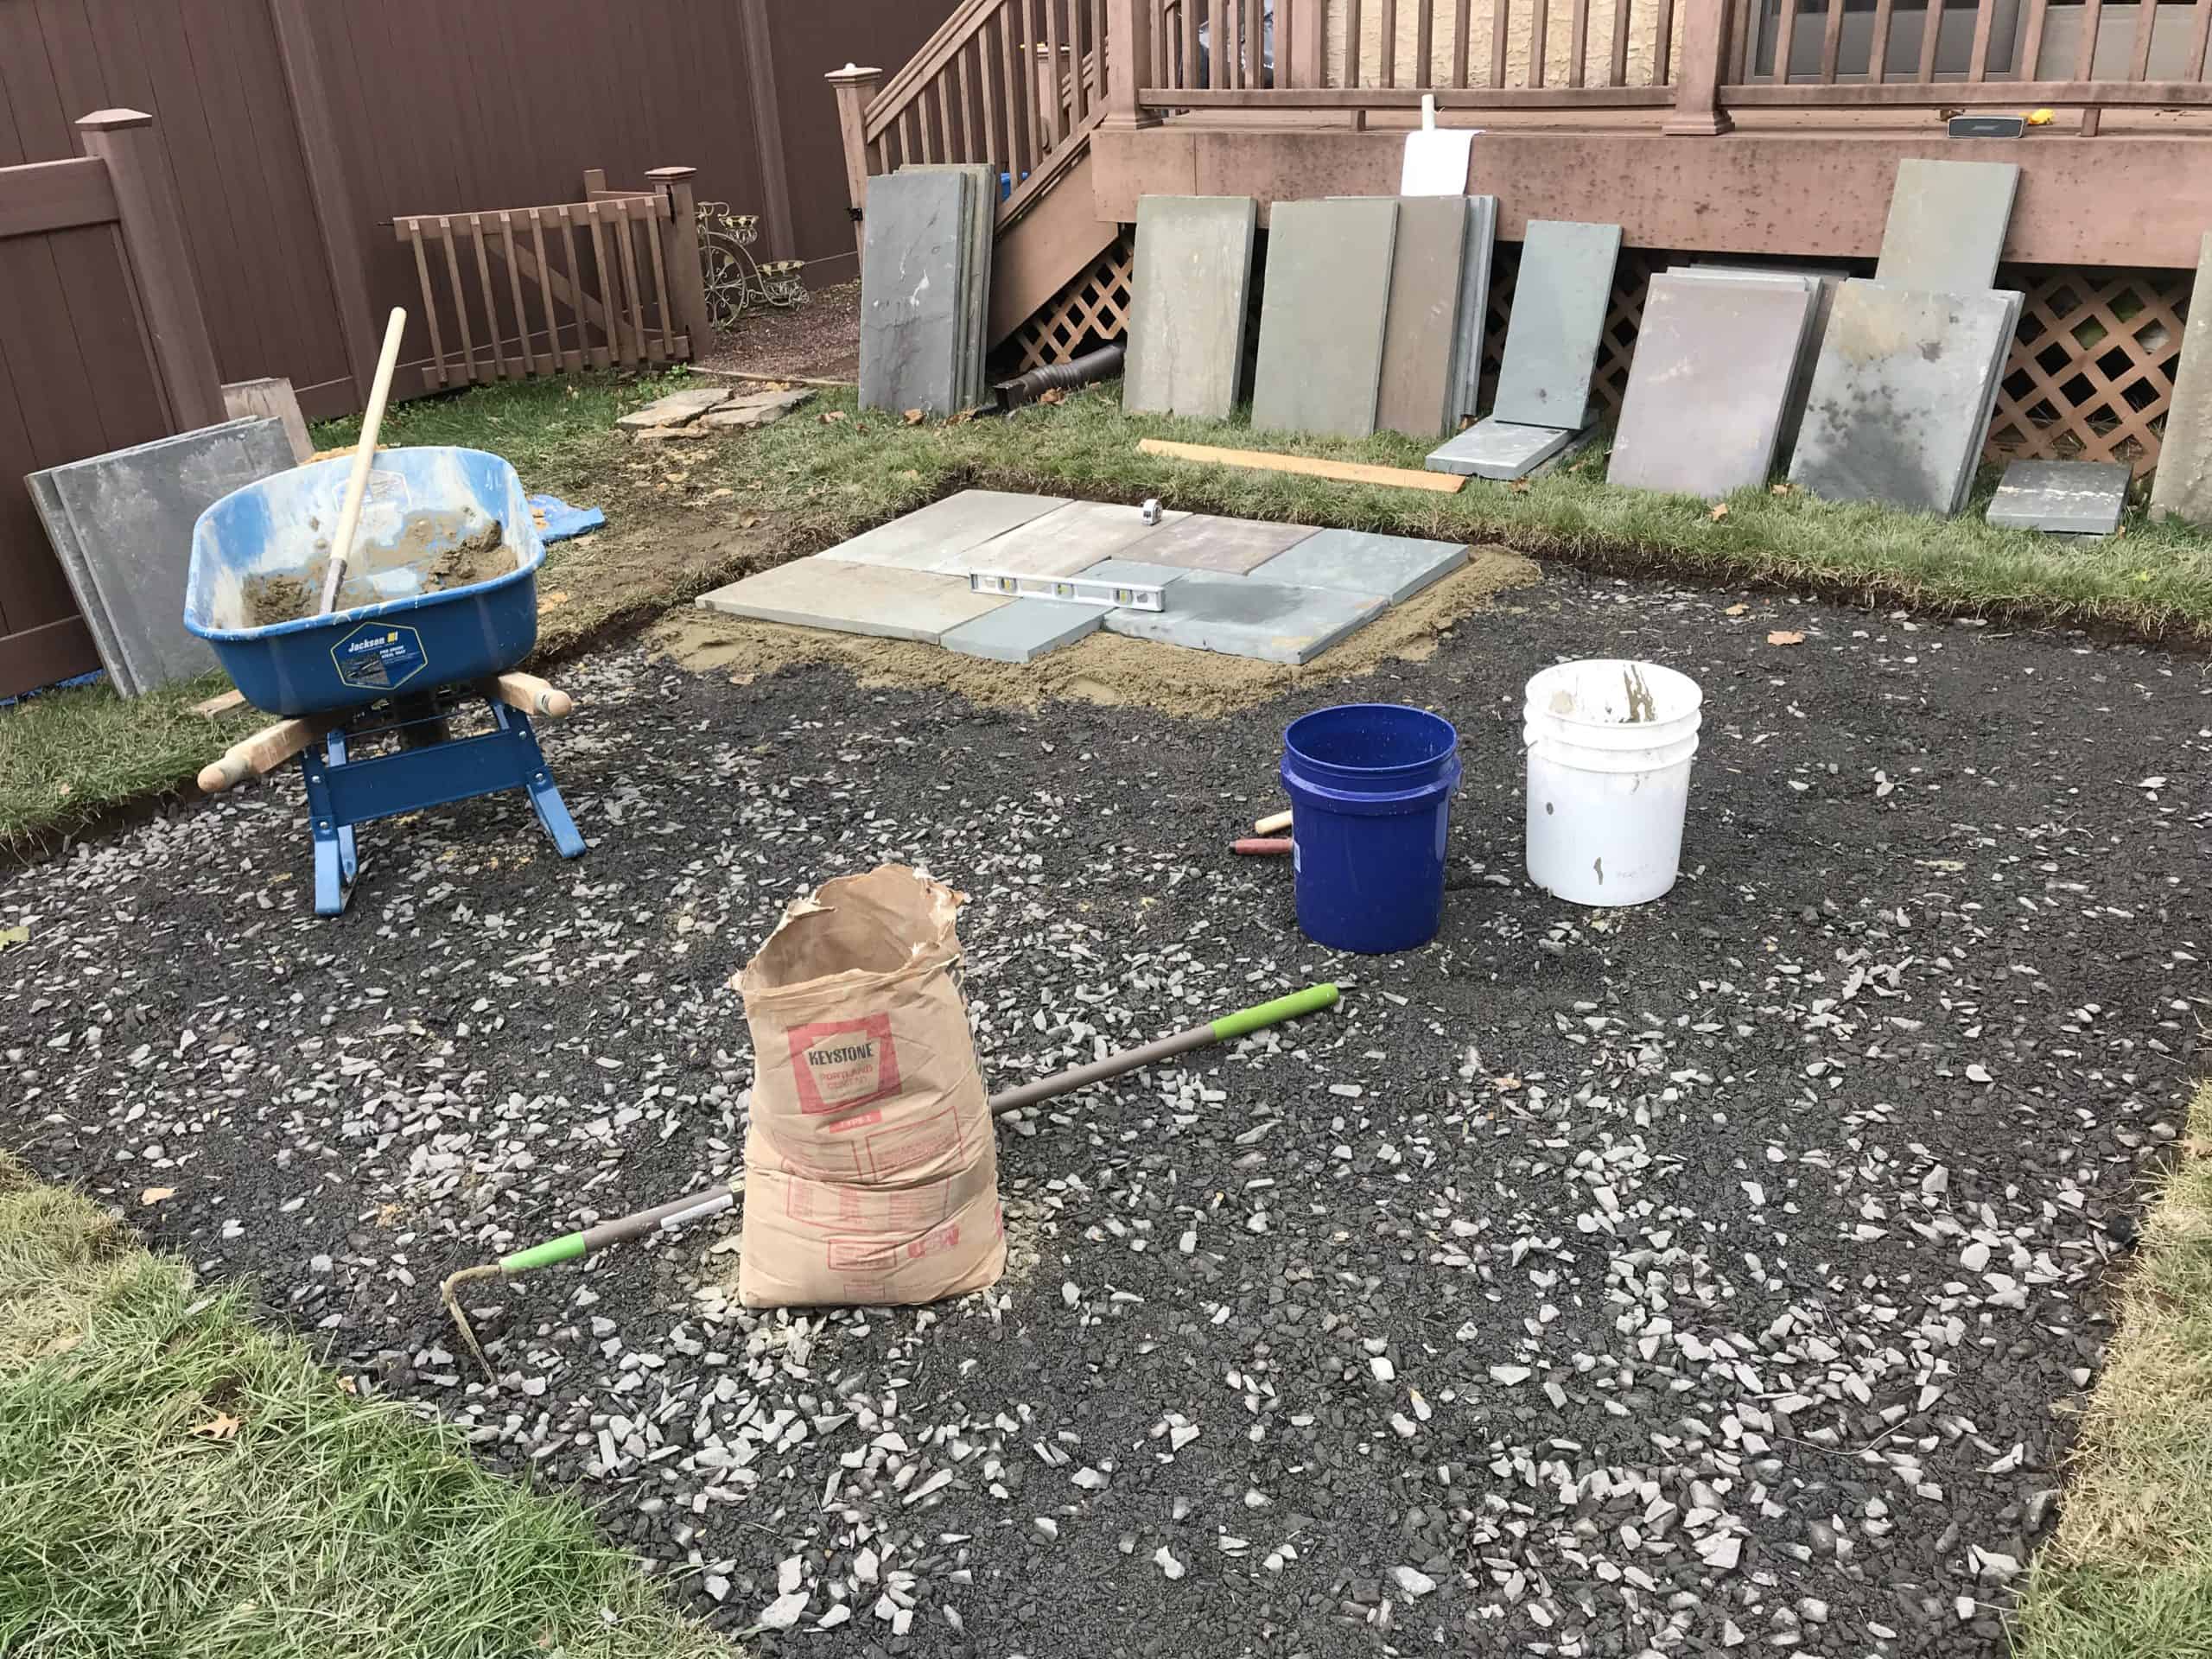
My first step was to identify the actual area where I wanted to put this patio. I staked off a (somewhat) square 12’-6” x 12’-6” area in the yard and also taped it off for visual aesthetics. The finished size of the patio will end up being a nominal 12’-0” x 12’-0” dimension, but I wanted a little extra room excavated out along the edges in case I needed more room to work.
Now
the work begins, time to dig. To accommodate the depth of my modified stone
base, setting bed and flagstone thickness, I dug the whole area out to an approximate
7” depth. That works out to roughly a 4” layer of the modified (tamped at 2”
intervals), about an 1 ½” layer for my setting bed, and the flagstone averages
about 1 ½” in thickness. When doing your own patio or walkway project, just let
your local supplier know the depth, length and width of your area and they will
be able to tell you the correct amount of cement, sand, and modified stone
you’ll need.
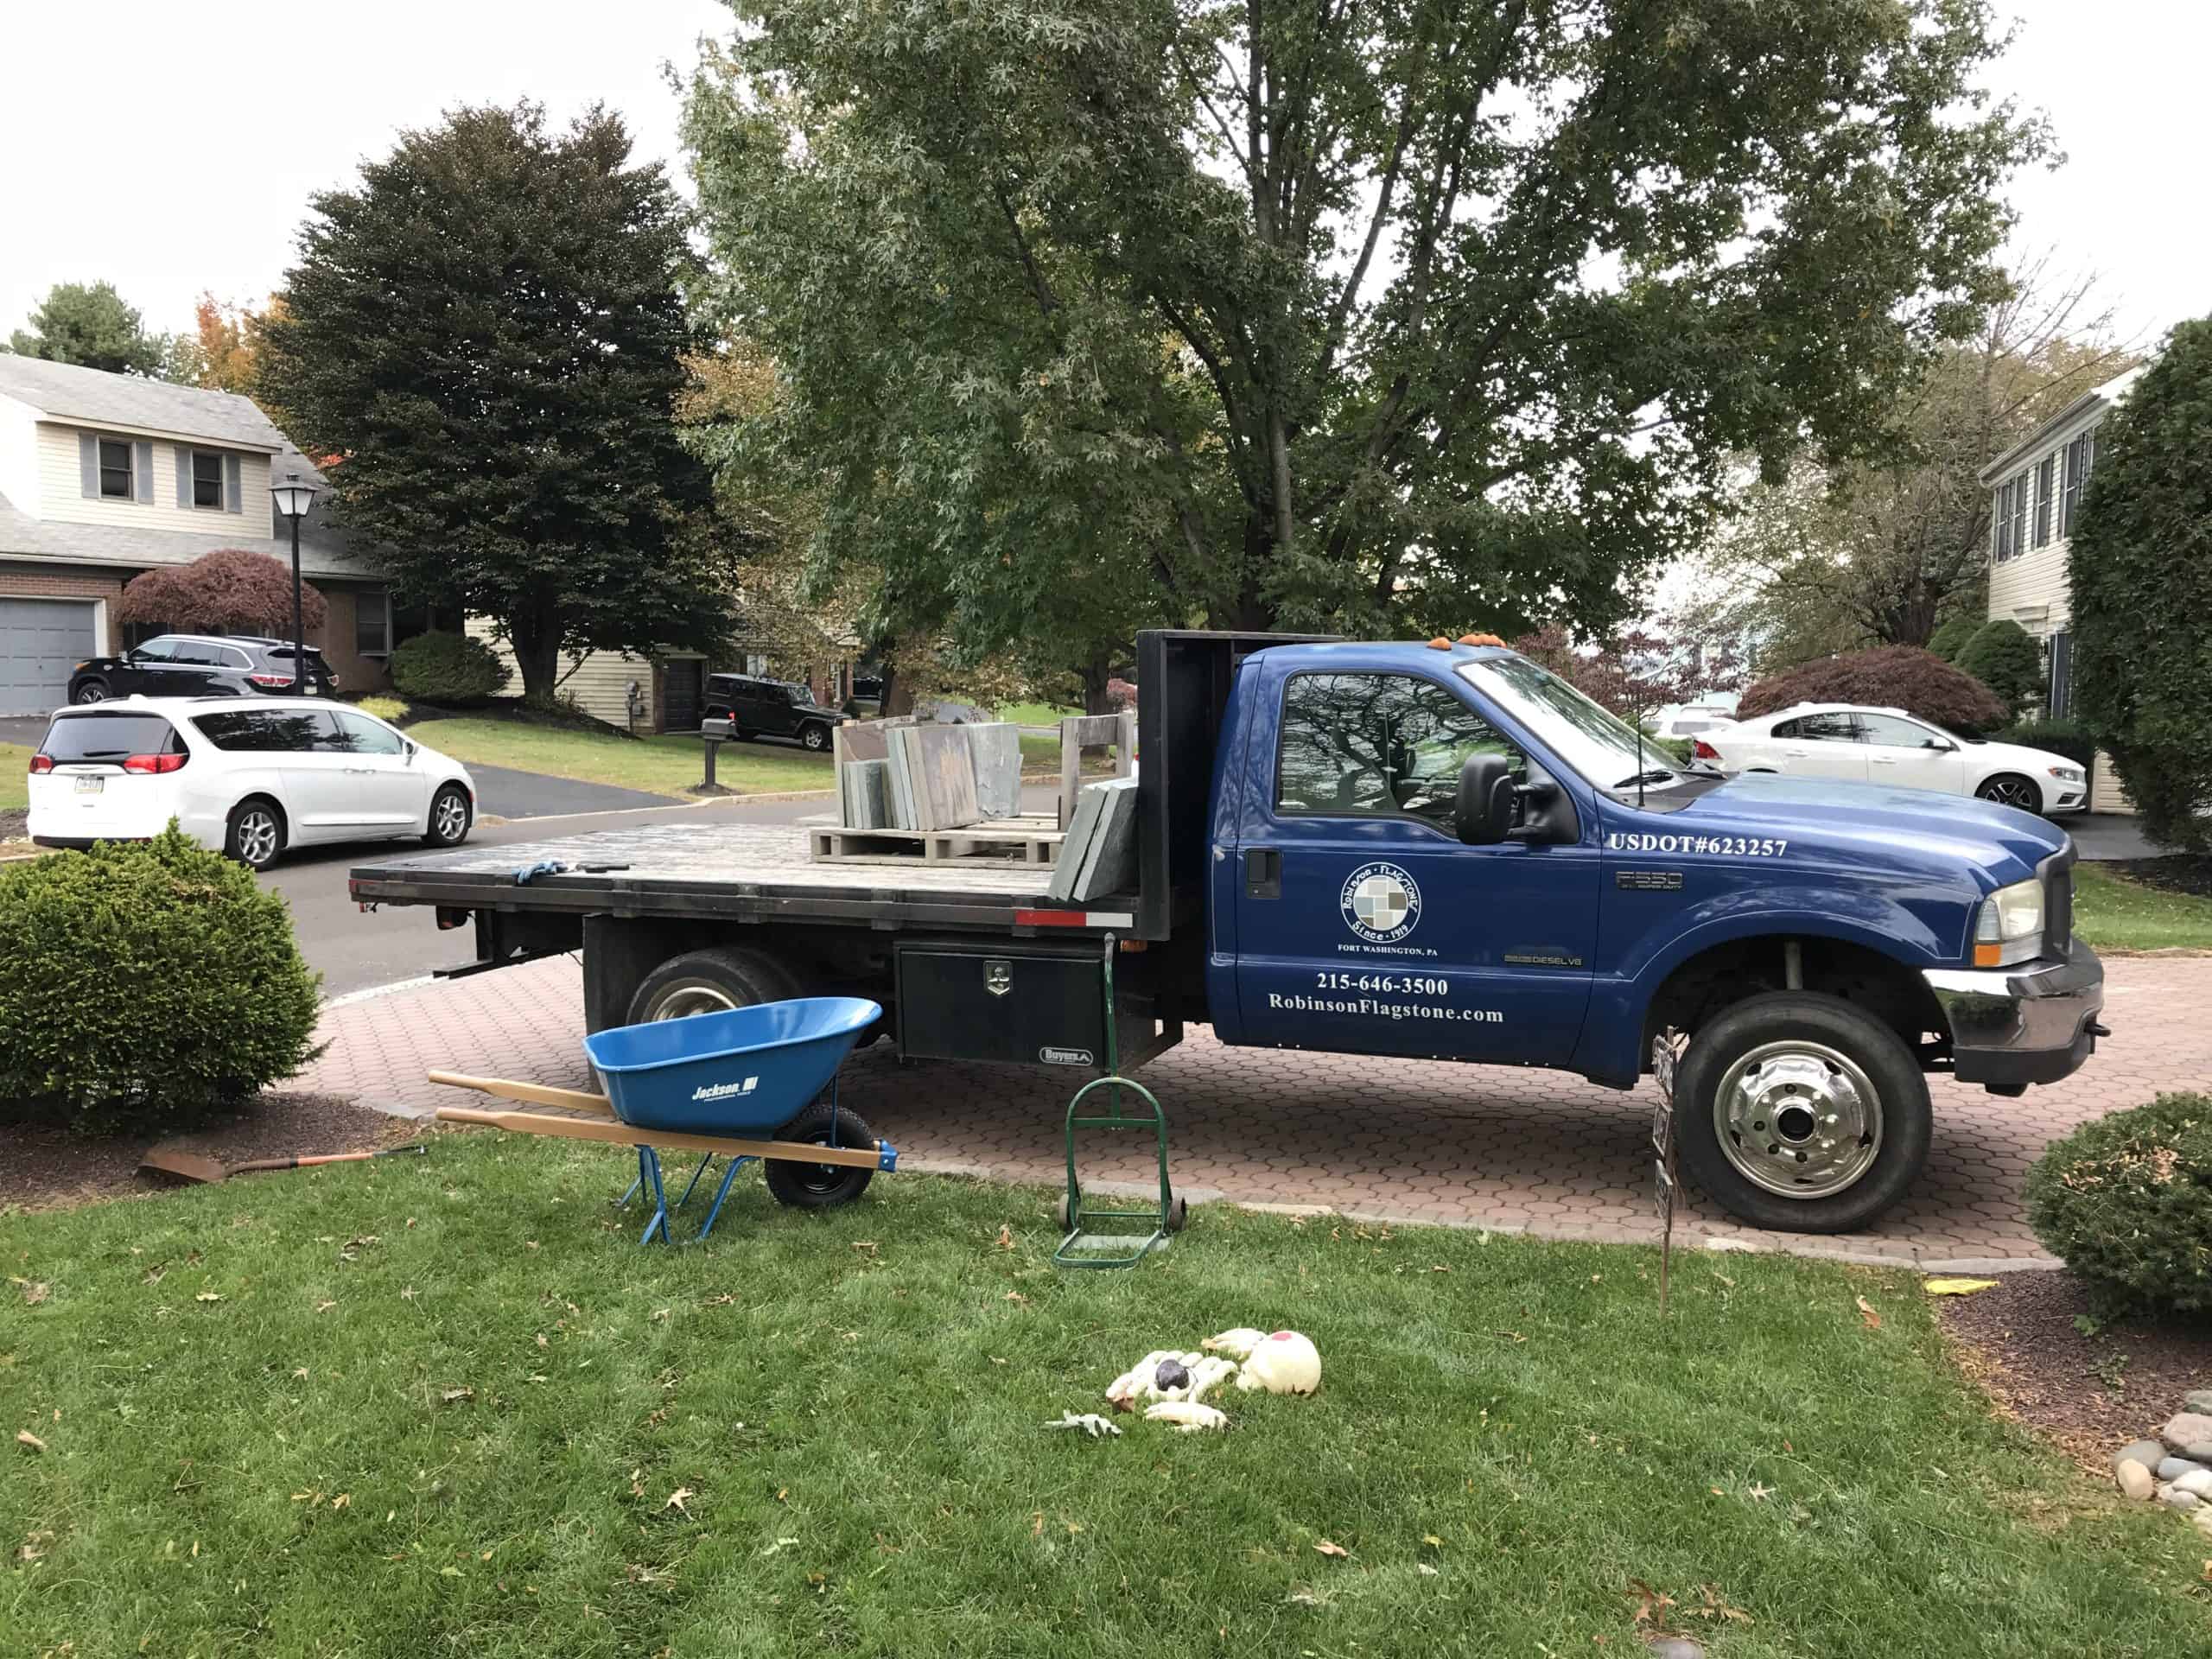
My
sand, modified, cement, and flagstone was all delivered to the front of the
house and had to be brought out back with a wheel barrow by hand, which was…
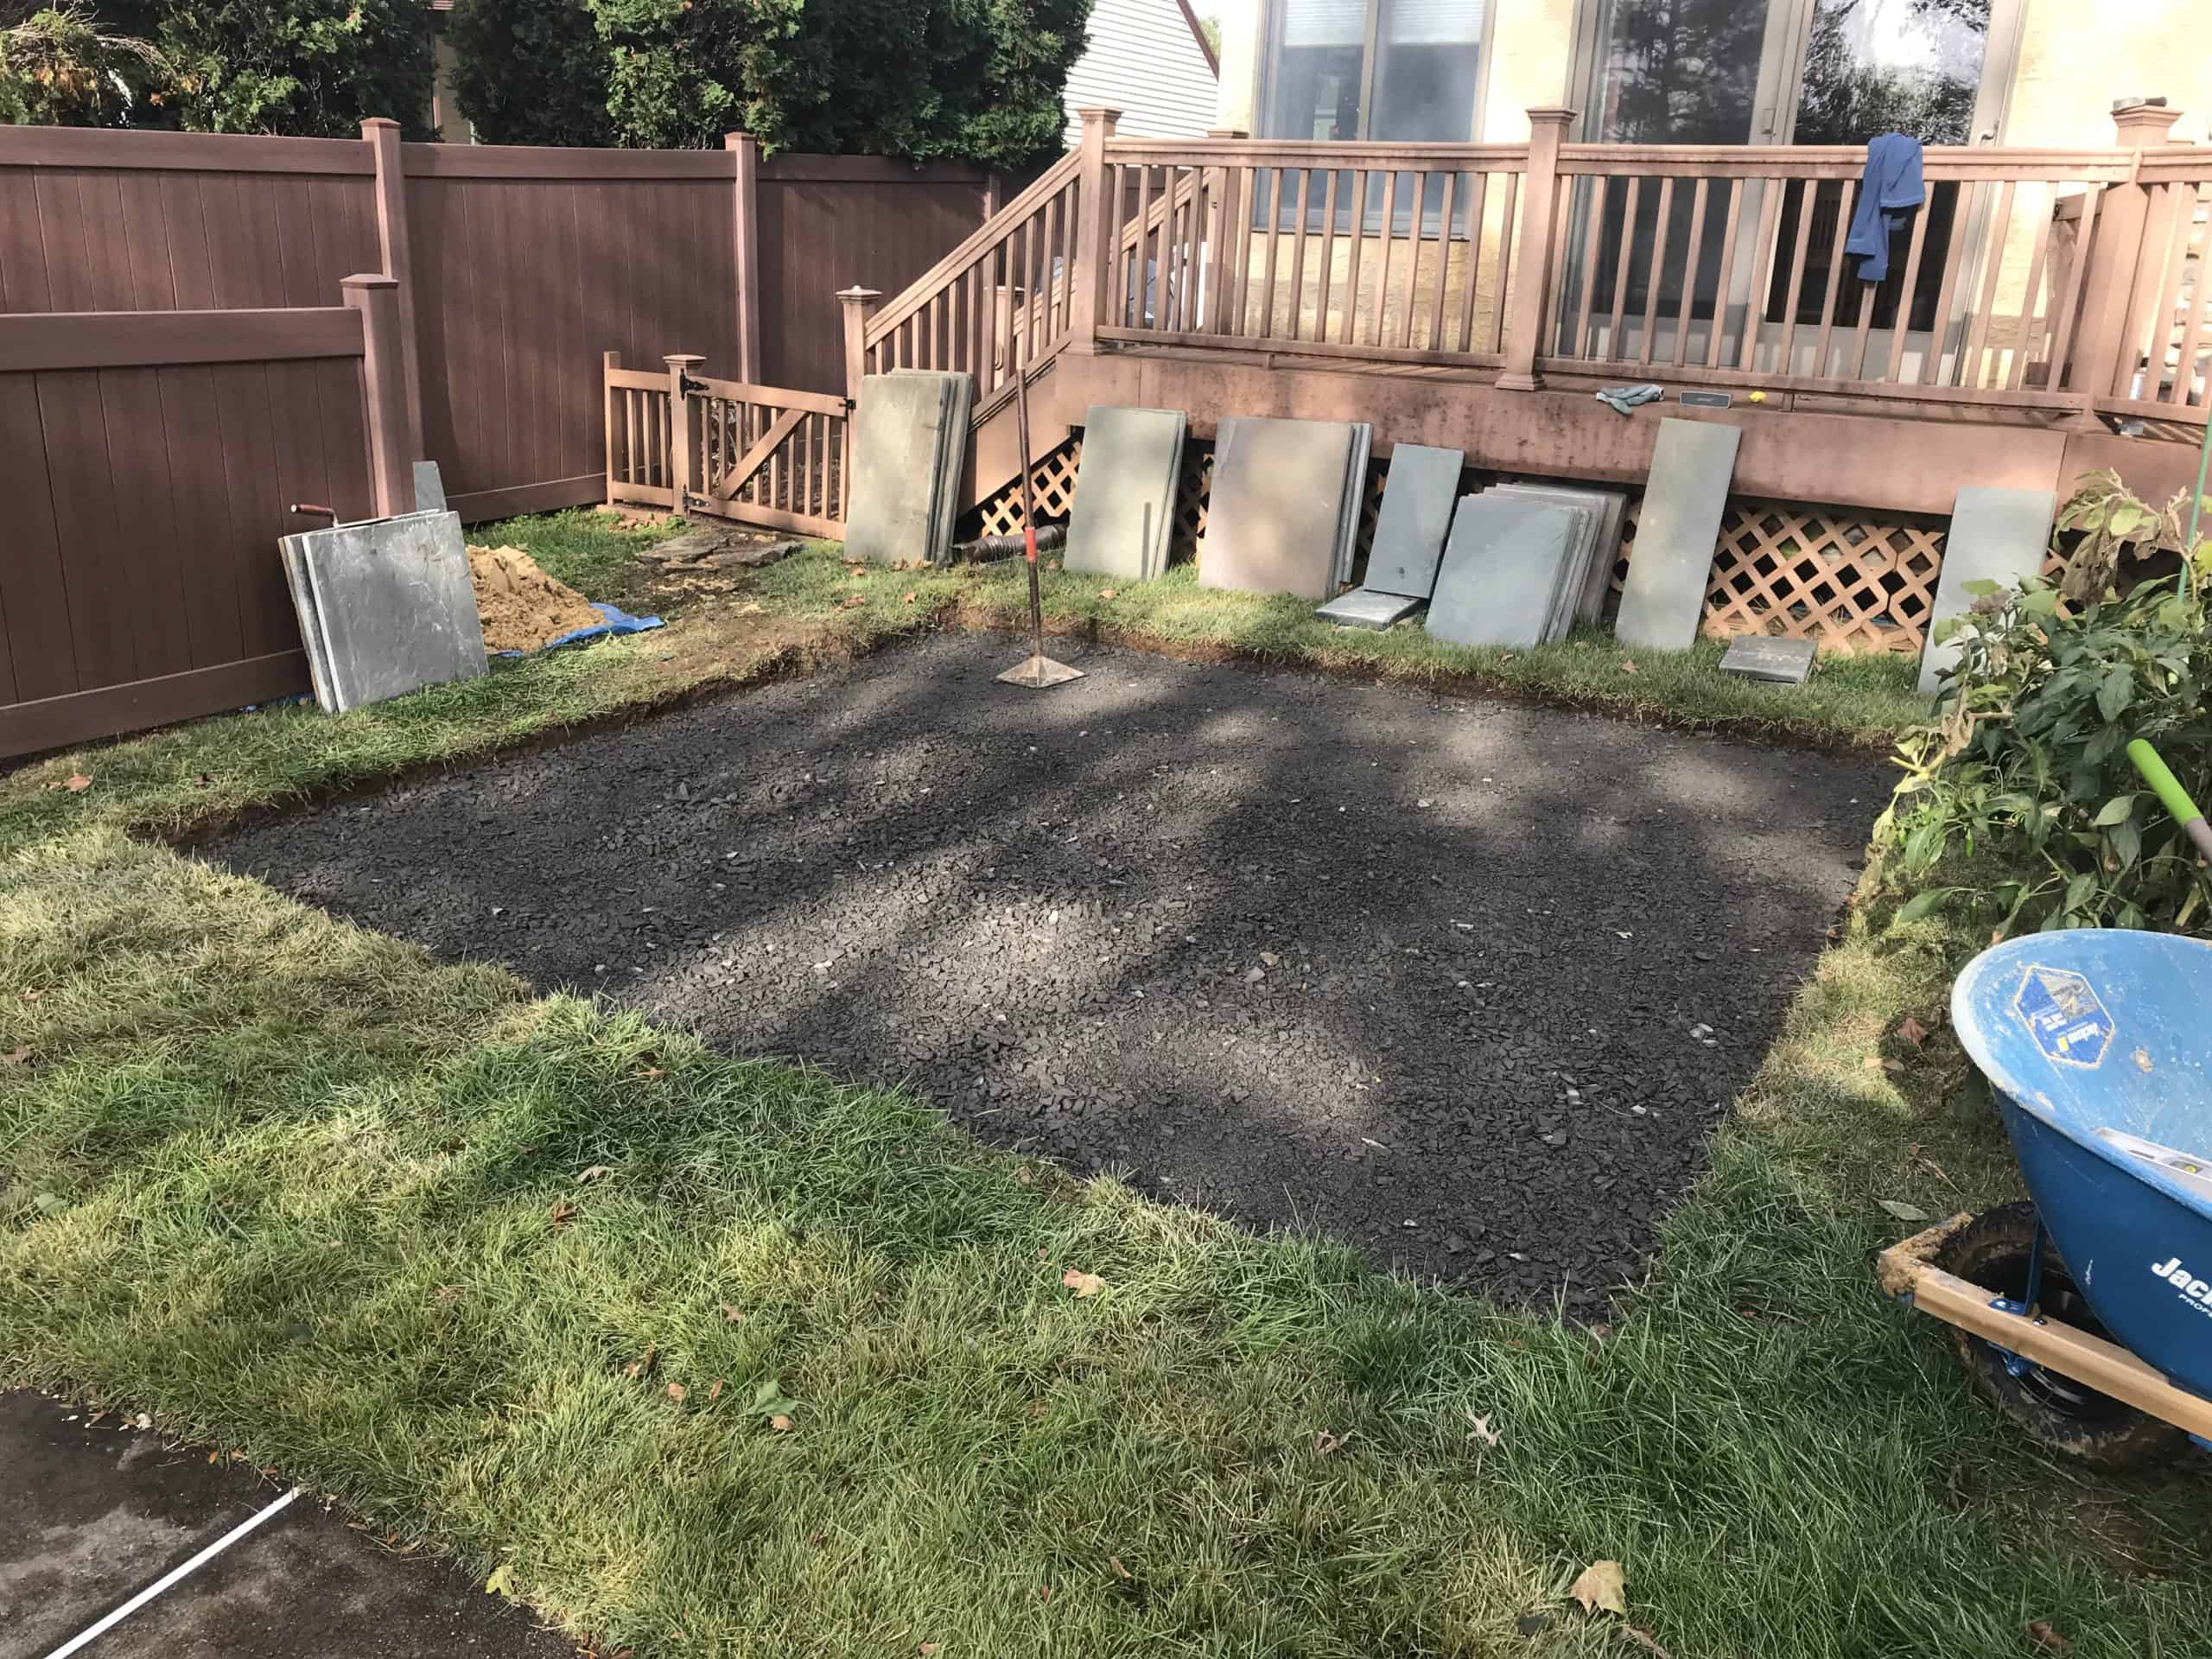
fun. The 2A modified crushed stone was then laid down in two 2” thick layers.
Each layer was firmly tamped down and compacted tight.
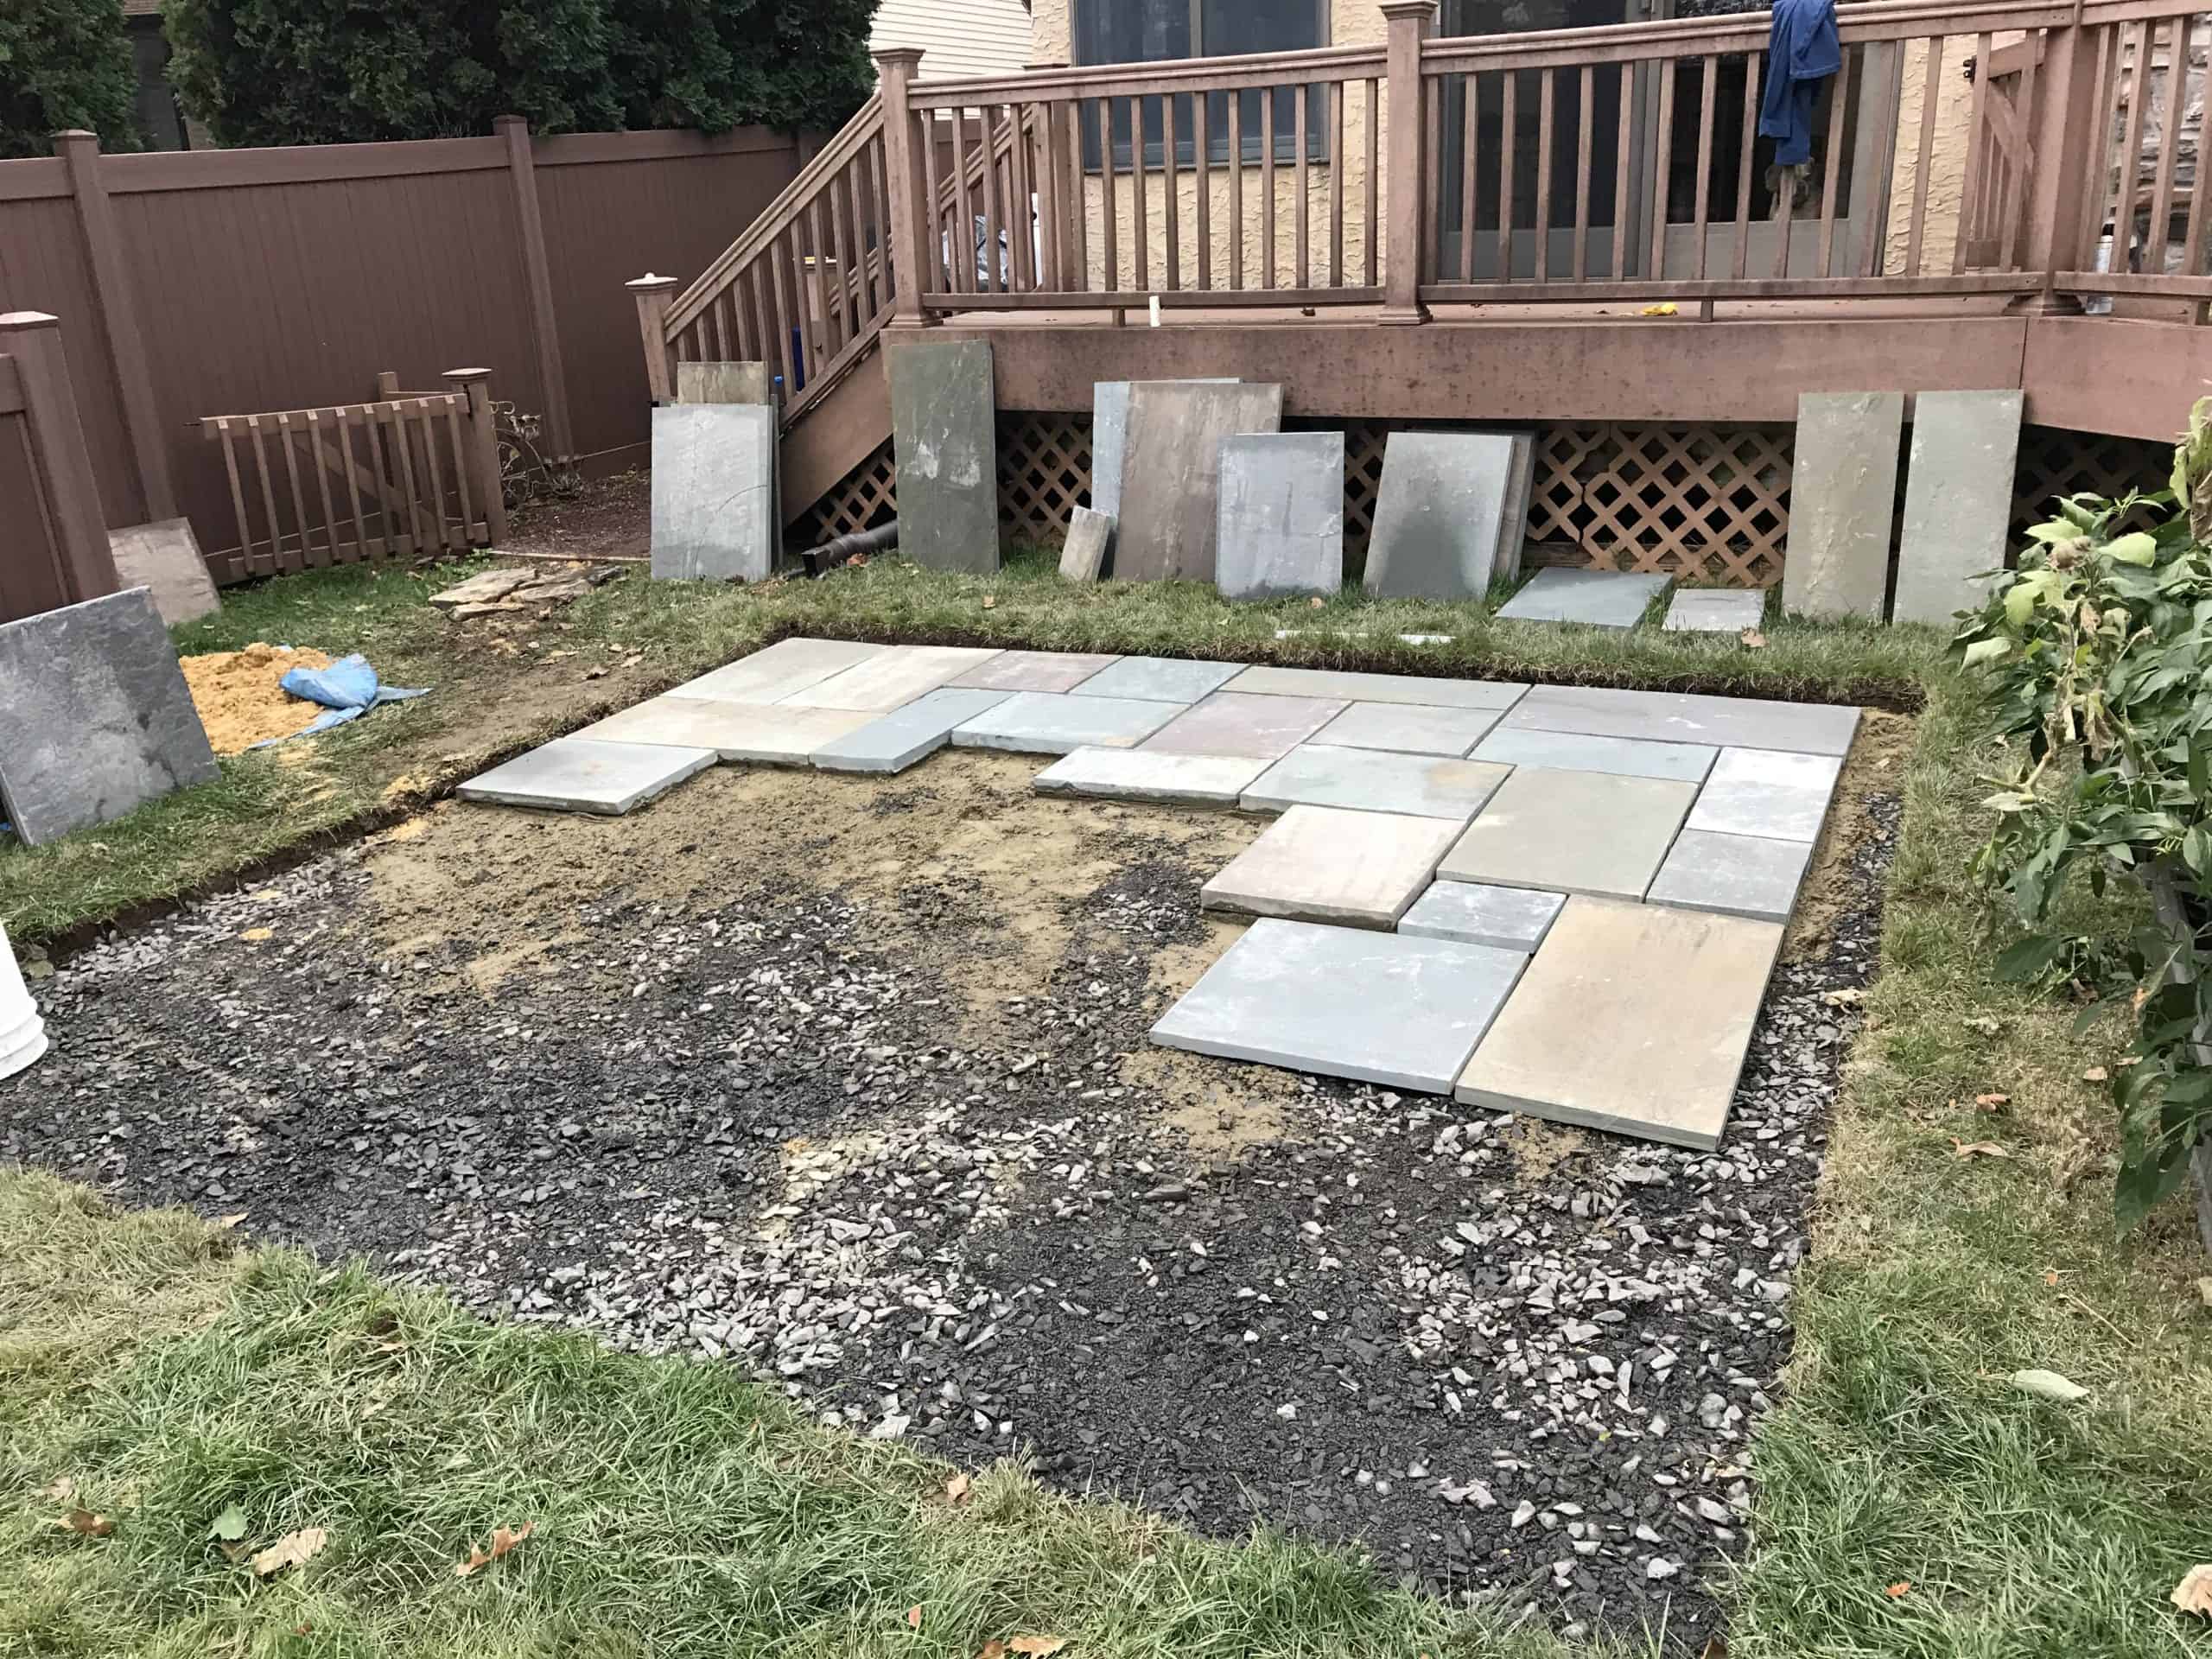
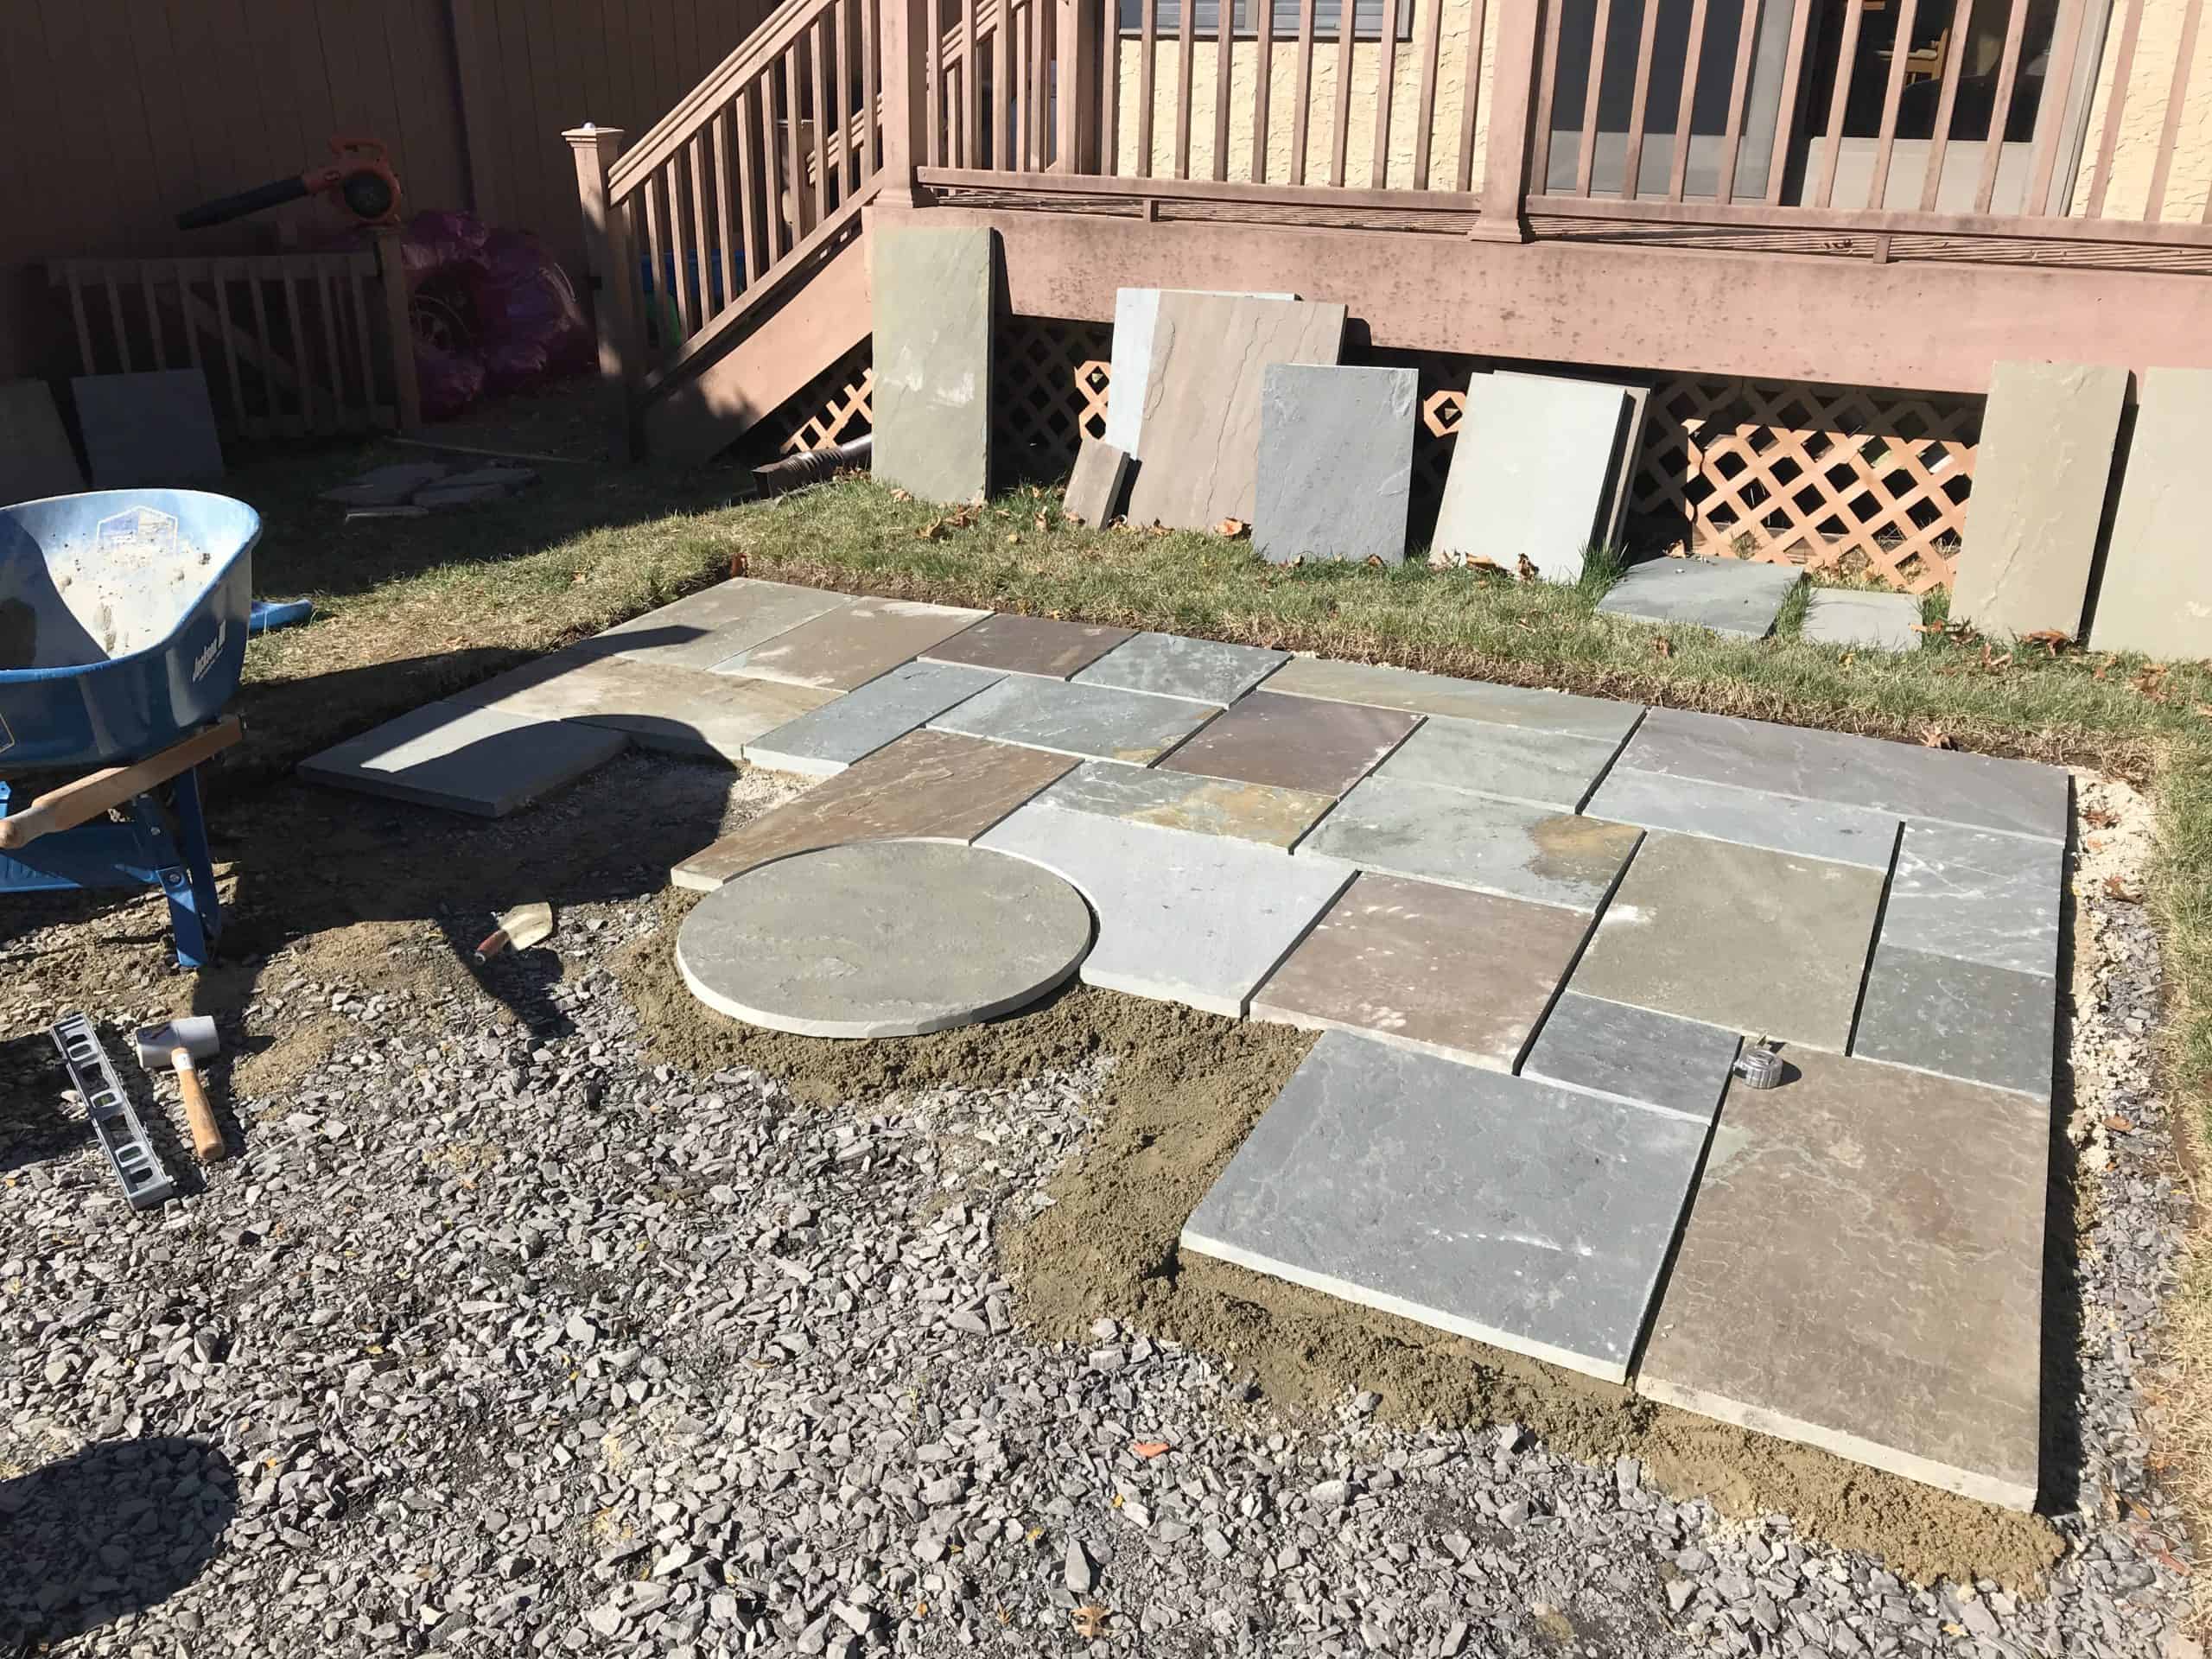
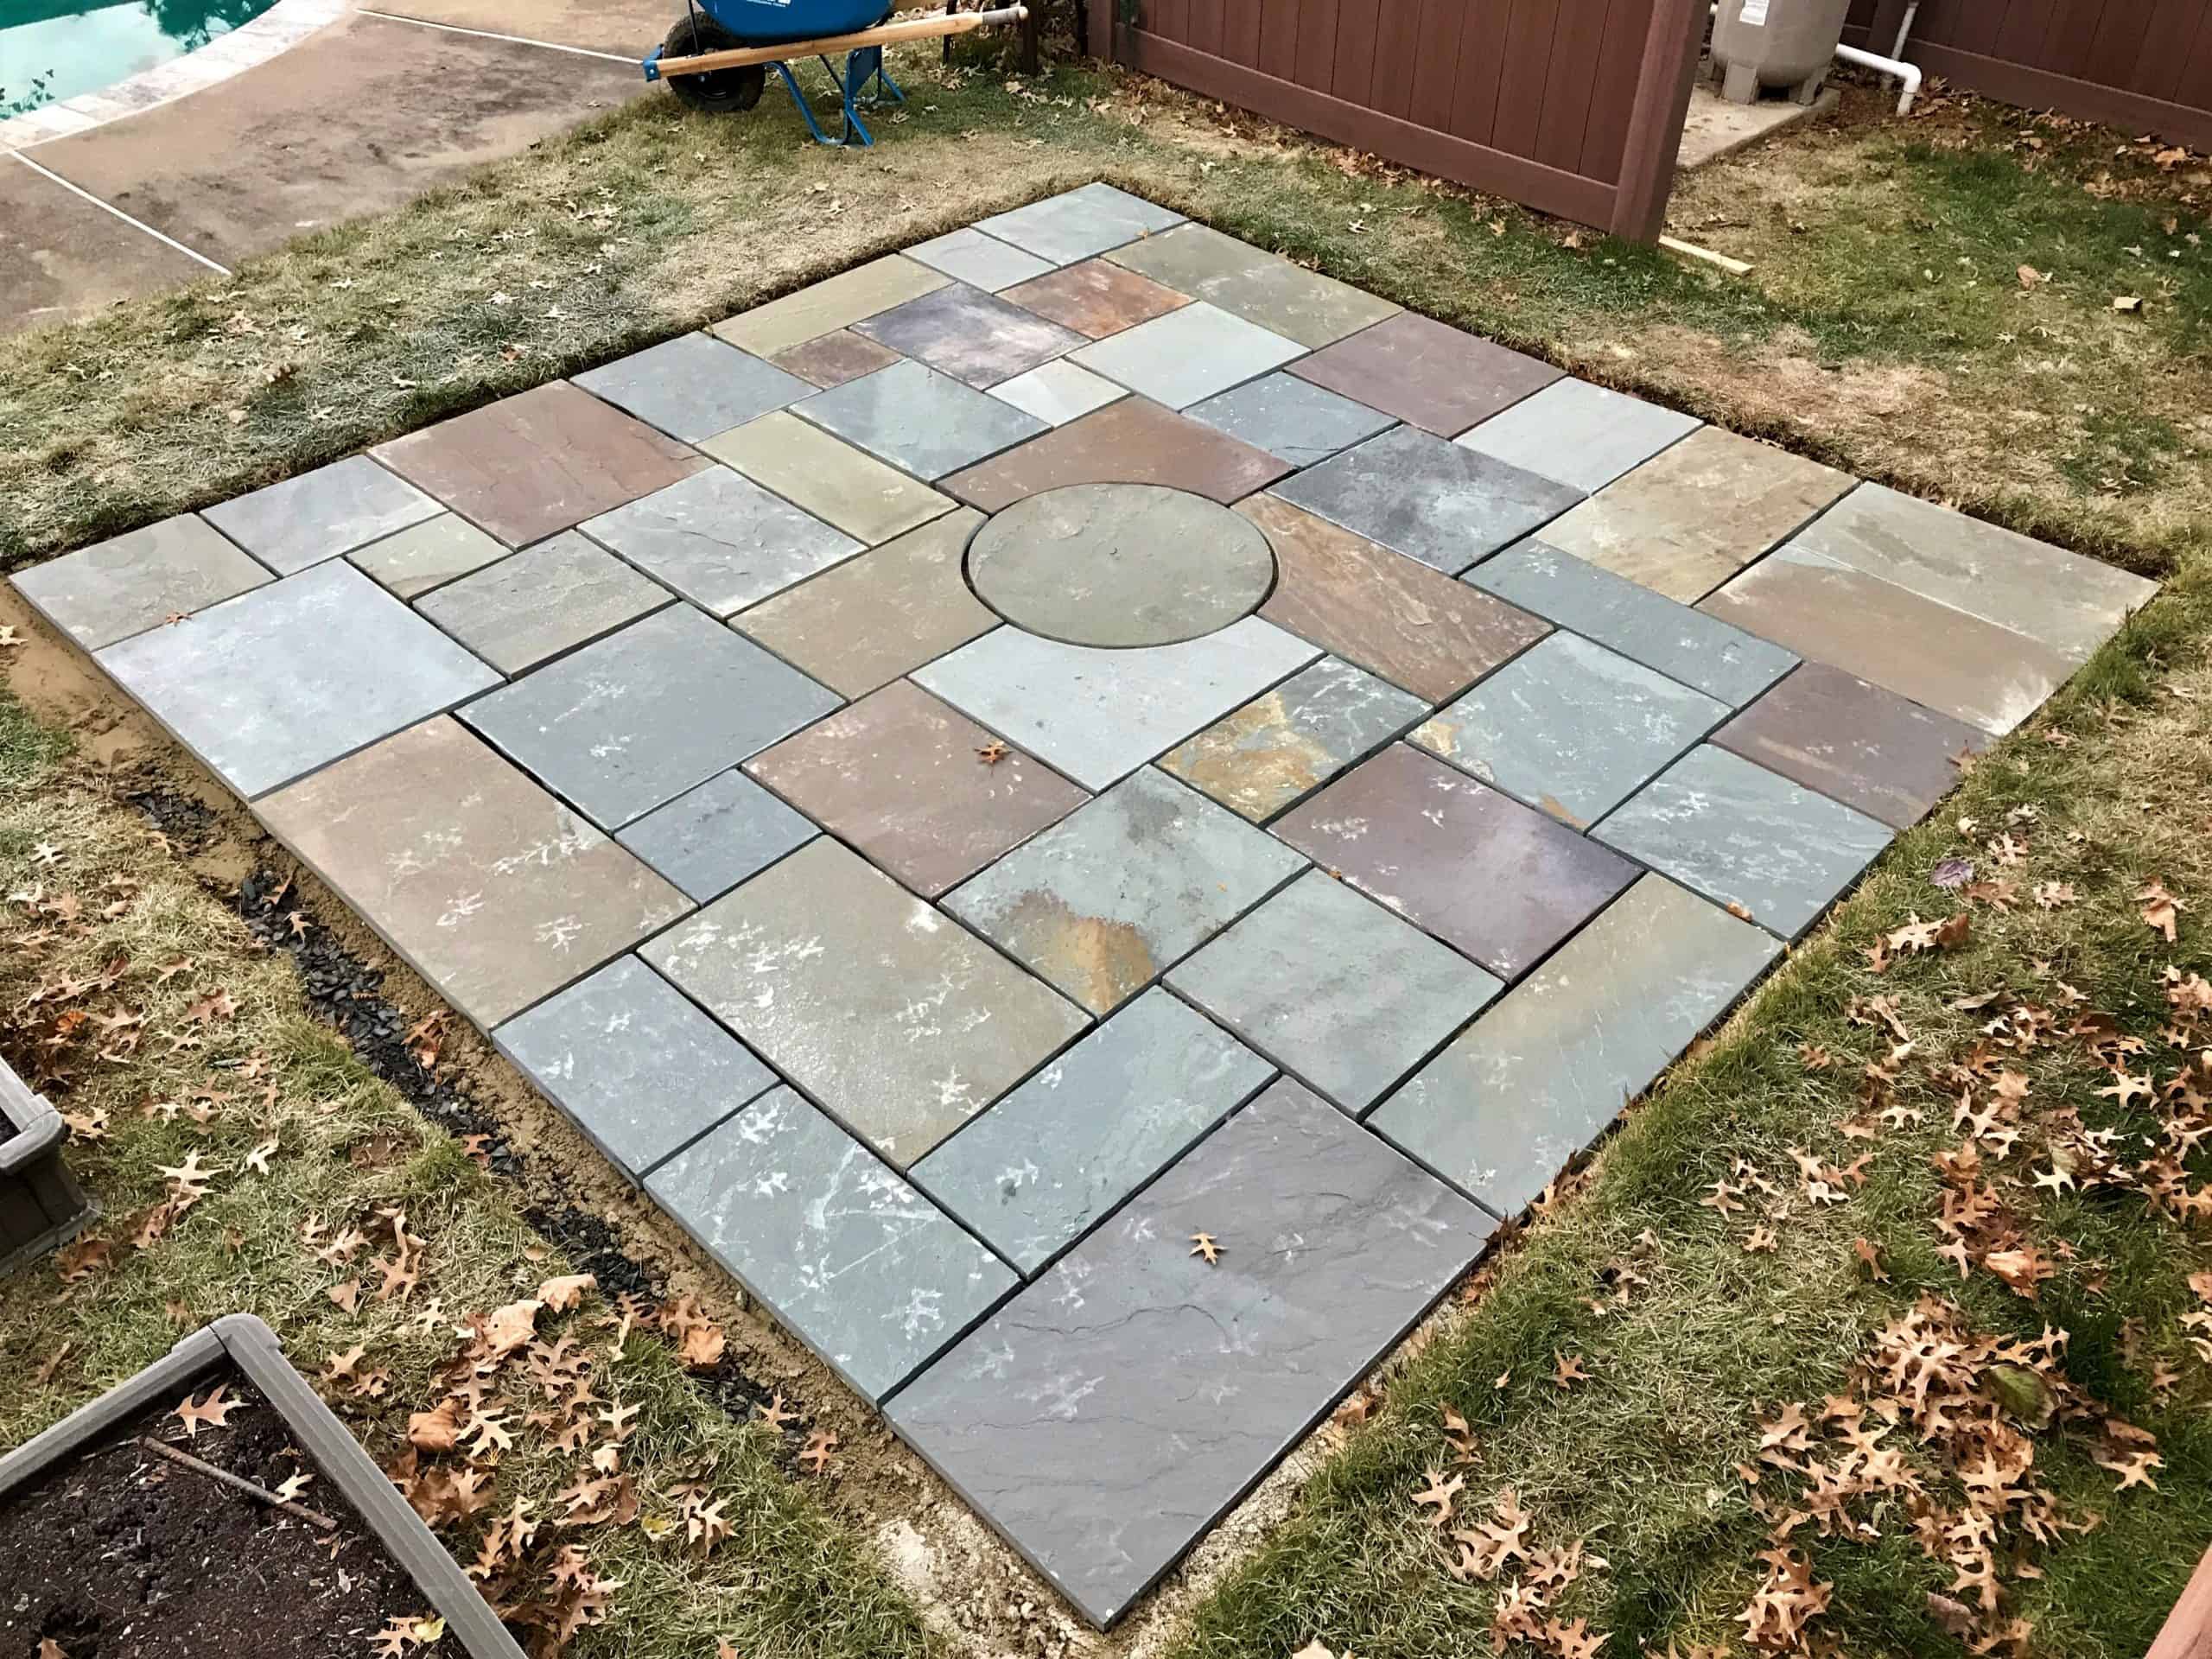
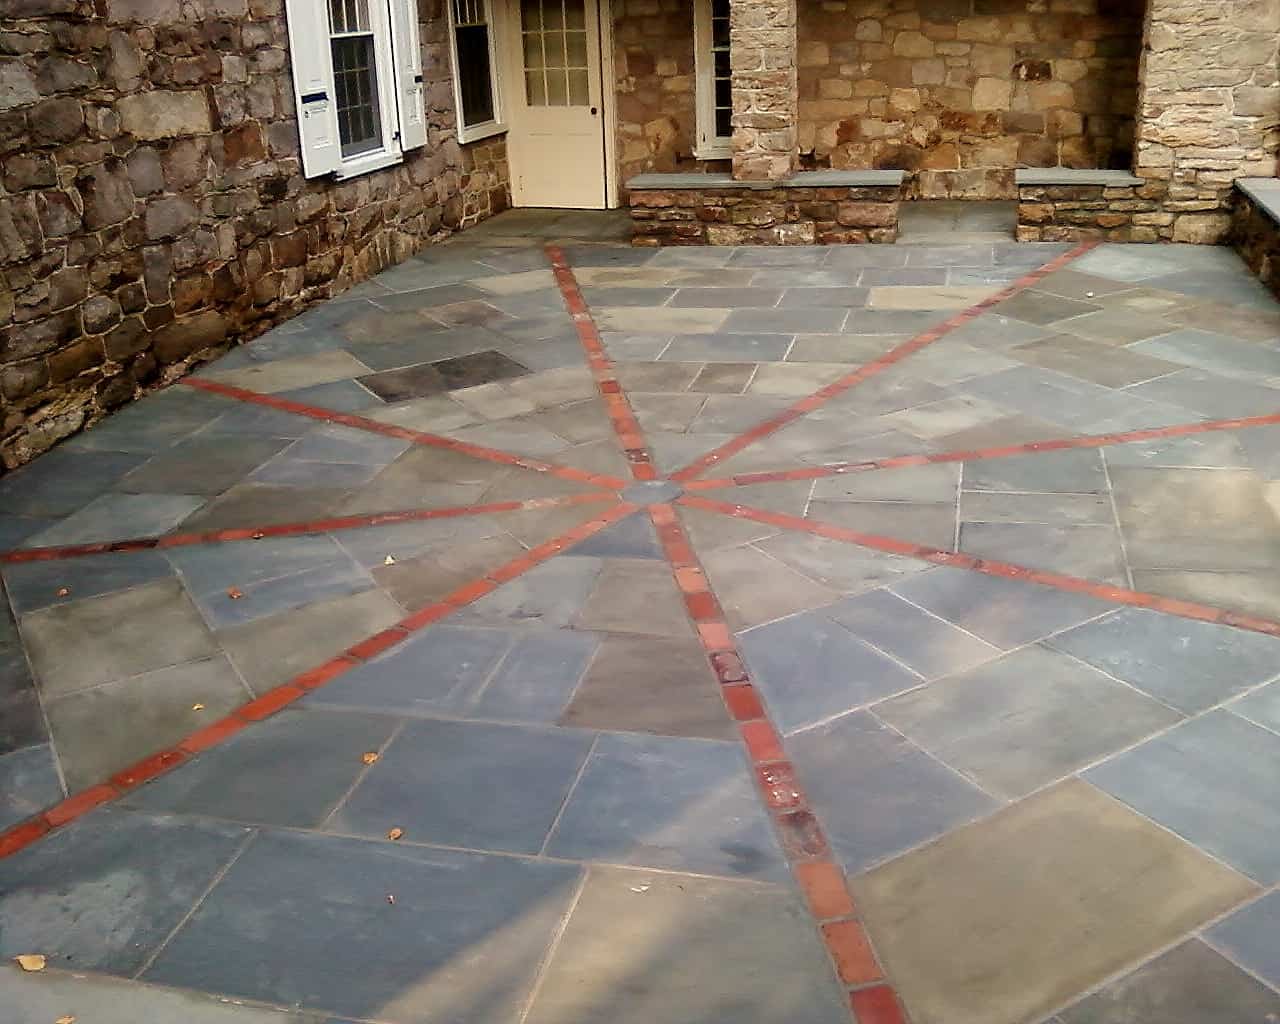
After the modified sub-base was in and tightly compacted, it was finally time to start setting the flagstone. I used full color range, natural cleft flagstone https://robinsonflagstone.com/pa-flagstones/full-color-range-natural-cleft-pa-flagstone for this project. Each piece of flagstone will be set with a ½” wide joint. I used a numbered setting sketch for this patio which plotted out the proper location of each individual stone. I highly recommend using a sketch, the less brain power that needs to be utilized in the field, the better. It really makes life easier knowing what size piece of stone you need to grab next to keep chugging along.
The
setting bed I’m using (sometimes known as “dry-pack”) consists of 4 parts
concrete sand to one part Portland cement. Four shovelfuls of sand, and one big
shovelful of Portland go in the wheel barrow and are vigorously mixed together
with a garden hoe. Only add enough water to keep your mix slightly damp. You do
not want the mix dripping or oozing with over saturation. *Do NOT use any
lime in your setting mix. Lime can seep up thru the setting bed and create white
“halos” around the stones, for this same reason avoid using pre mixed bags of
concrete. Mixing your own setting bed will make you feel great and
vitalized!
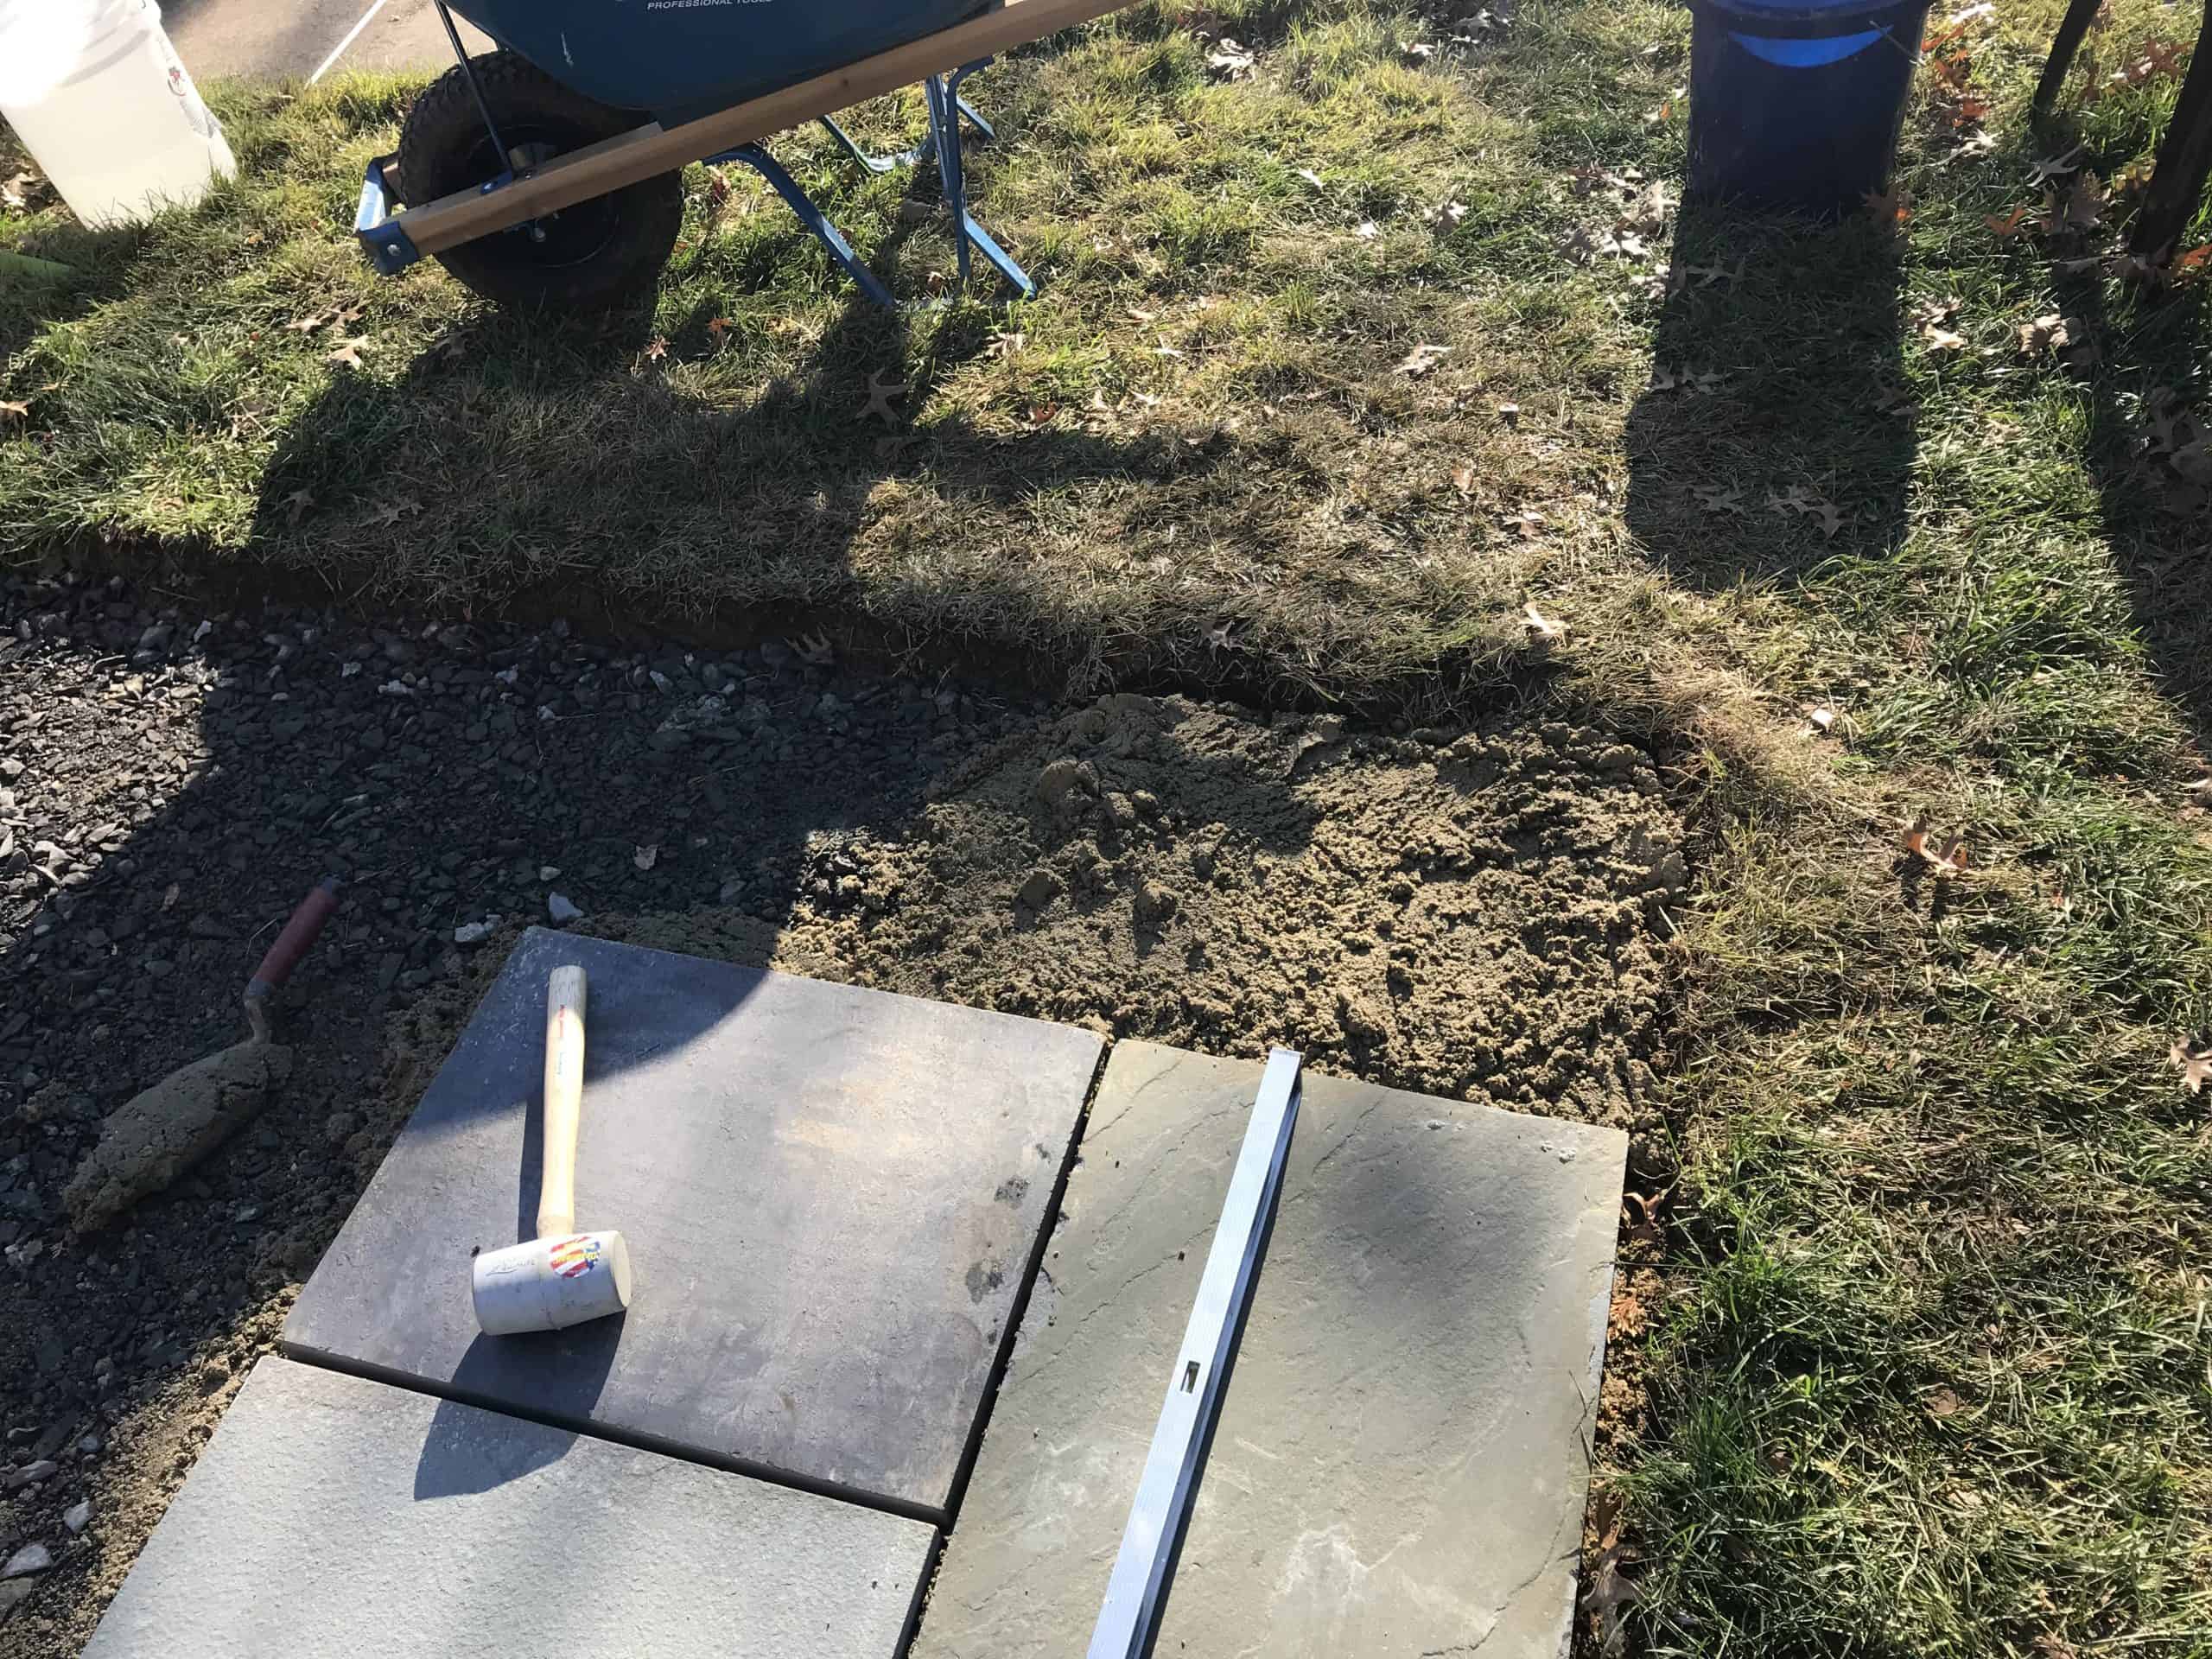
Lay
down about an 1 ½” thick layer of the setting mix in the area you will be starting
your first few stones. Grab your first piece of flagstone and lay it down in
the setting bed. Use your level and be sure to pitch the stones slightly away
from the house (rule of thumb is ¼” of pitch for every 10 feet of patio or
walkway). One of the joys of setting natural cleft flagstone is that every piece
varies in thickness. This means that you will constantly be picking up and
re-setting pieces until you are at the desired level with adjacent stones. In
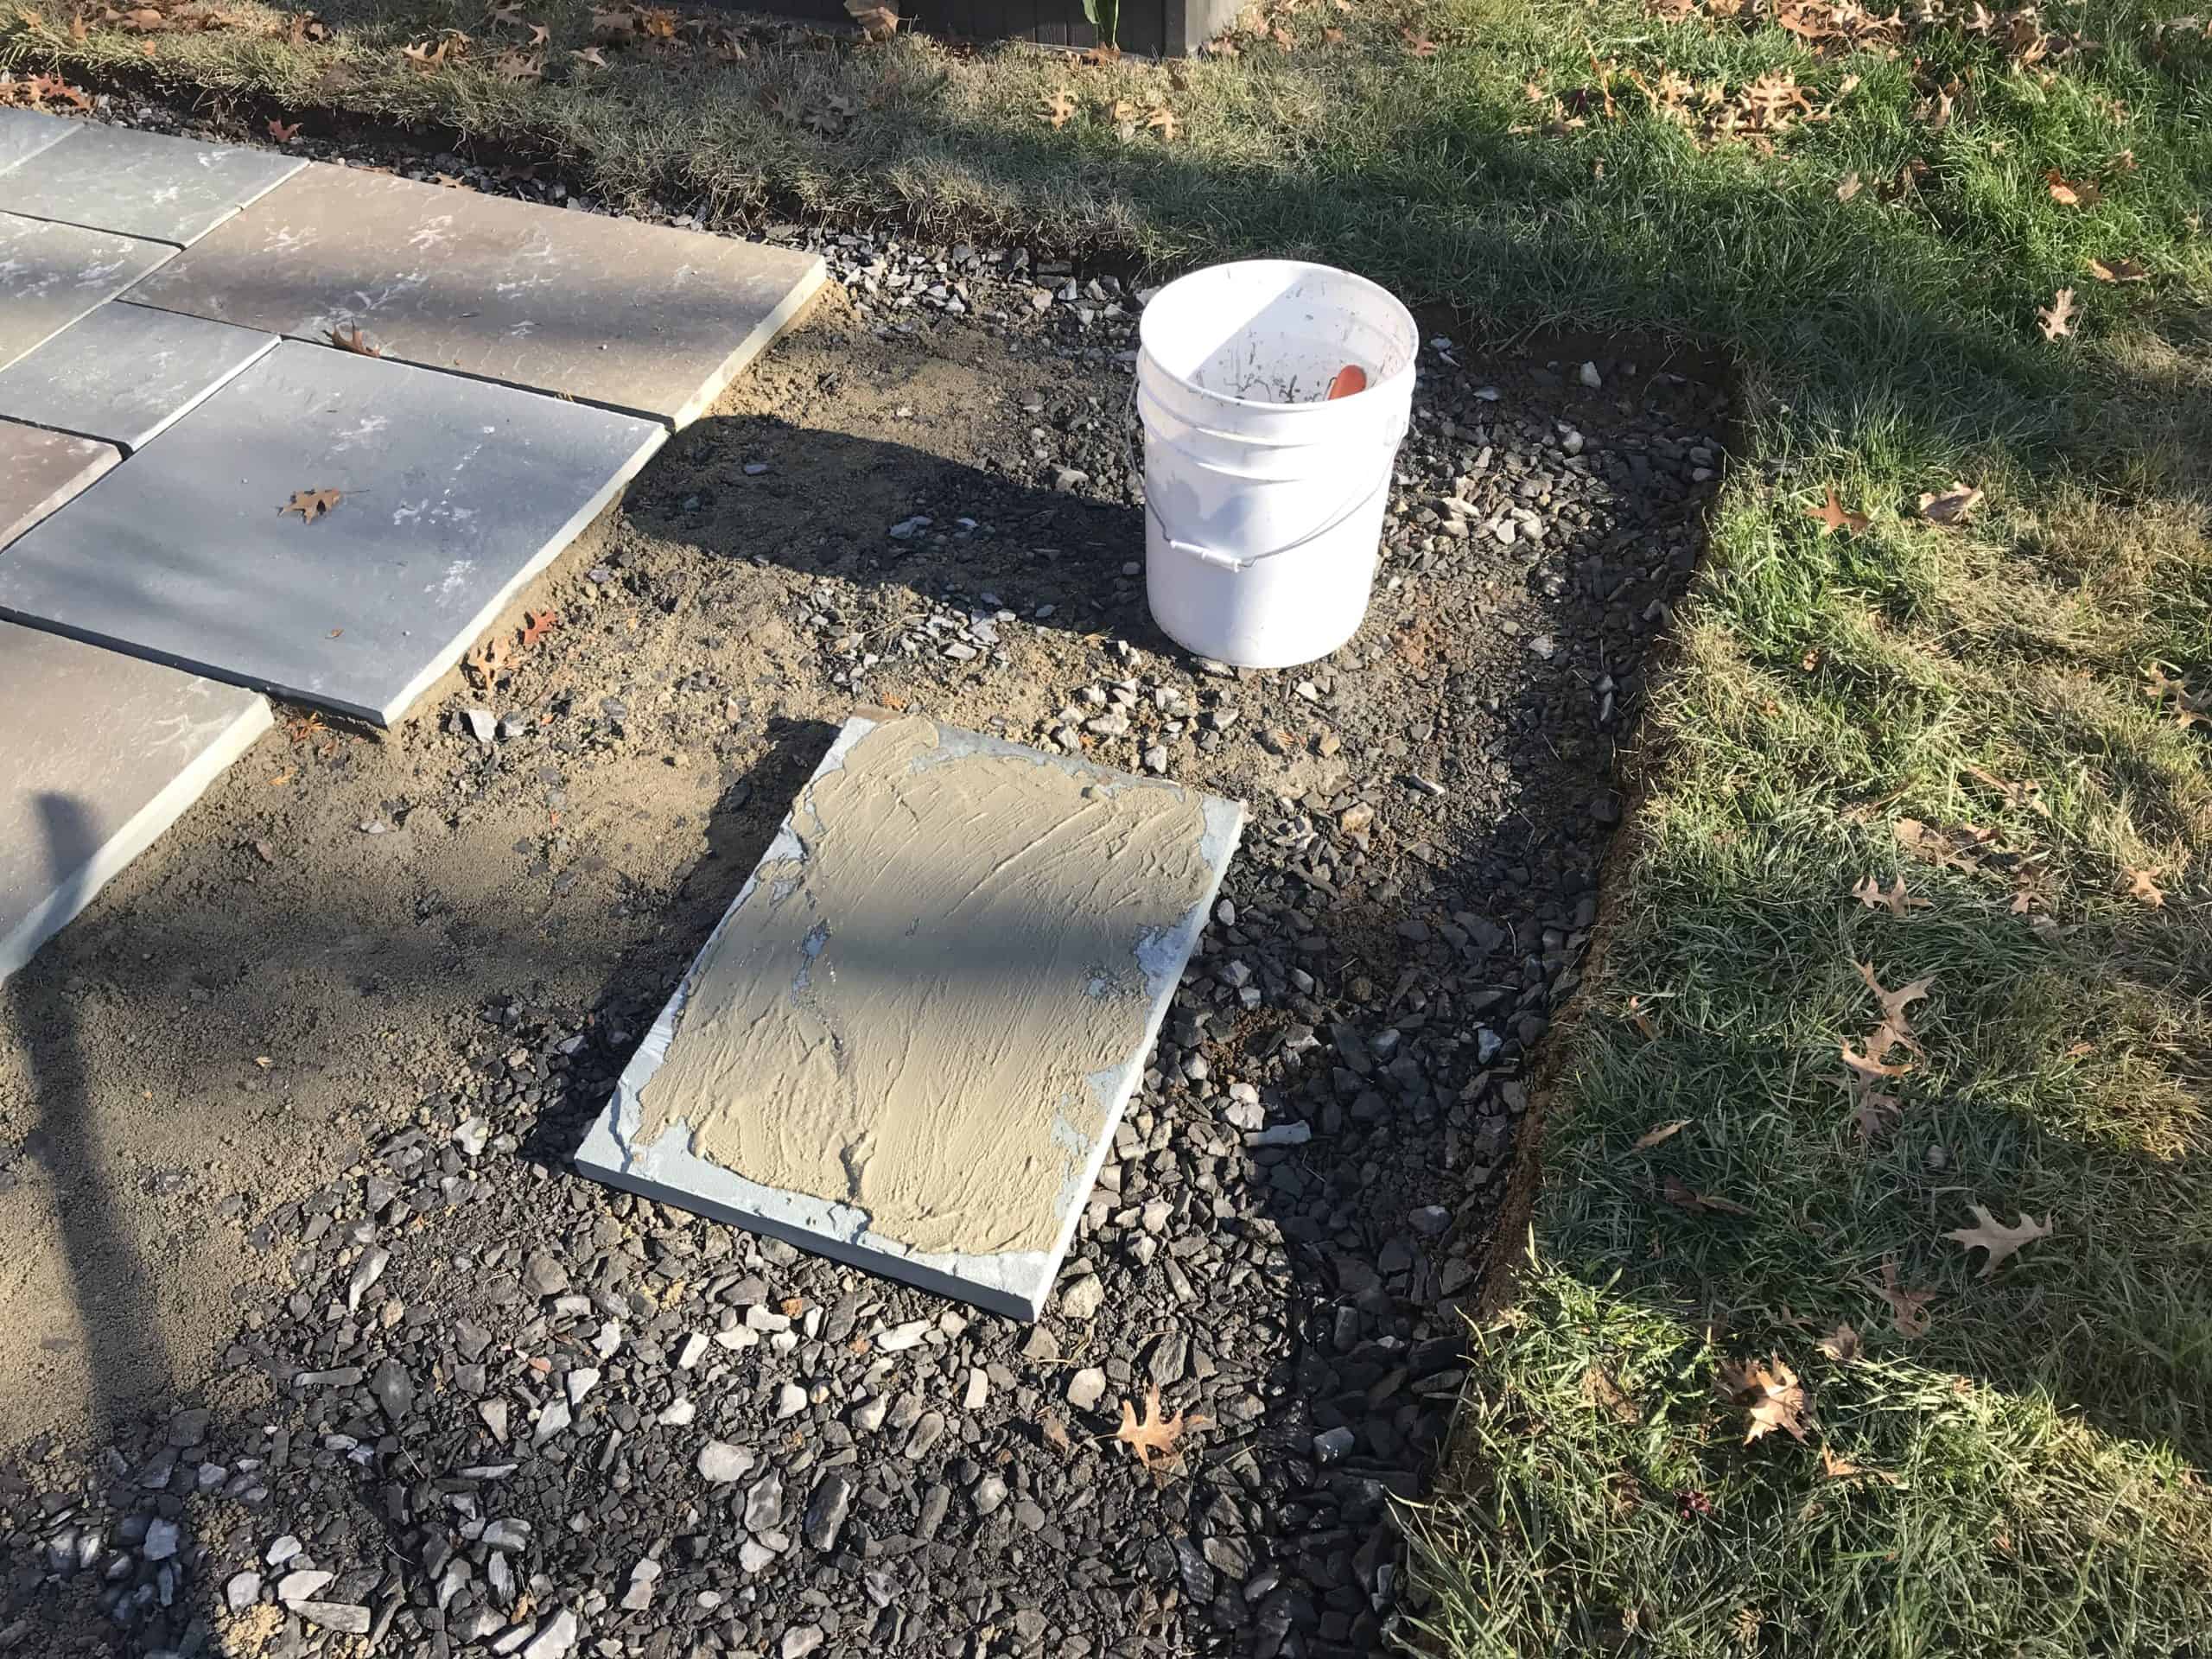
one of your empty 5 gallon buckets, add a shovelful of pure Portland and a few
ounces of water to create a cement slurry with the consistency of mayonnaise. This
slurry will be used to butter the back of each stone so that they bite into
your 4 to 1 setting bed. Use the trowel or even an old brush to cover the entire
back of the stones and try not miss any surface area. I dry lay the stone
first, then, once level, butter the backs of the stones for adhesion. This is where
the rubber mallet comes in. Use the mallet to beat those stones into place and maybe
relieve some pent up, repressed rage in the process. Keep a bucket of clean
water close at hand so you can wash off any stains you get on the stones with a
clean sponge, and also to wash off your hands as needed.
At this point, you’re on stone-setting auto pilot: Dry-lay the stones, level them, butter their backs, savagely beat them with mallet, and make new setting mix as needed. Wash, rinse, repeat.
Natural
cleft flagstone can be slightly out of square and is meant to be laid with ½”
wide joints in between the stones. After all your stone is set & laid you
might see some joints that are a little out of whack. You can use a grinder
with a diamond wheel on it and carefully grind only the top, inside portion of
the joint to correct the joint width. Once the polymeric sand is swept between the
joints you can’t tell the joint has been altered.
After
all your flagstone has been laid accordingly it’s time to fill in the joints.
For this patio I used HP NextGel Polymeric Sand in a gray color. Polymeric sand
can only be swept in on a nice, dry day. This product matched the flagstone
pretty well, and didn’t leave any hazing or discoloration on the surface when
it was swept into the joints, so I was happy with it.
After the patio was complete I added a few stepping stones, and a small Belgian block https://robinsonflagstone.com/pa-flagstones/belgium-blocks lined flower bed. I feel like the red cushions on the furniture really tied the patio together nicely. Feel free to call or email us at Robinson Flagstone if you would like to design and install one of your own.
The Backyard Patio Area
Staked off patio Area
12′-6″ x 12′-6″ Excavated area
Flagstone Delivery
Sand & Modified
Laying the Modified
Tamping the Modified
Mixing the Setting Bed
Buttering the Backs of Stones
Laying Stone
Starting to Take Shape
Round Centerpiece is Installed
Close to the End
Finished 12′-0″ x 12′-0″ Patio
Flagstone Patio with Furniture and Stepping Stones
Setting Sketch- nominal 12′-0″ x 12′-0″
https://robinsonflagstone.com/wp-content/uploads/2020/02/IMG_E2172-scaled.jpg19192560Robinson Flagstonehttps://robinsonflagstone.com/wp-content/uploads/2023/02/Logo-3-300x300.pngRobinson Flagstone2020-02-29 10:02:102020-03-11 14:59:42How to Install a Flagstone Patio
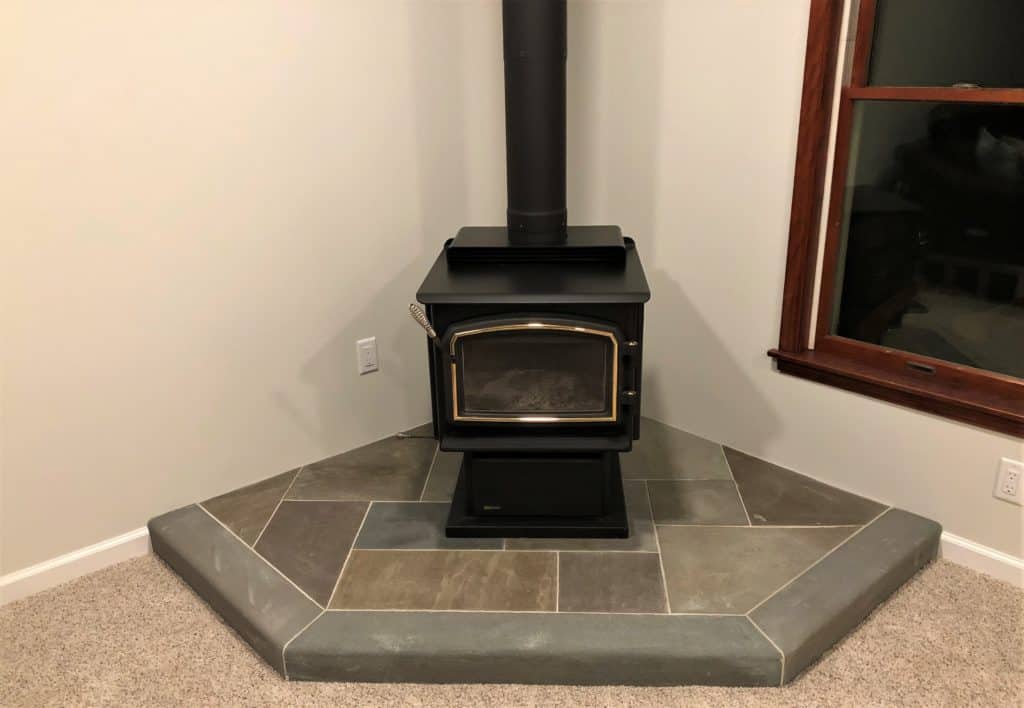
This custom-cut to size wood burning stove base was just purchased and installed by a local customer in the spring of 2019. Our customer provided us with his dimensions and a general idea of what he was looking for as a base to a wood burning stove he was installing in his home.
The process began when we drafted a setting sketch for his approval, based on his idea and specifications. Once the sketch was approved, we laid out a working template of the stove base and used it to cut & fabricate each individual piece of stone.
The borders are 4″ thick thermal bluestone with a 3/4″ radius round-over on the exposed edges. The “field” behind the border is 3/4″ to 1″ thick, full color range, natural cleft paving which was installed on a built up setting bed to ensure it was level with the 4″ thick borders.
The customer was able to install this material without having to trim any stones himself, as everything was pre-cut by us. All stones were numbered on the bottom surfaces to coordinate with the sketch making this a “paint by numbers” type project. The end result came out very nicely. If you have a custom bluestone project please feel free to call or email us and we can get to work for you.
https://robinsonflagstone.com/wp-content/uploads/2019/05/Cut-to-Size-Stove-Base.jpg26723865Tom Ruanehttps://robinsonflagstone.com/wp-content/uploads/2023/02/Logo-3-300x300.pngTom Ruane2019-05-13 12:03:422019-05-21 11:43:59Cut to Size Stove Base
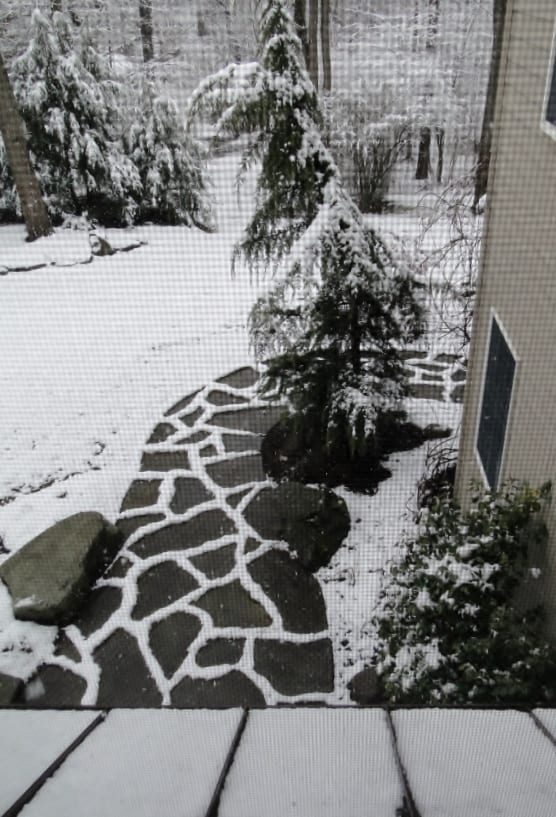
Even in the Winter flagstone takes on a beautiful look. Pictured are 2” grass joints with irregular flagstone paving. On the subject of Winter, remember to never use rock salt (Sodium Chloride) on your flagstone products. Rock salt can damage the grout and can cause the surface to flake if enough is used on the stone. A safer alternative would be Calcium Chloride or Magnesium Chloride which are both more effective in cold temperatures and are much less harsh on stone, concrete, etc.
If you ever have any questions regarding various products, please let us know.
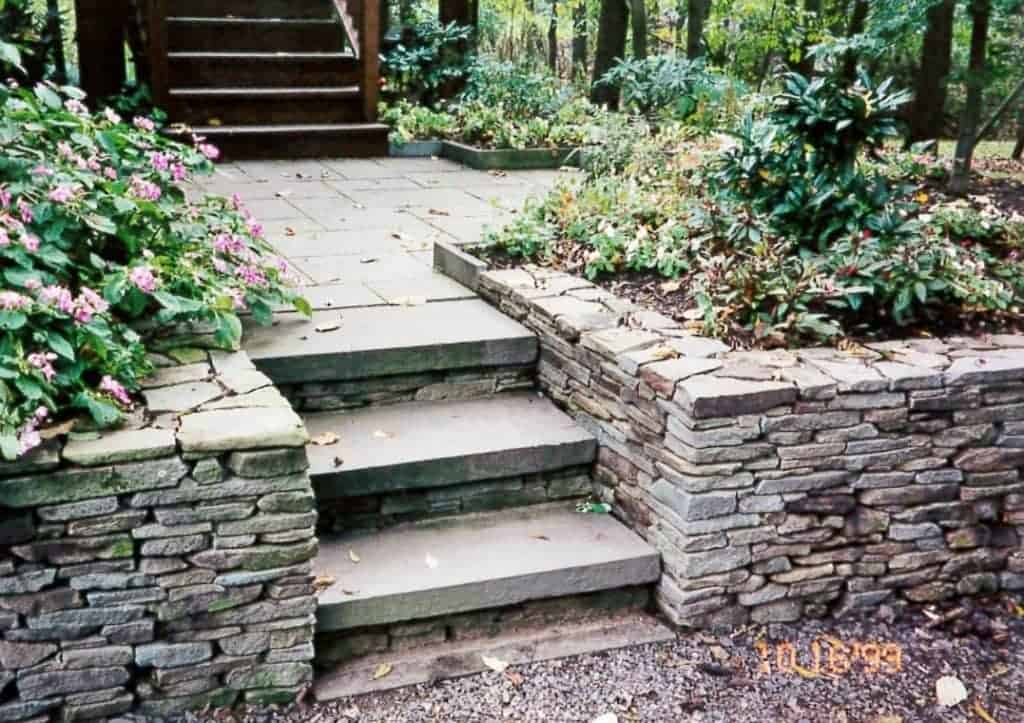
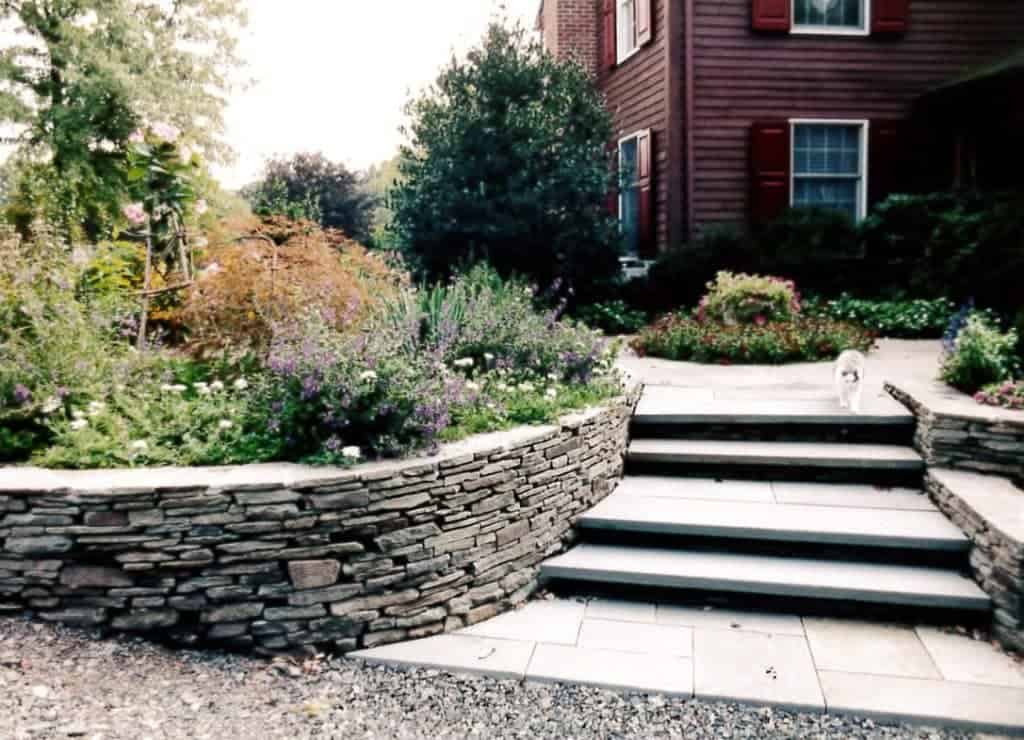
It’s April and our customers have been very busy buying and building dry-stack stone walls for their home garden projects. Dry-stack walls are an easy and inexpensive way to raise up a garden bed, build a natural looking border, or to hide undesirable looking areas around the house.
Some tips for installing a dry stack wall-
Dig down 3″ to 5″ where the base of your wall will be, and level the dirt with a tamper
Set a level stringline for the height of your wall
Lay heavier, but somewhat flat stones as the base layer
For every two pieces laid, try to span the top of them with another piece set in the middle (like bricks). This will produce a more structurally sound wall
Use uneven or odd shaped stones in the middle of the wall. Use small “chinkers” to make the uneven stones level.
Save your nicest flat pieces to cap the top of your wall off
A single pallet of Pa. Fieldstone or colonial stone will yield a wall approximately 12″ high by 12″ wide, and roughly 30 lineal feet long.
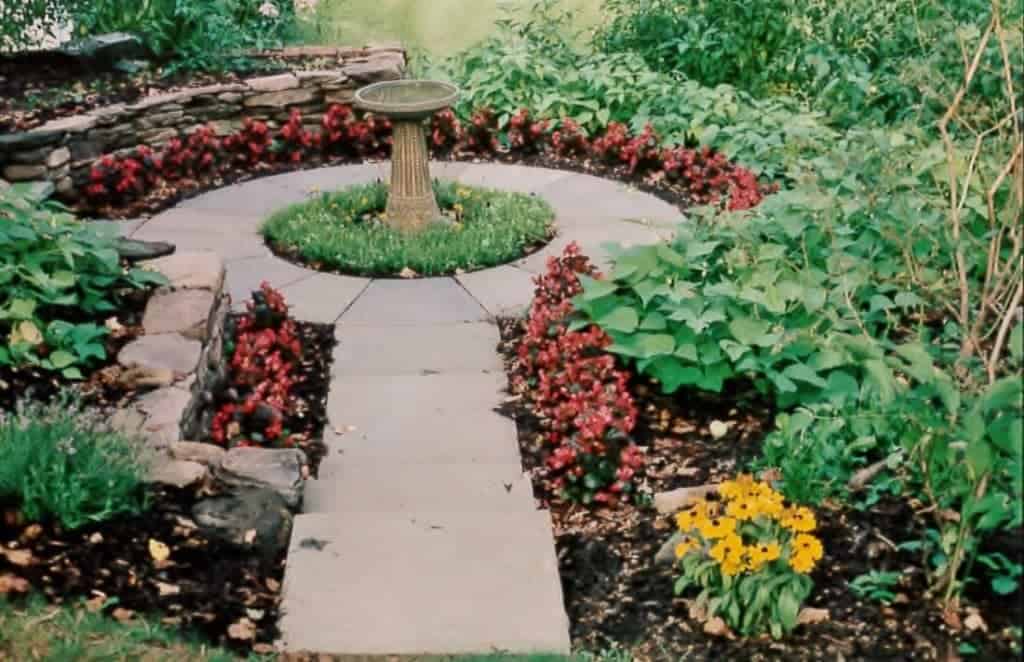
The below pictures are scanned photos from almost 20 years ago. They are from two separate jobs installed by the same person which turned out quite nicely.
New for 2017, please check out our Pool & Spa Coping page just added to the site. We will be adding more pictures in the coming weeks. Feel free to email us any pictures you would like to share.
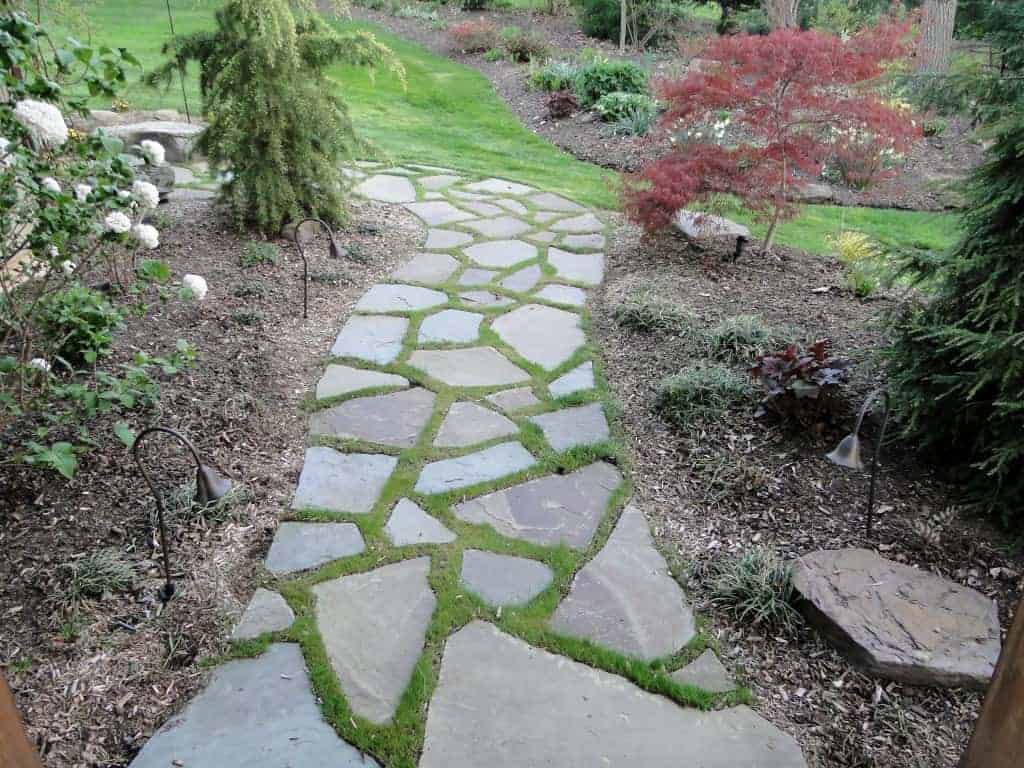
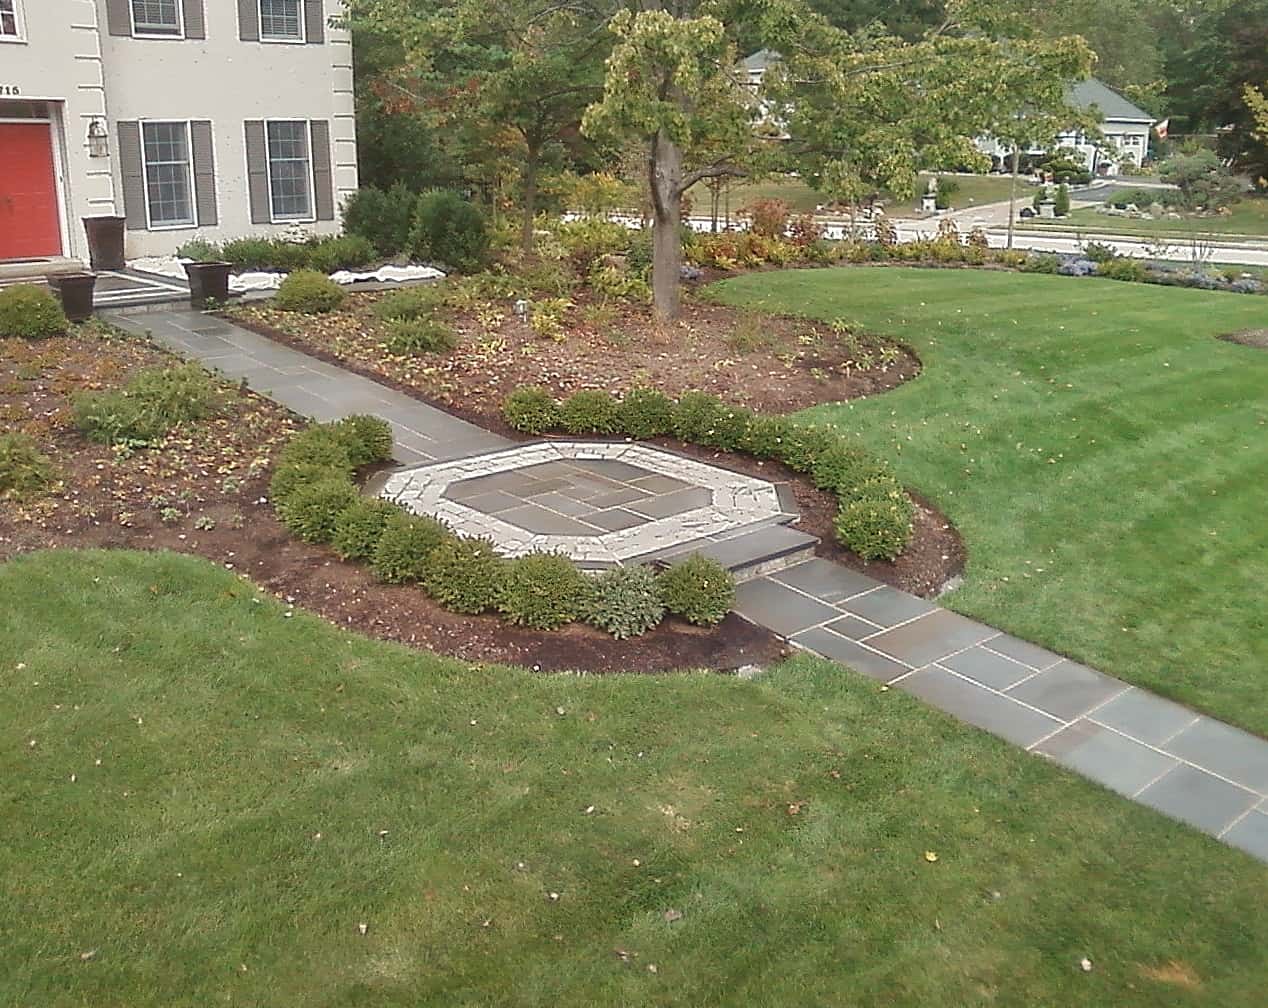
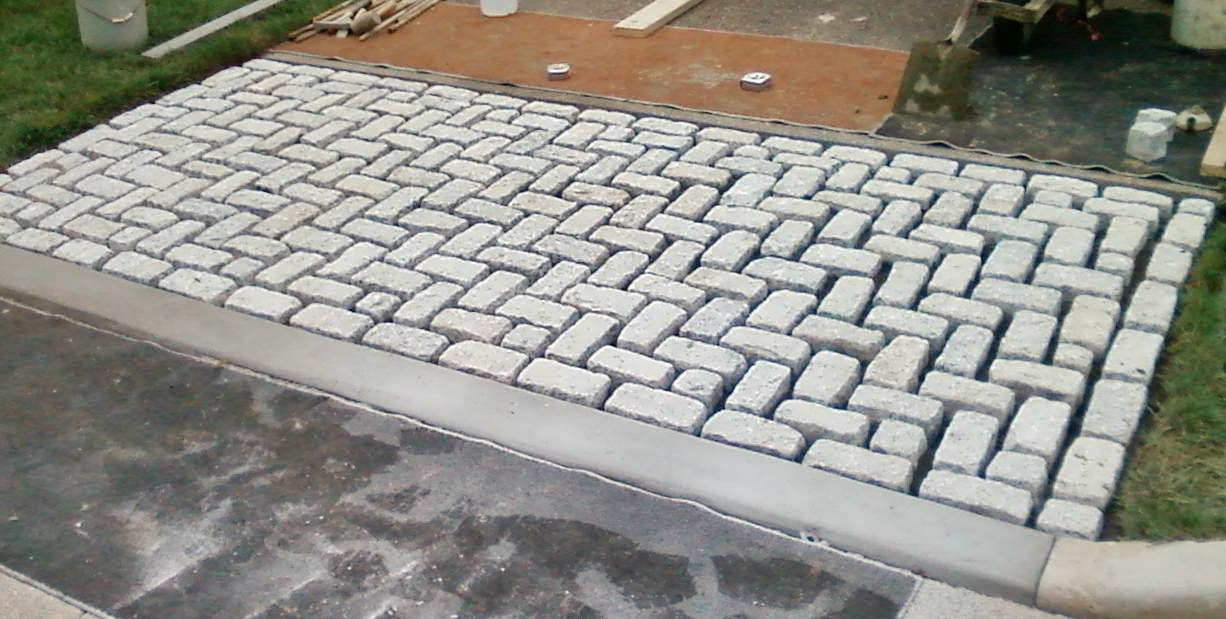
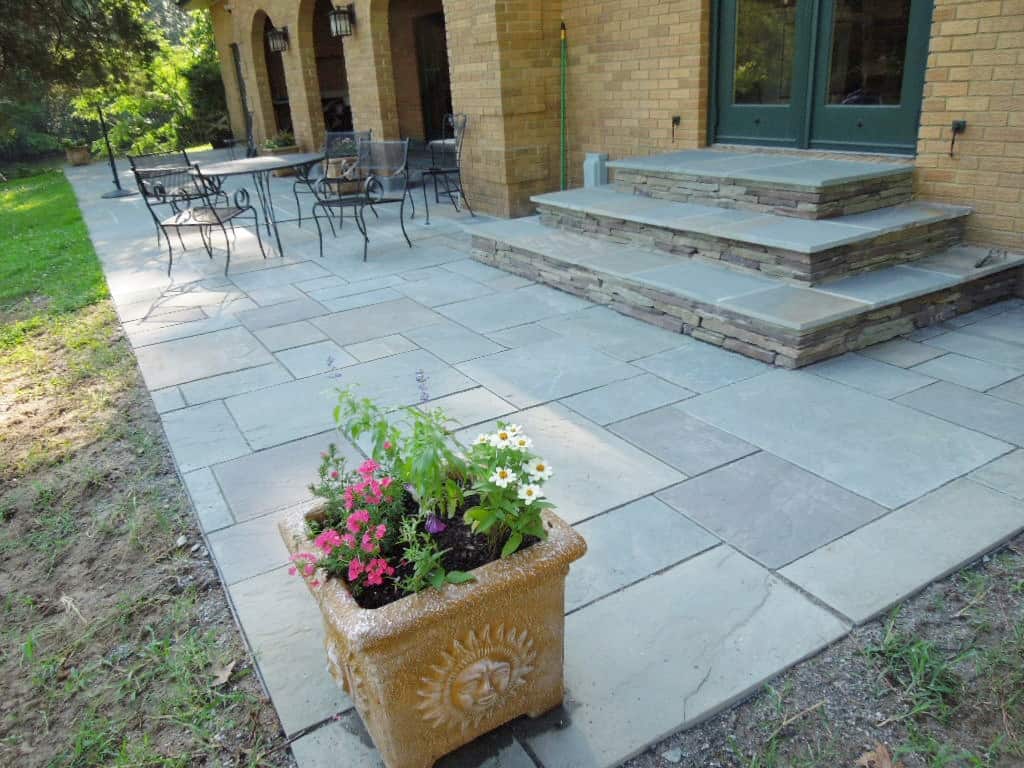
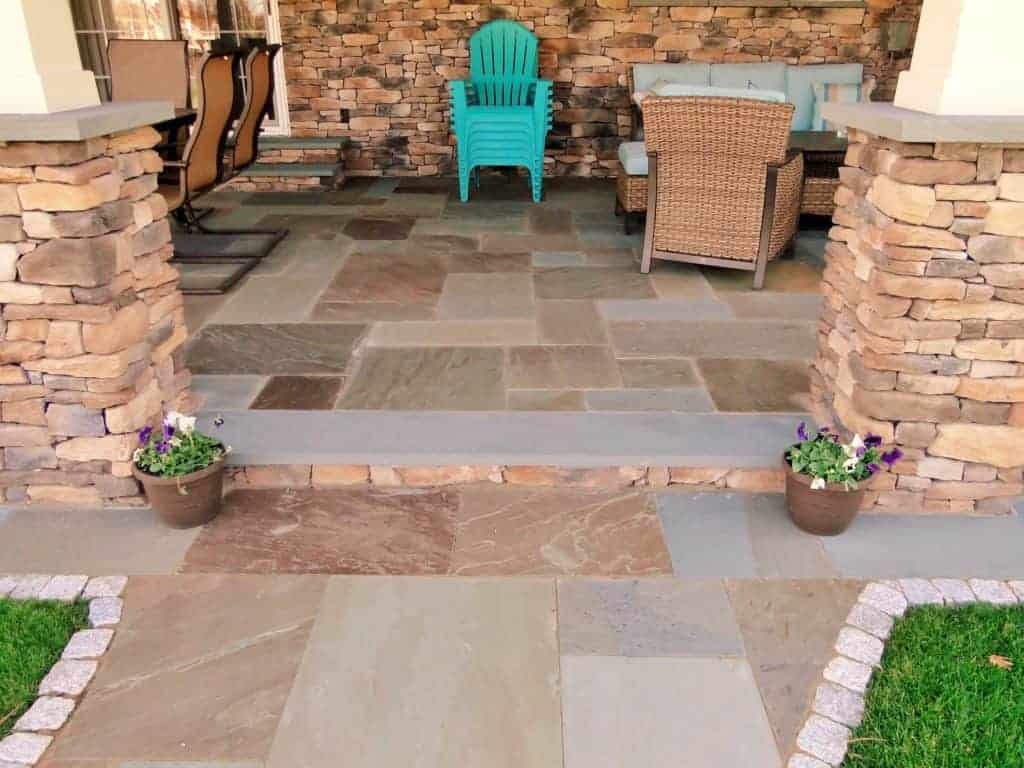
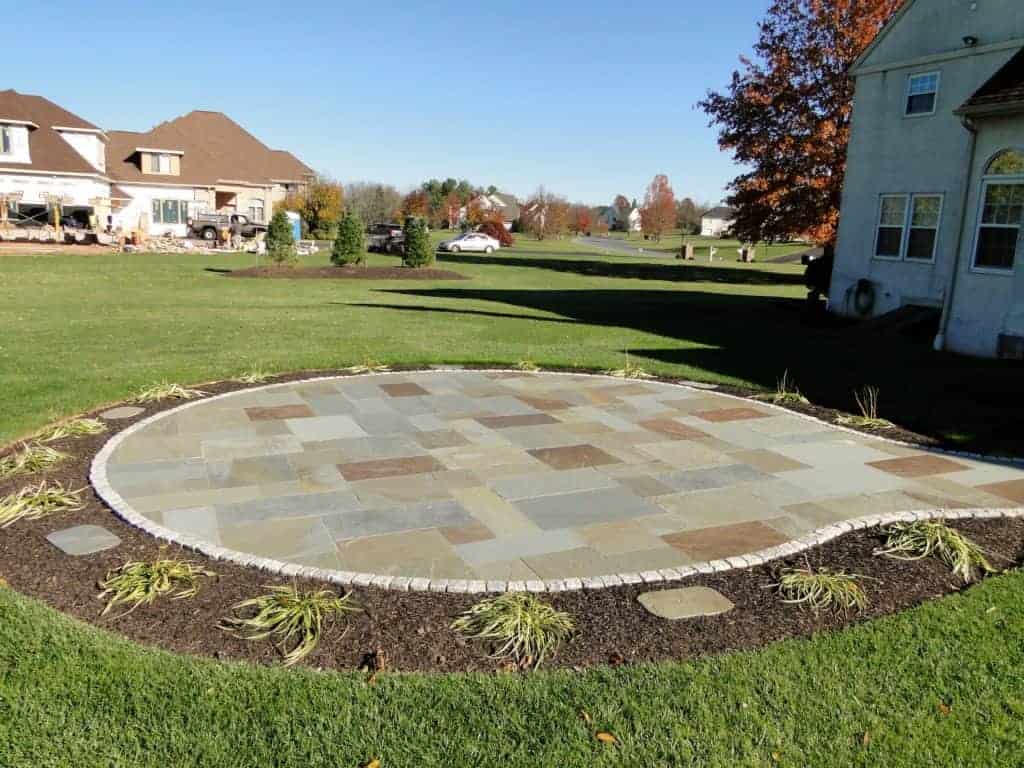
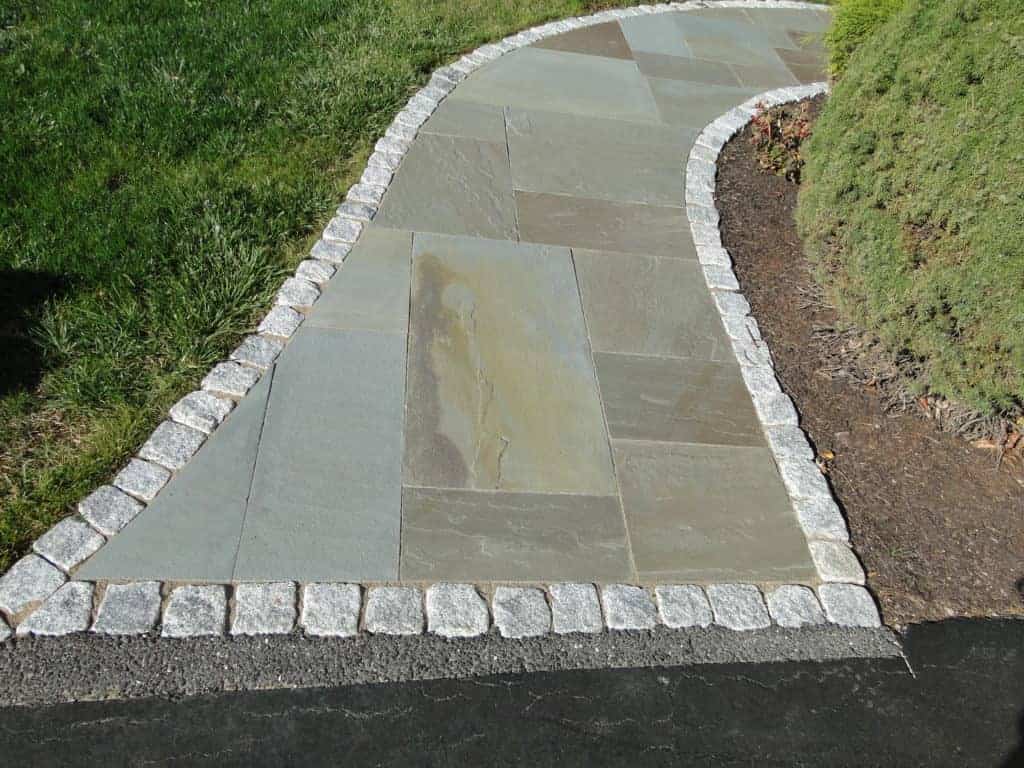
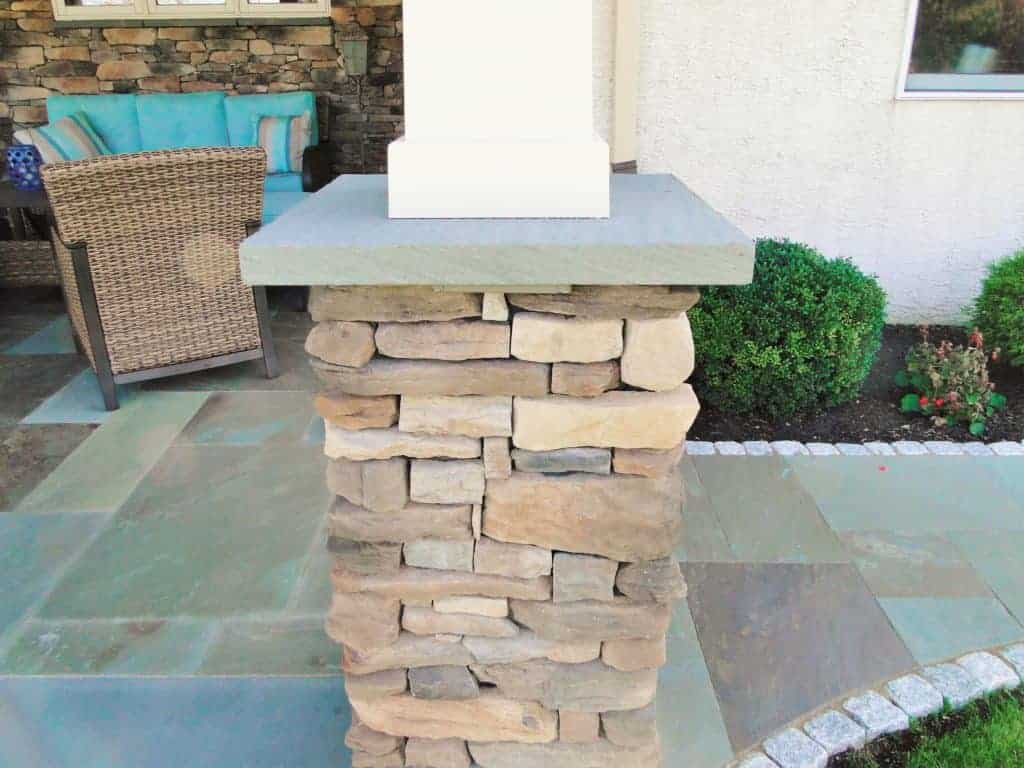
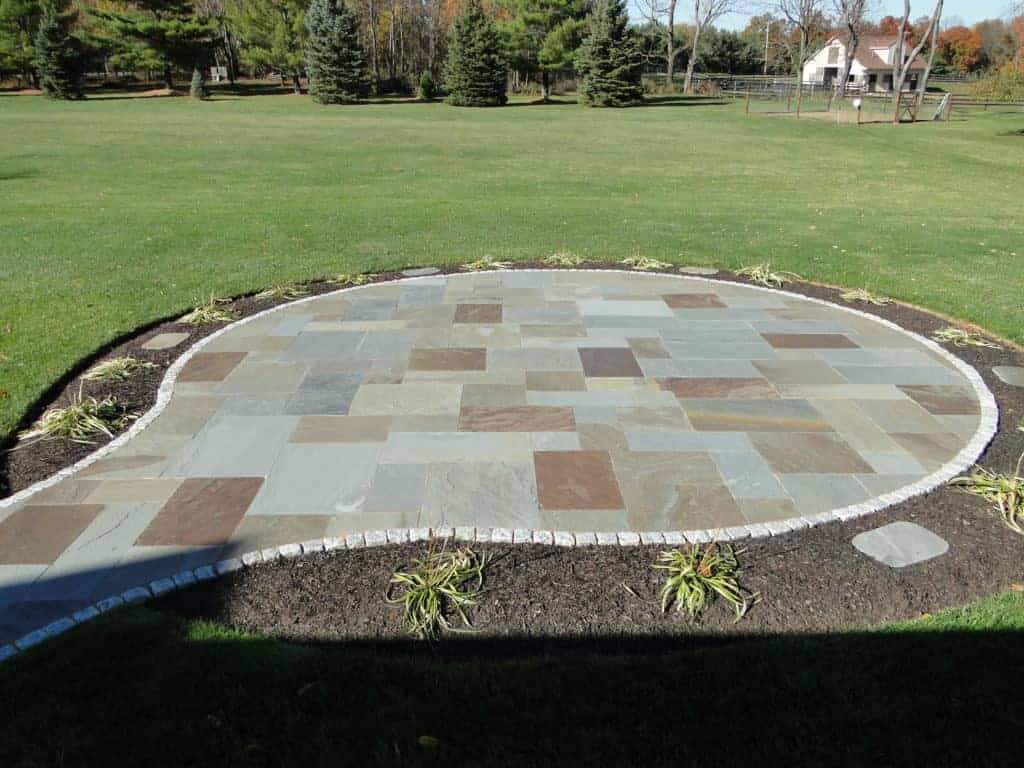
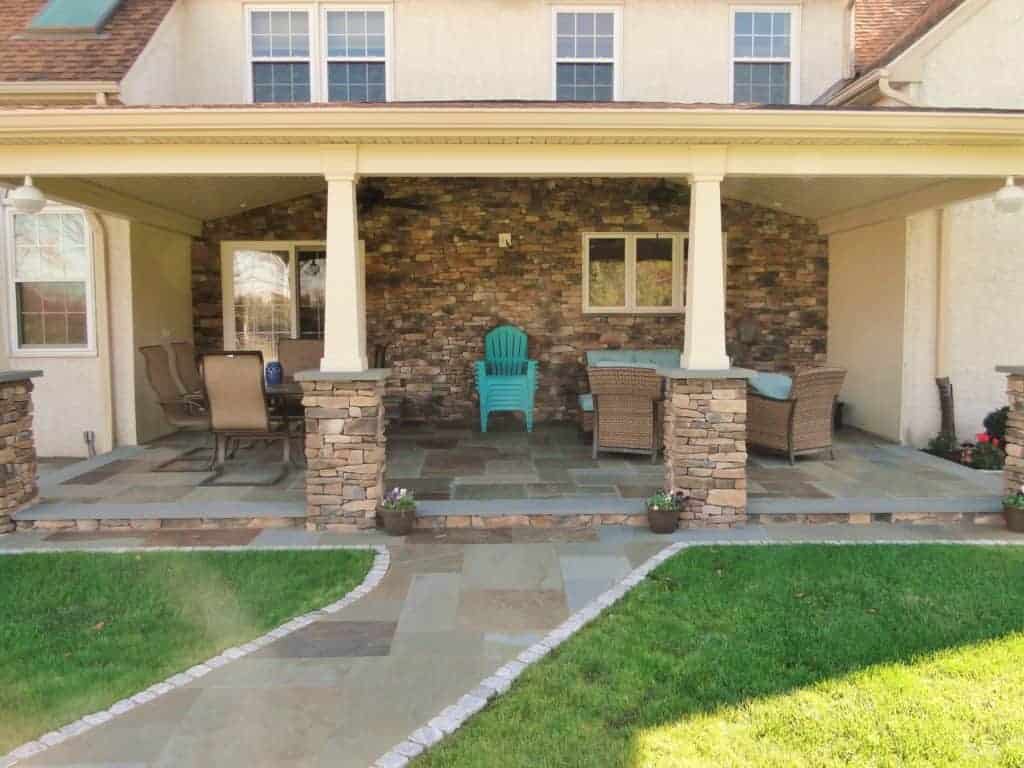
Below are pictures of a job taken at a private residence in Lansdale, Pa that was installed in the Fall of 2016. Full color range, natural cleft paving was used throughout the walkways and both terraces. At the customer’s request, the contractor connected the main terrace off the house to a very unique circular shaped patio with a belgian block border. The circular sitting area will be used as a perfect spot for the family’s fire-pit.
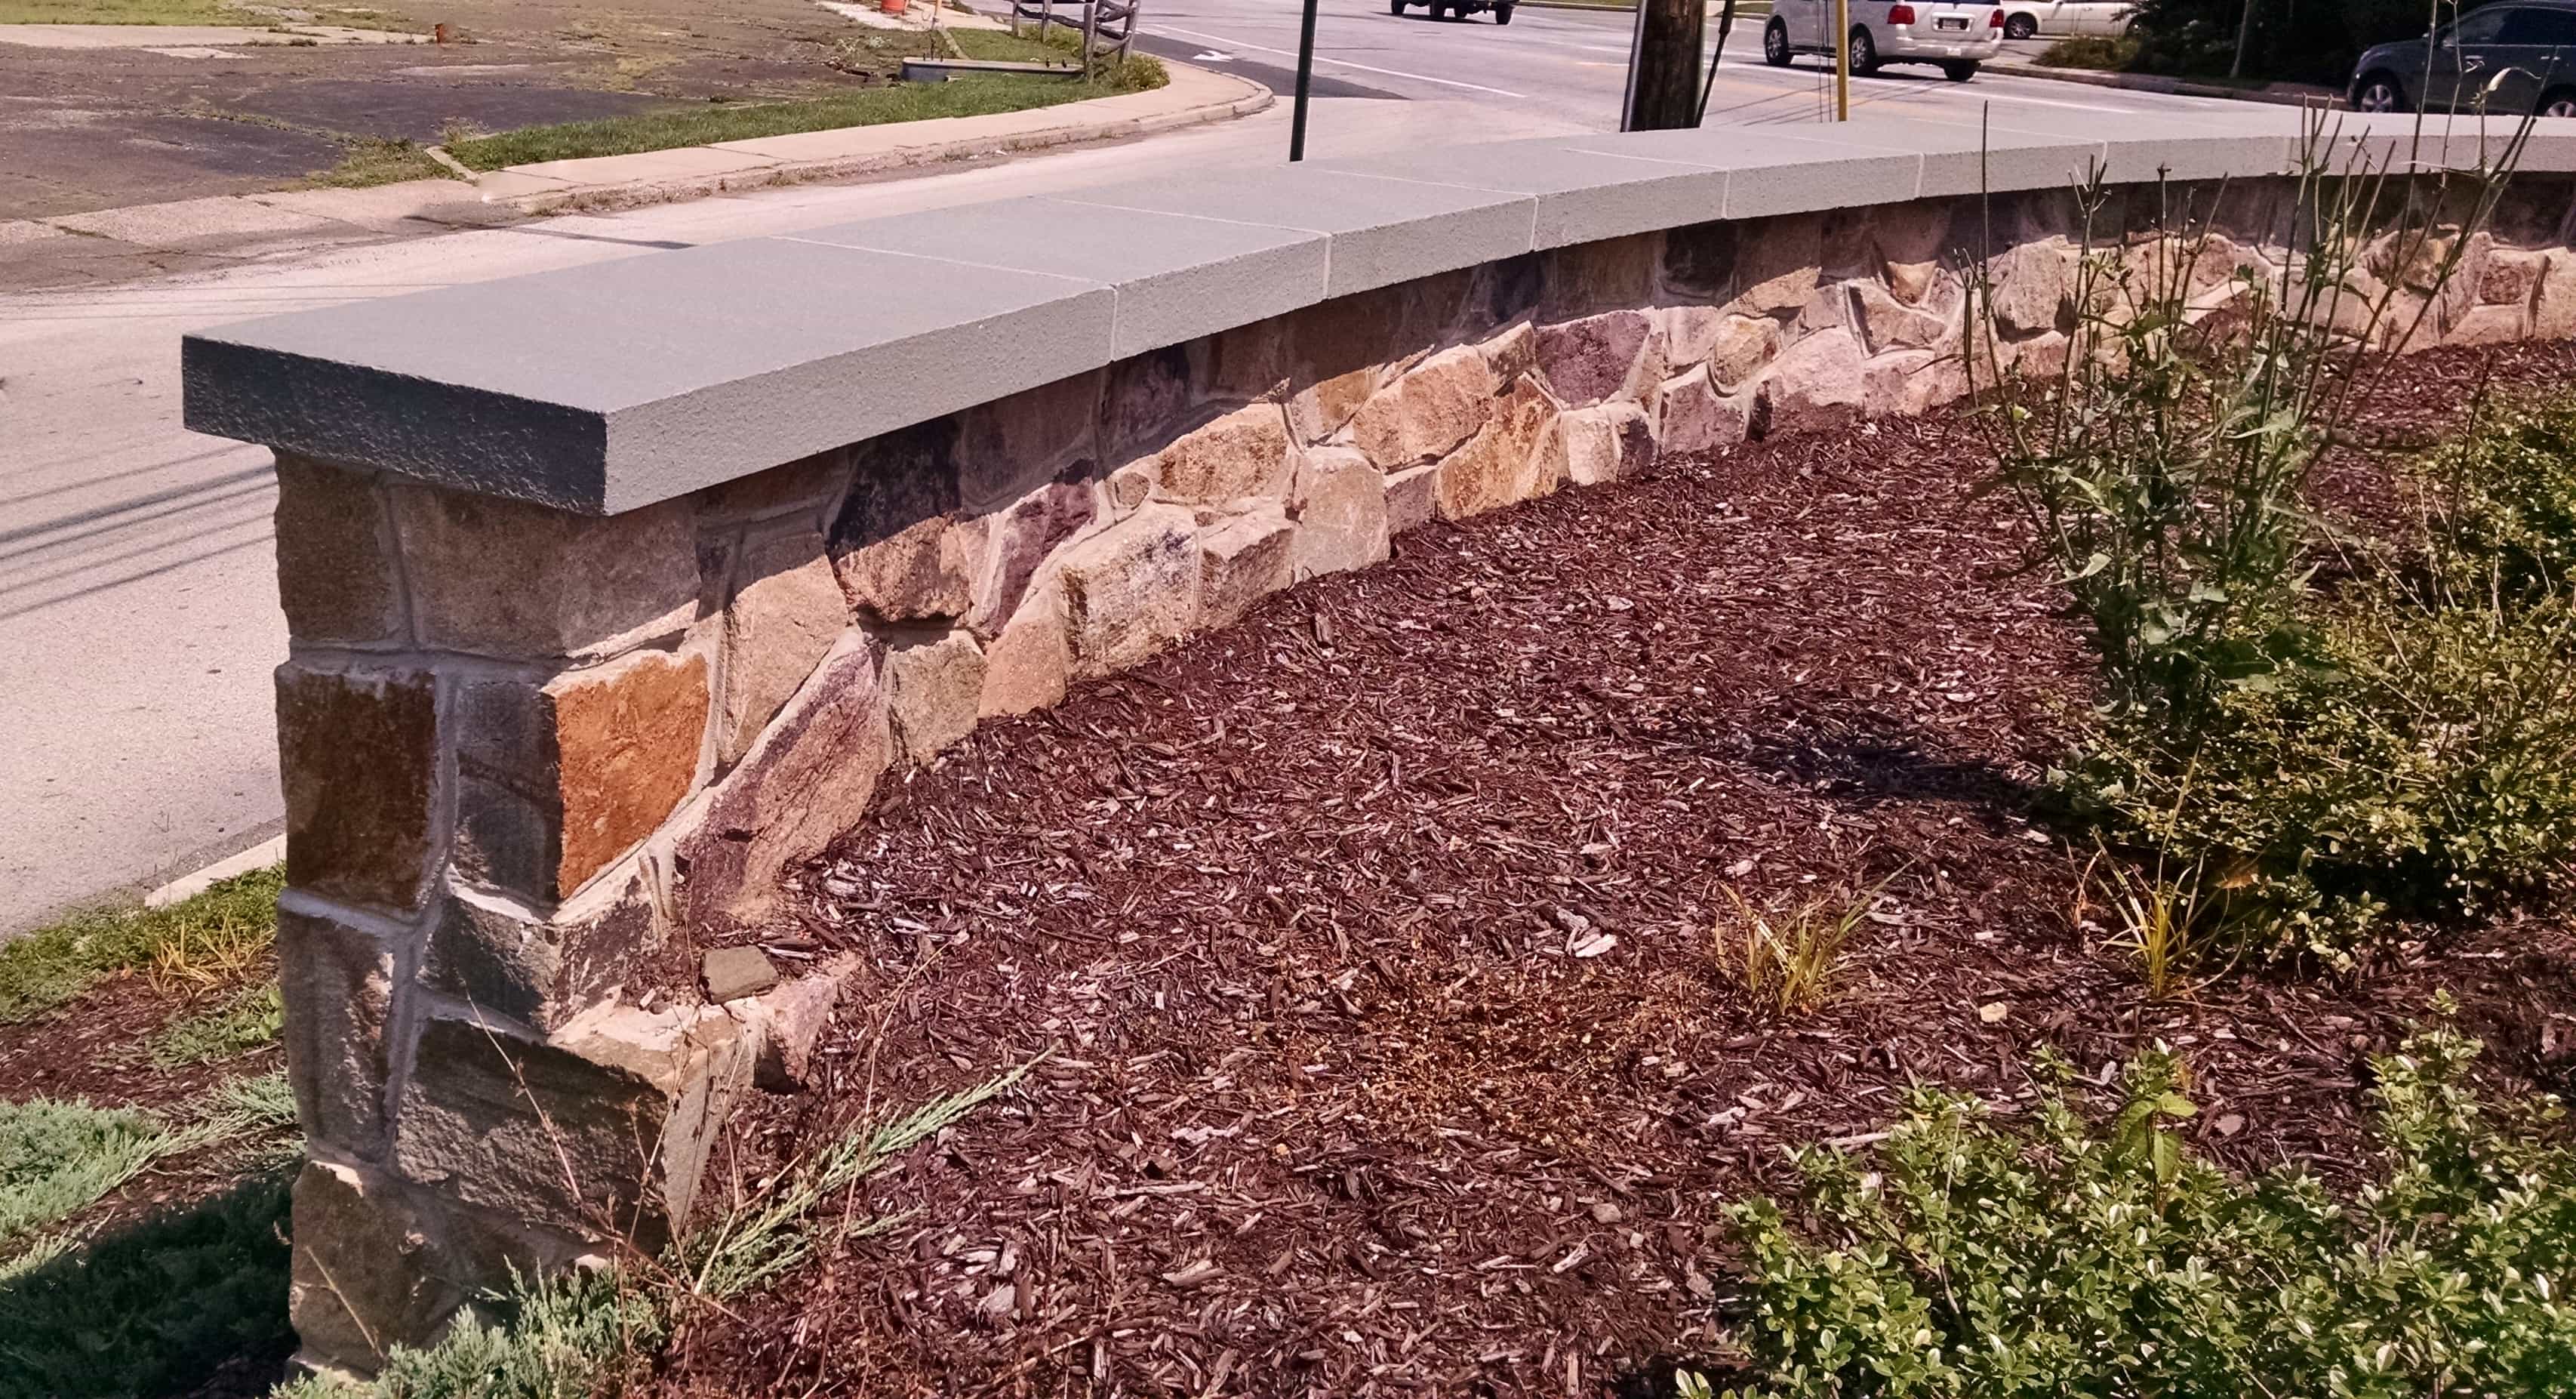
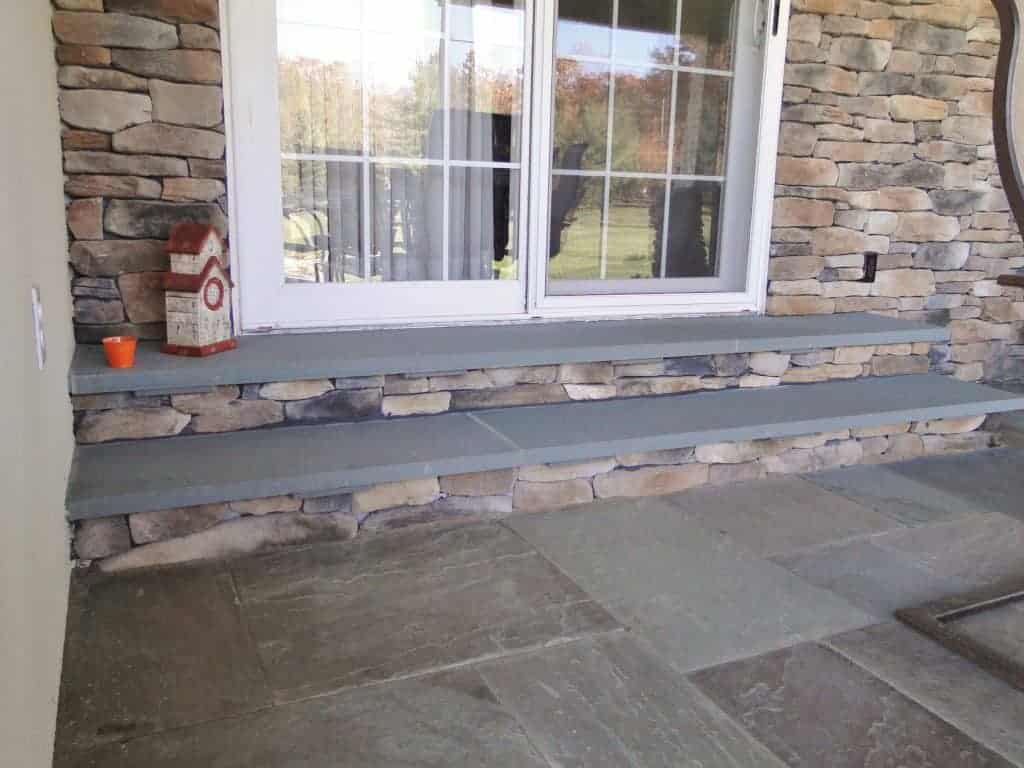
Thermal bluestone treads were used for the stairs, border treads and pier caps. Because natural cleft bluestone varies in thickness, thermal bluestone is used where there are visible exposed edges. The thermal treads and caps are a consistent thickness (on this particular job they are 1 1/2″ thick), and have flamed exposed edges. The natural cleft paving material has sawn edges that vary in thickness and isn’t always the right type of bluestone to be set in areas where the exposed edges will be highly visible. The solid bluish-gray color of the thermal bluestone contrasts nicely with the more varied colors of the full color range paving.
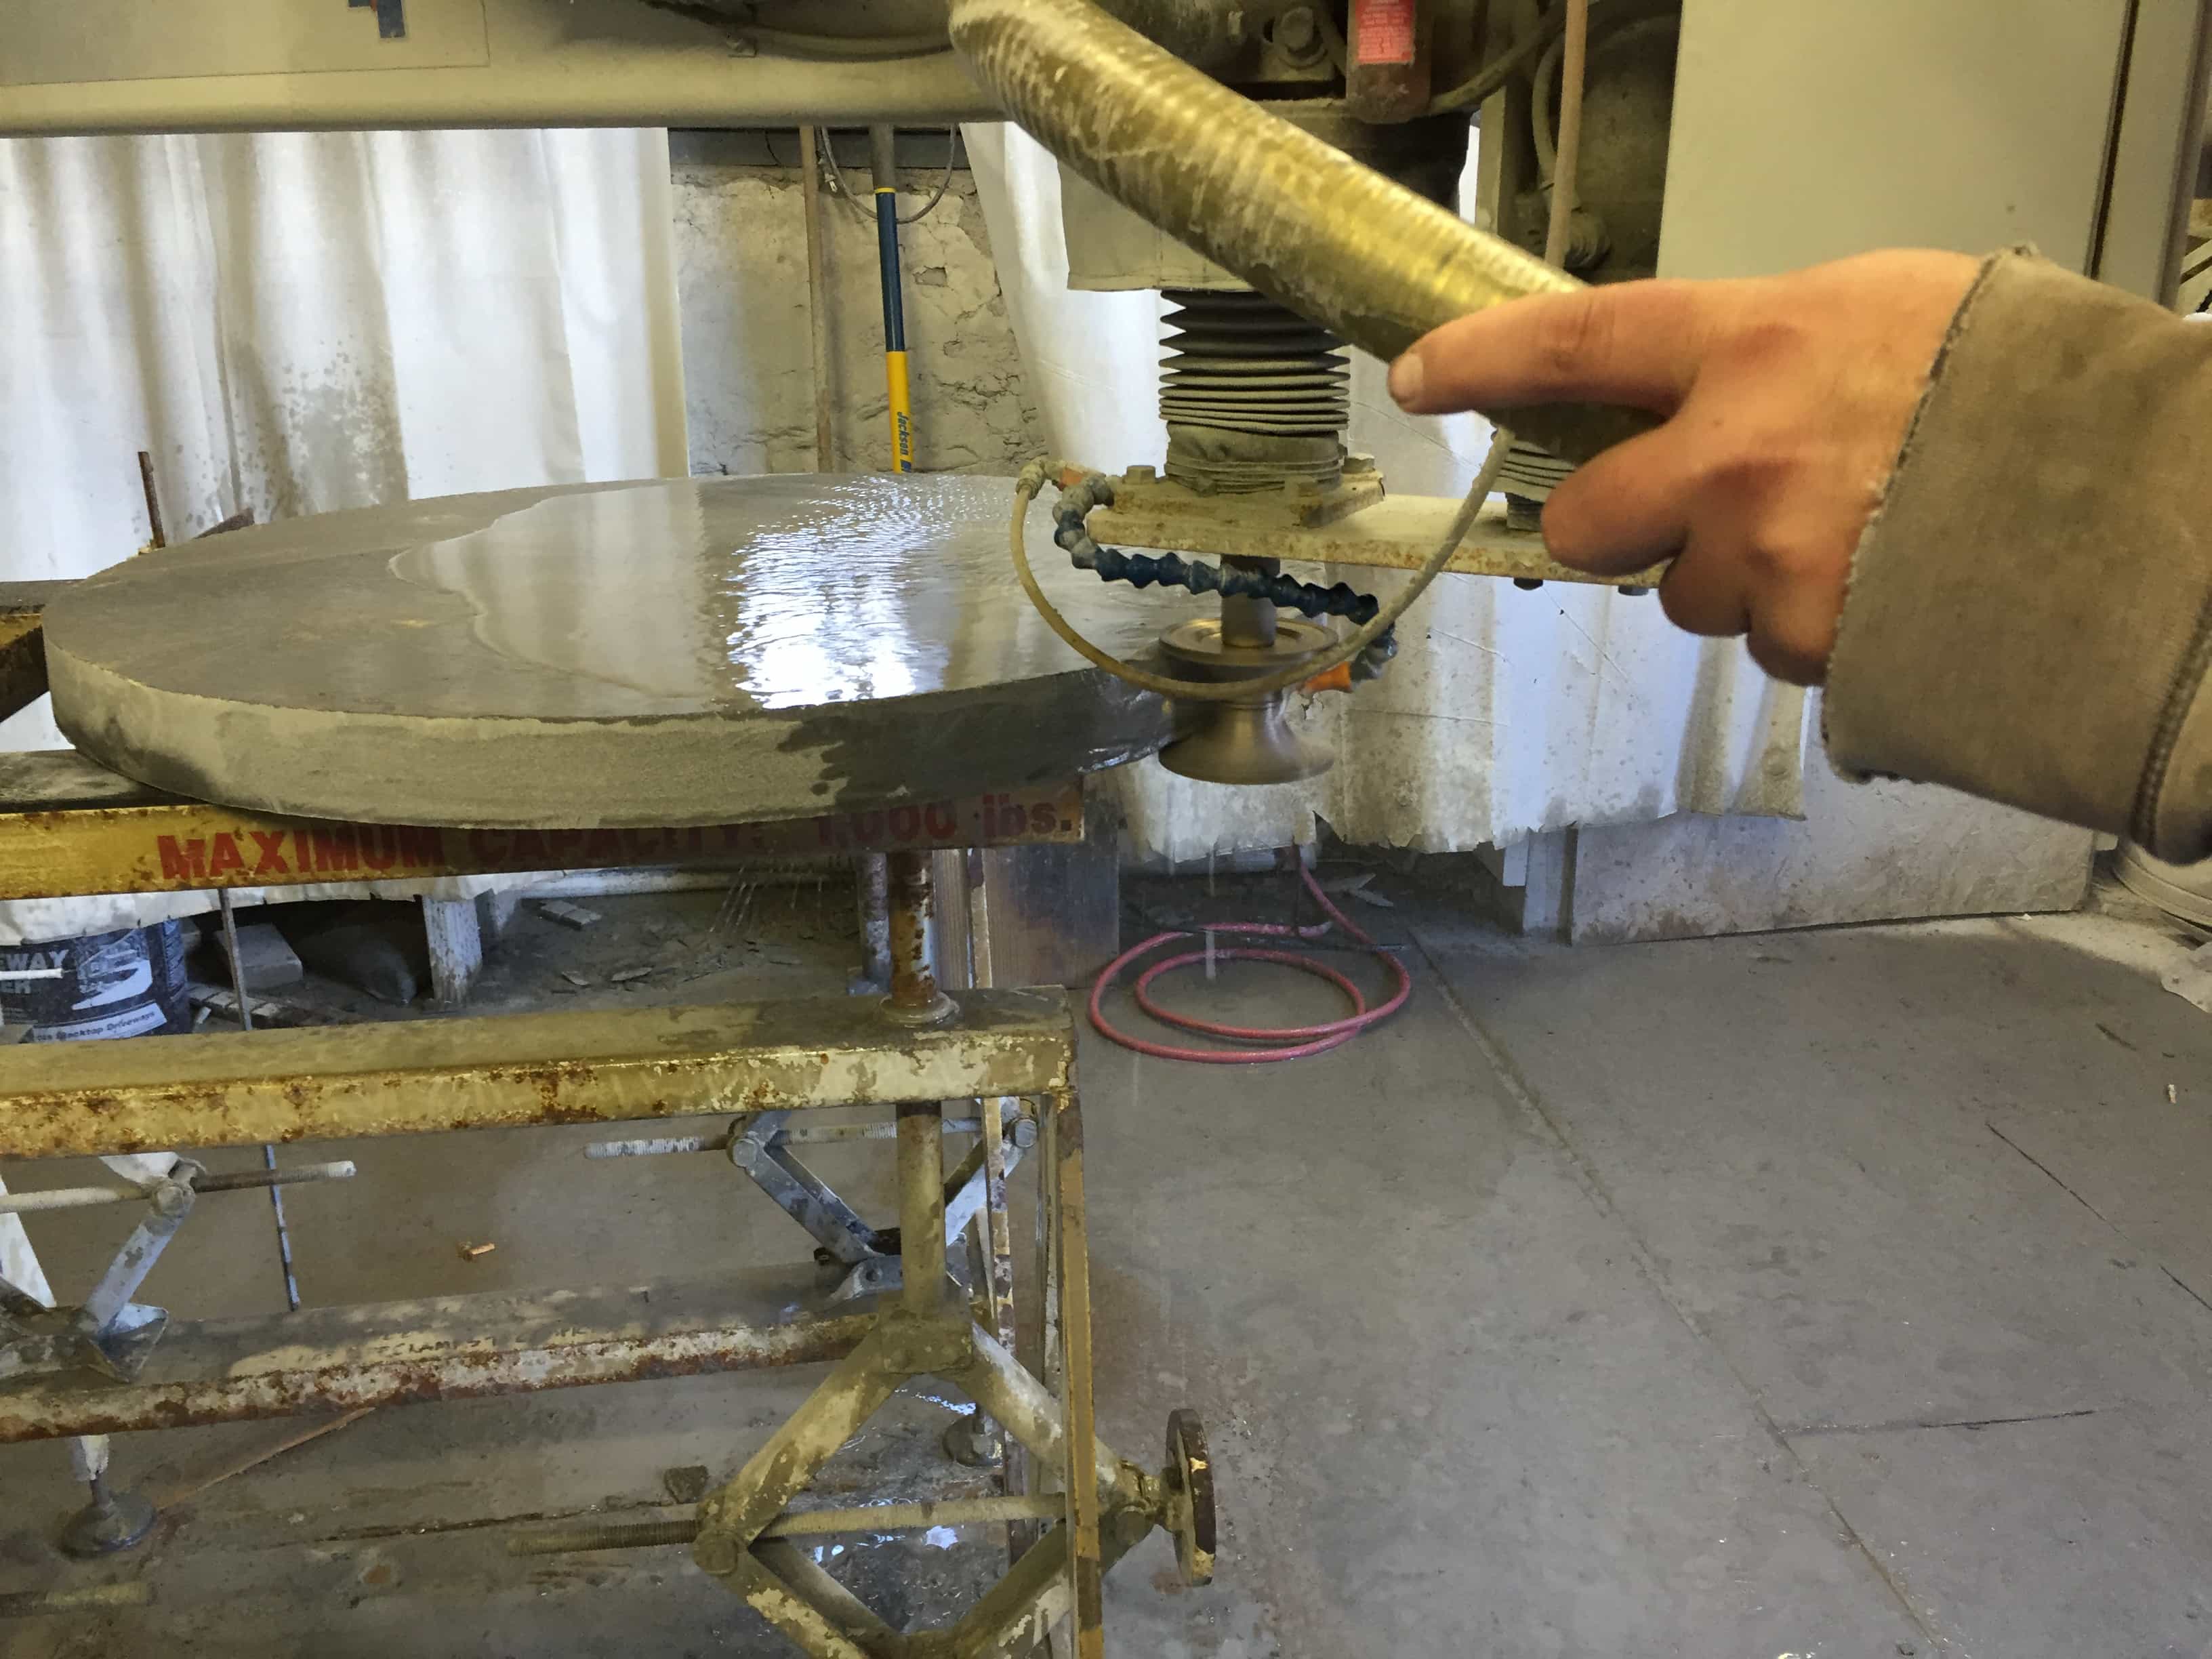
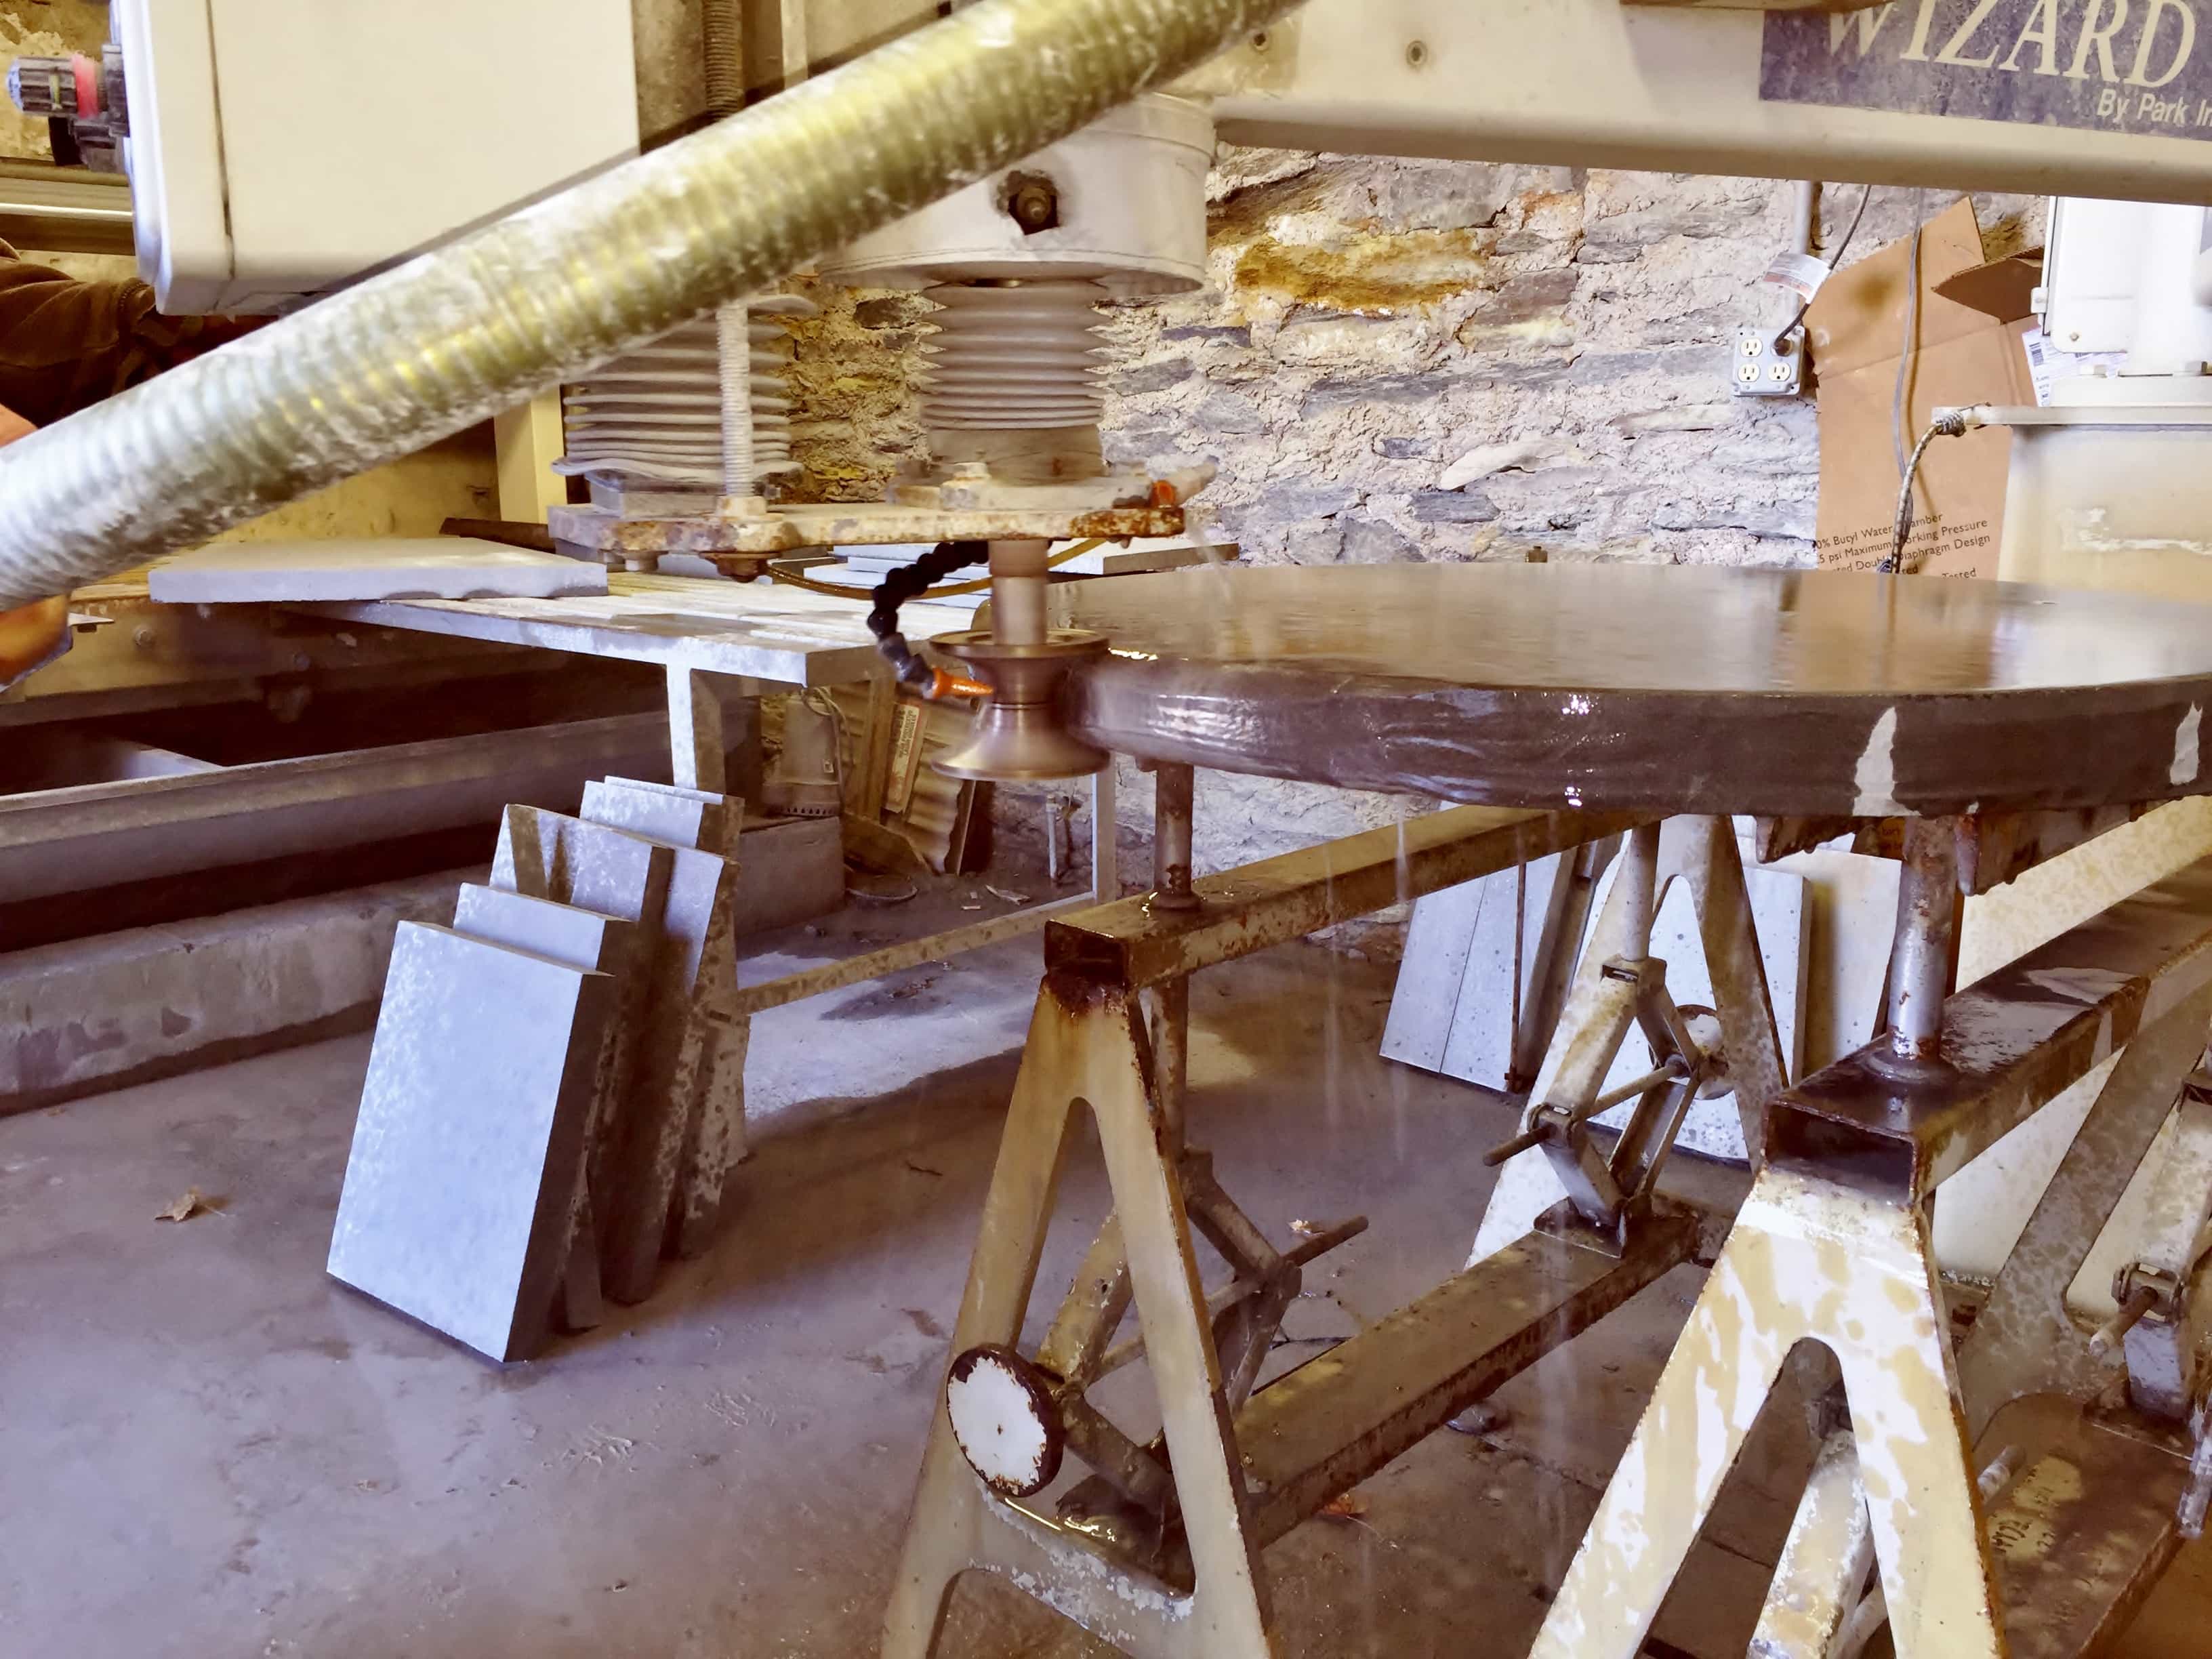
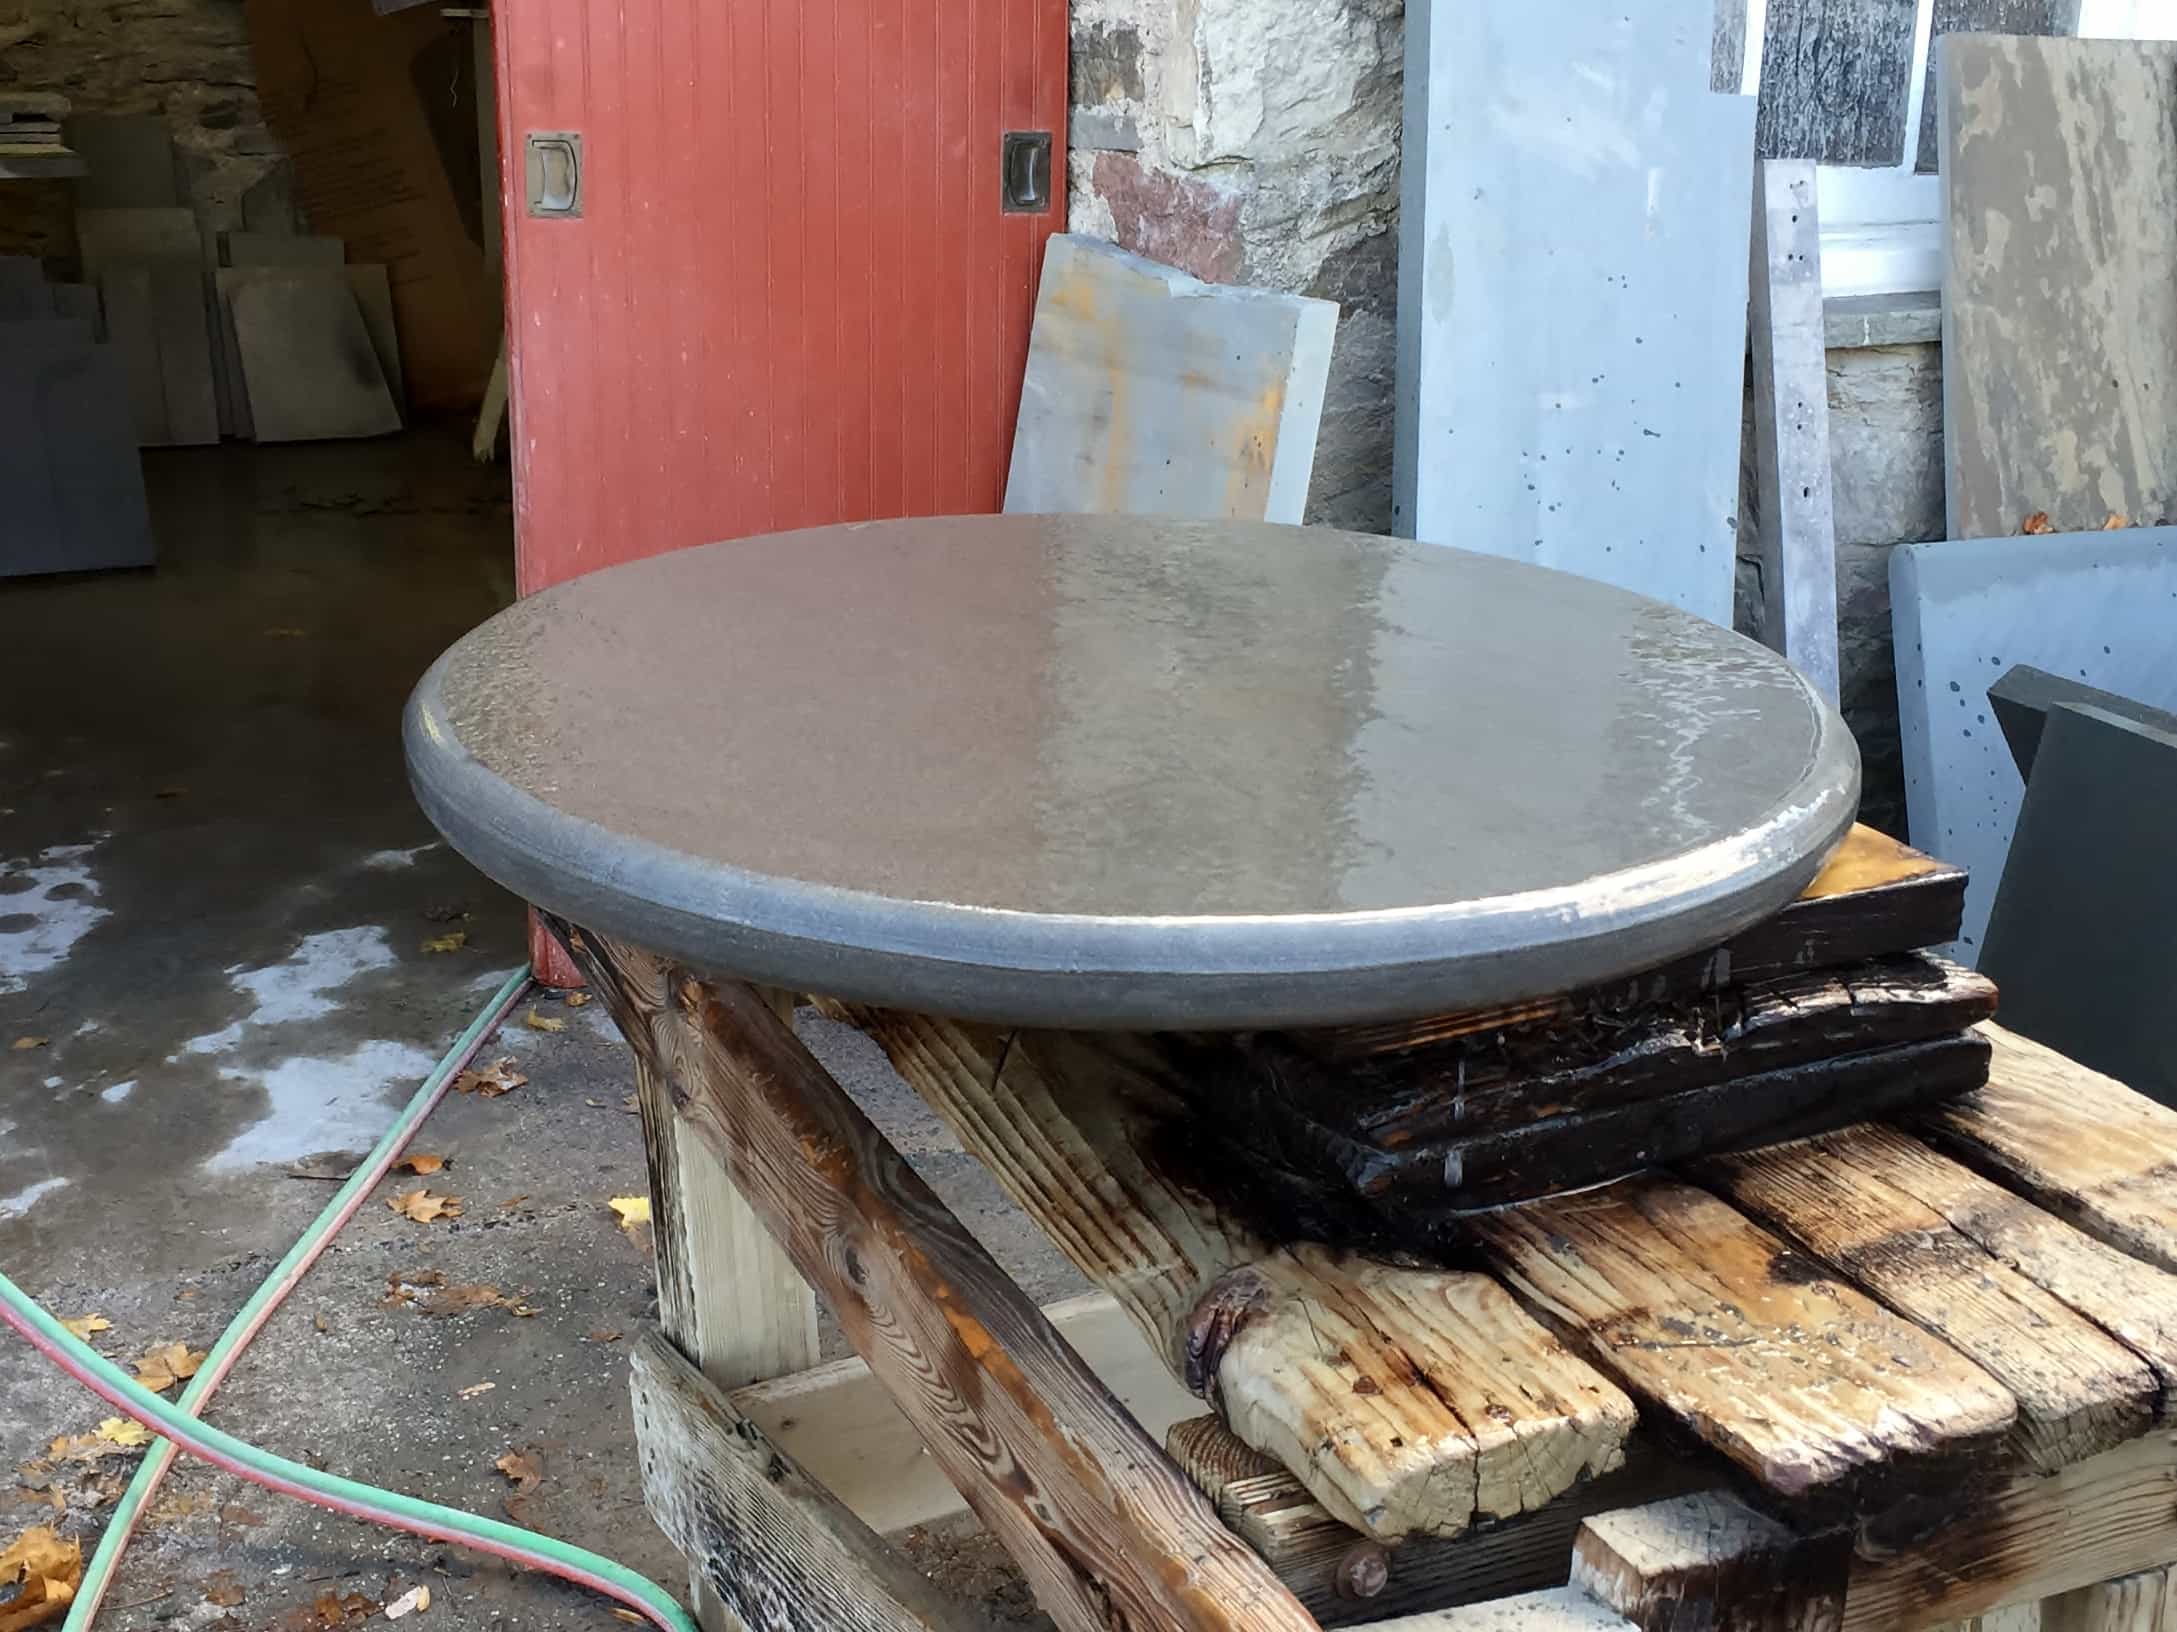
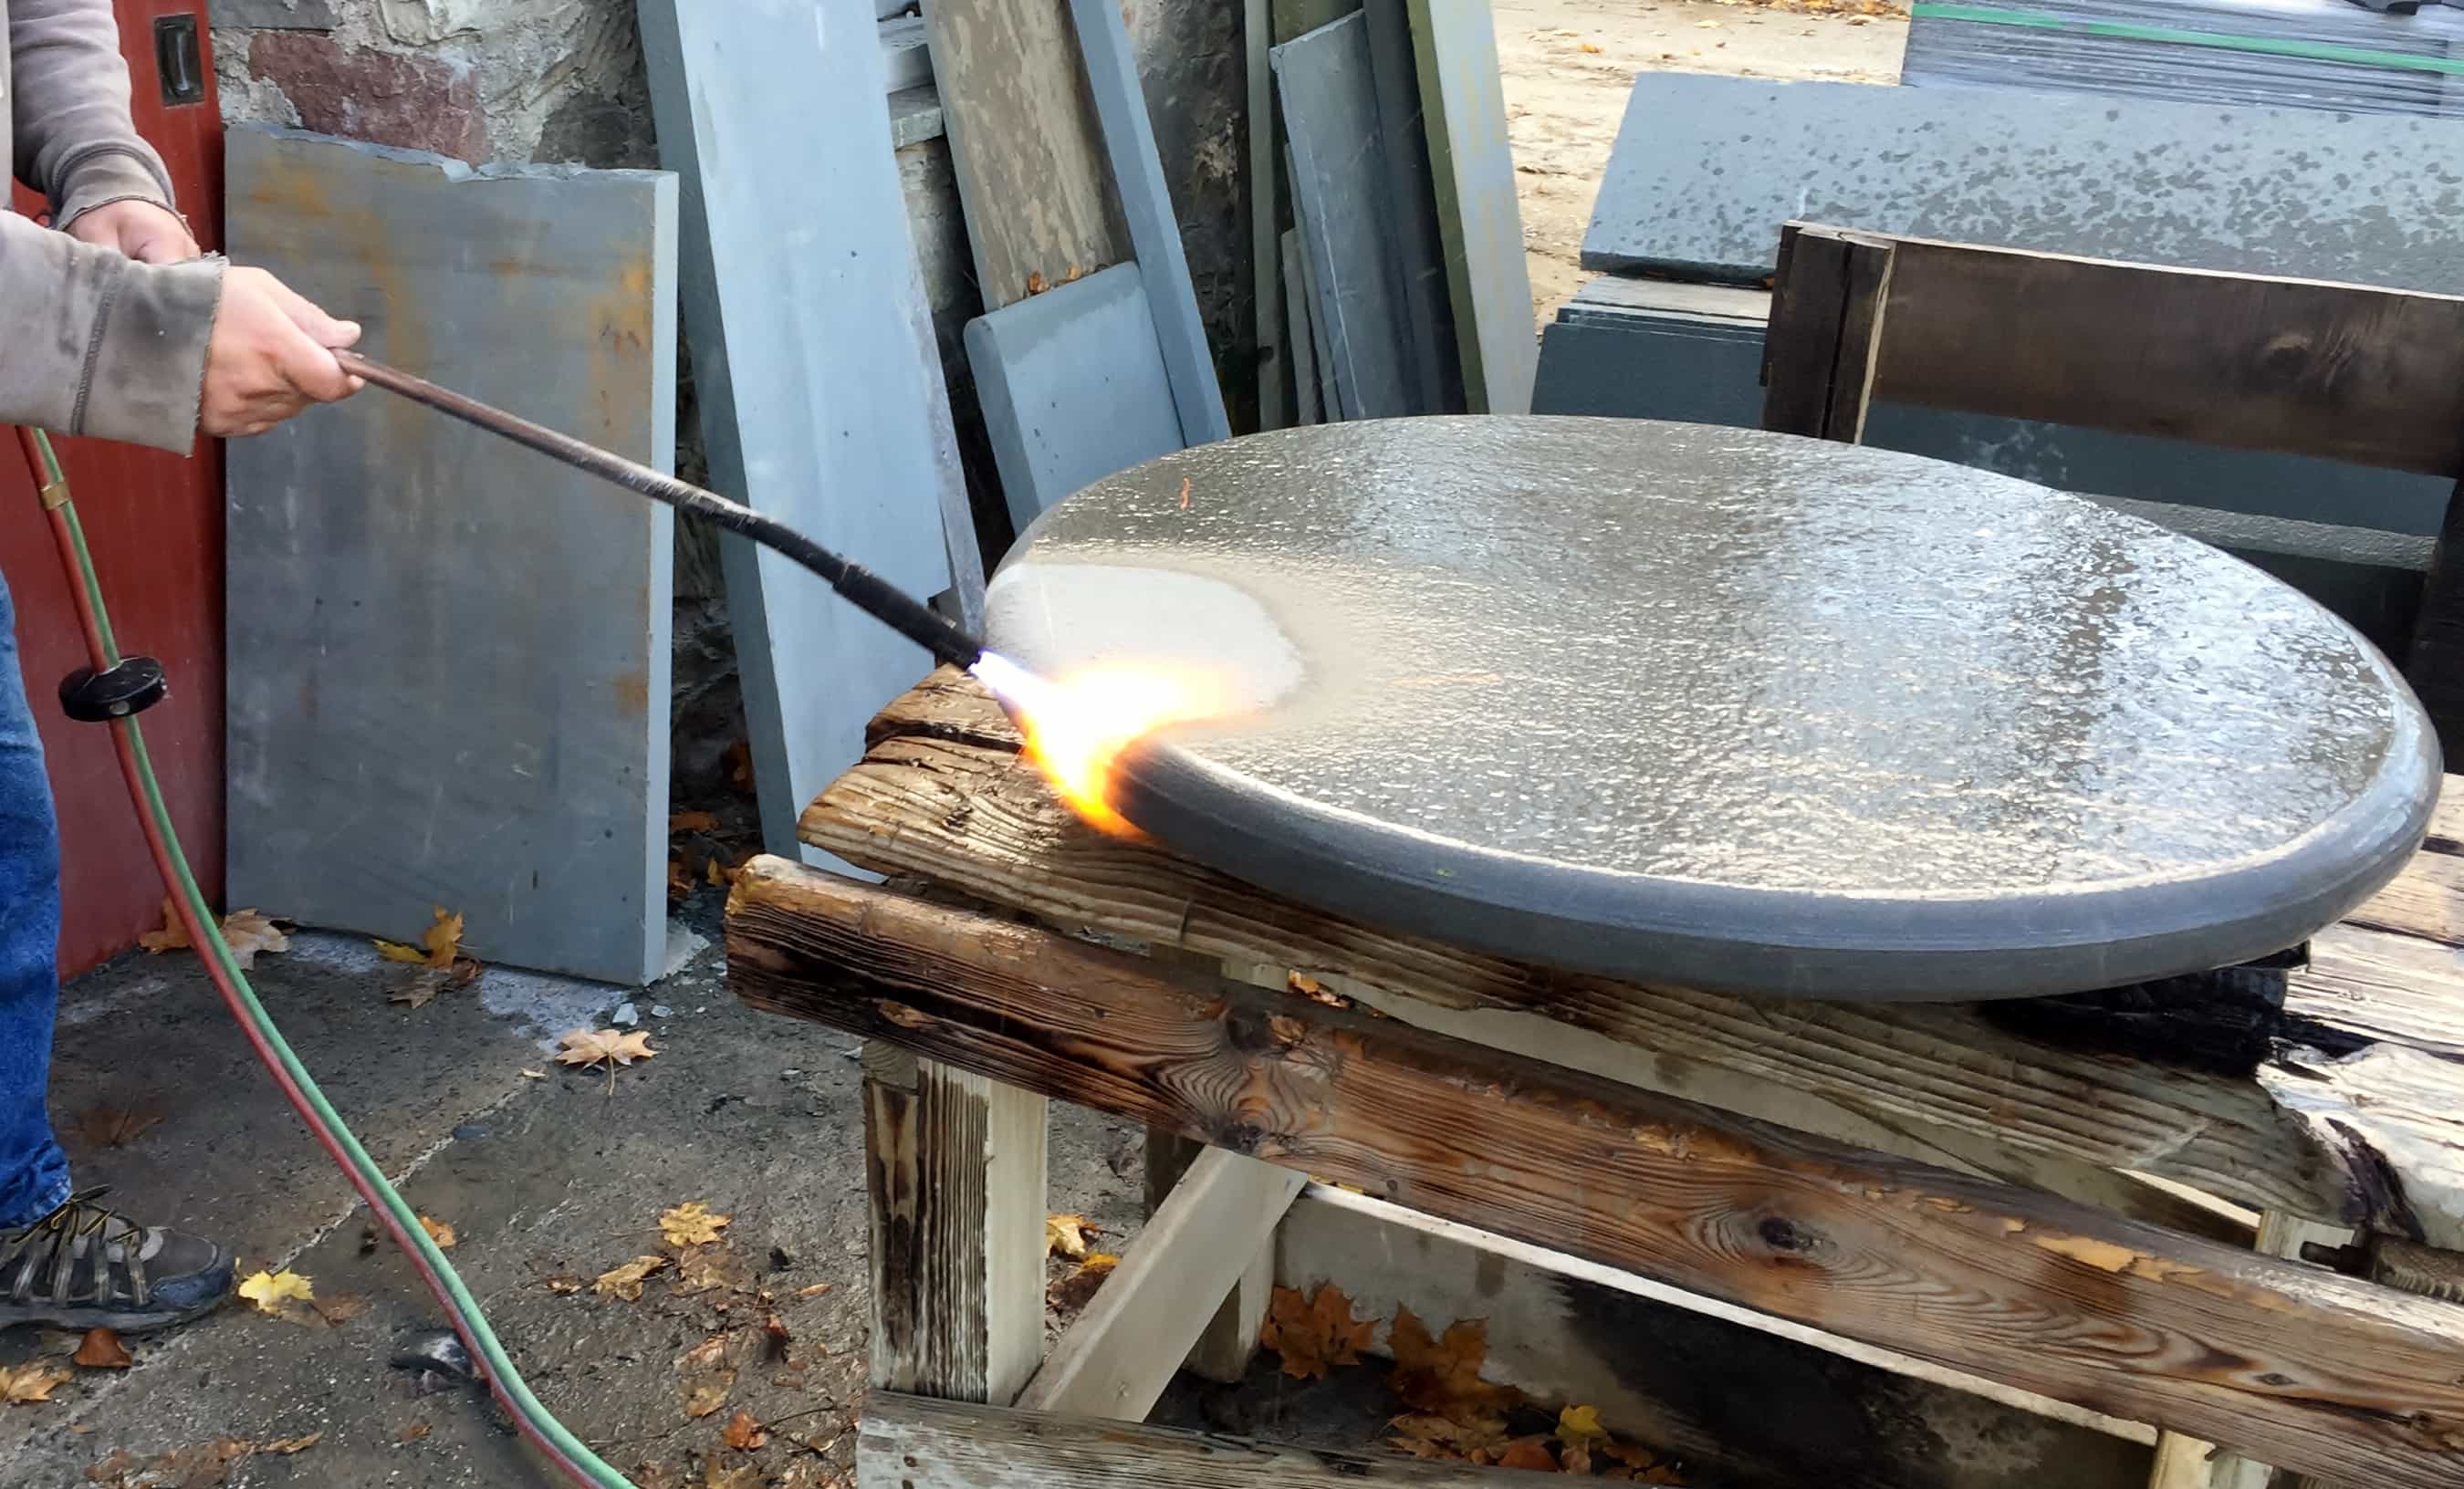
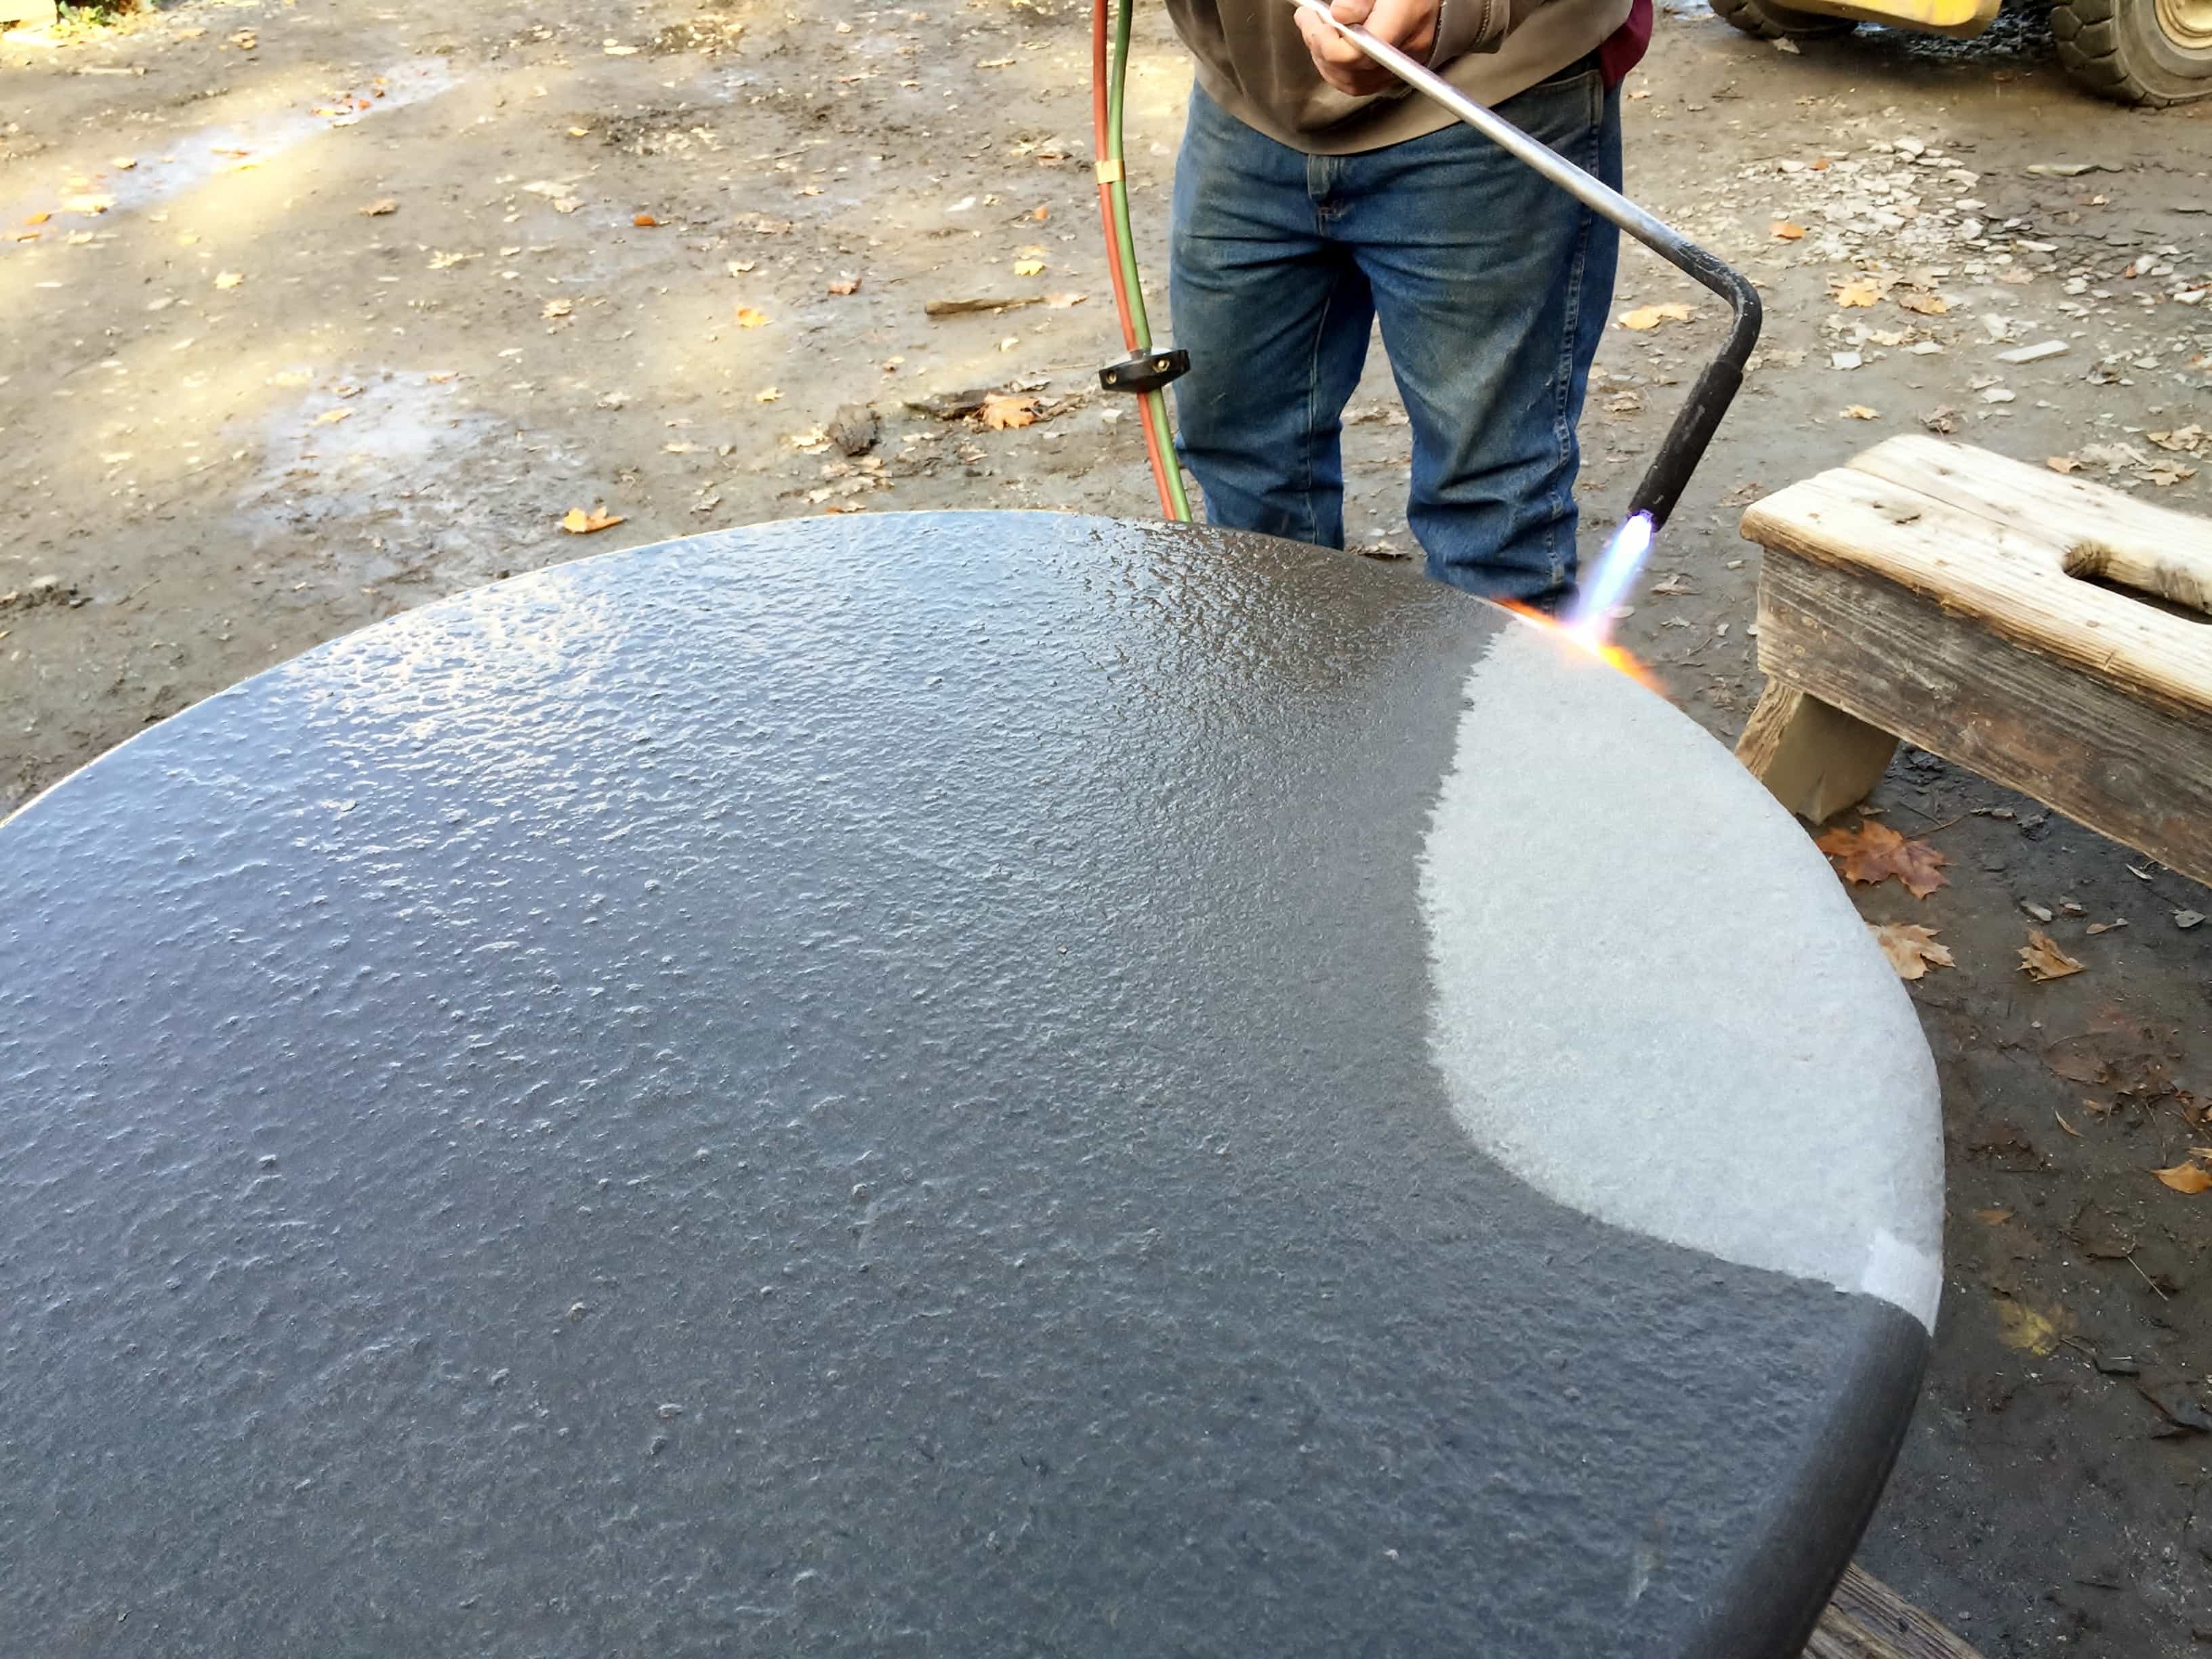
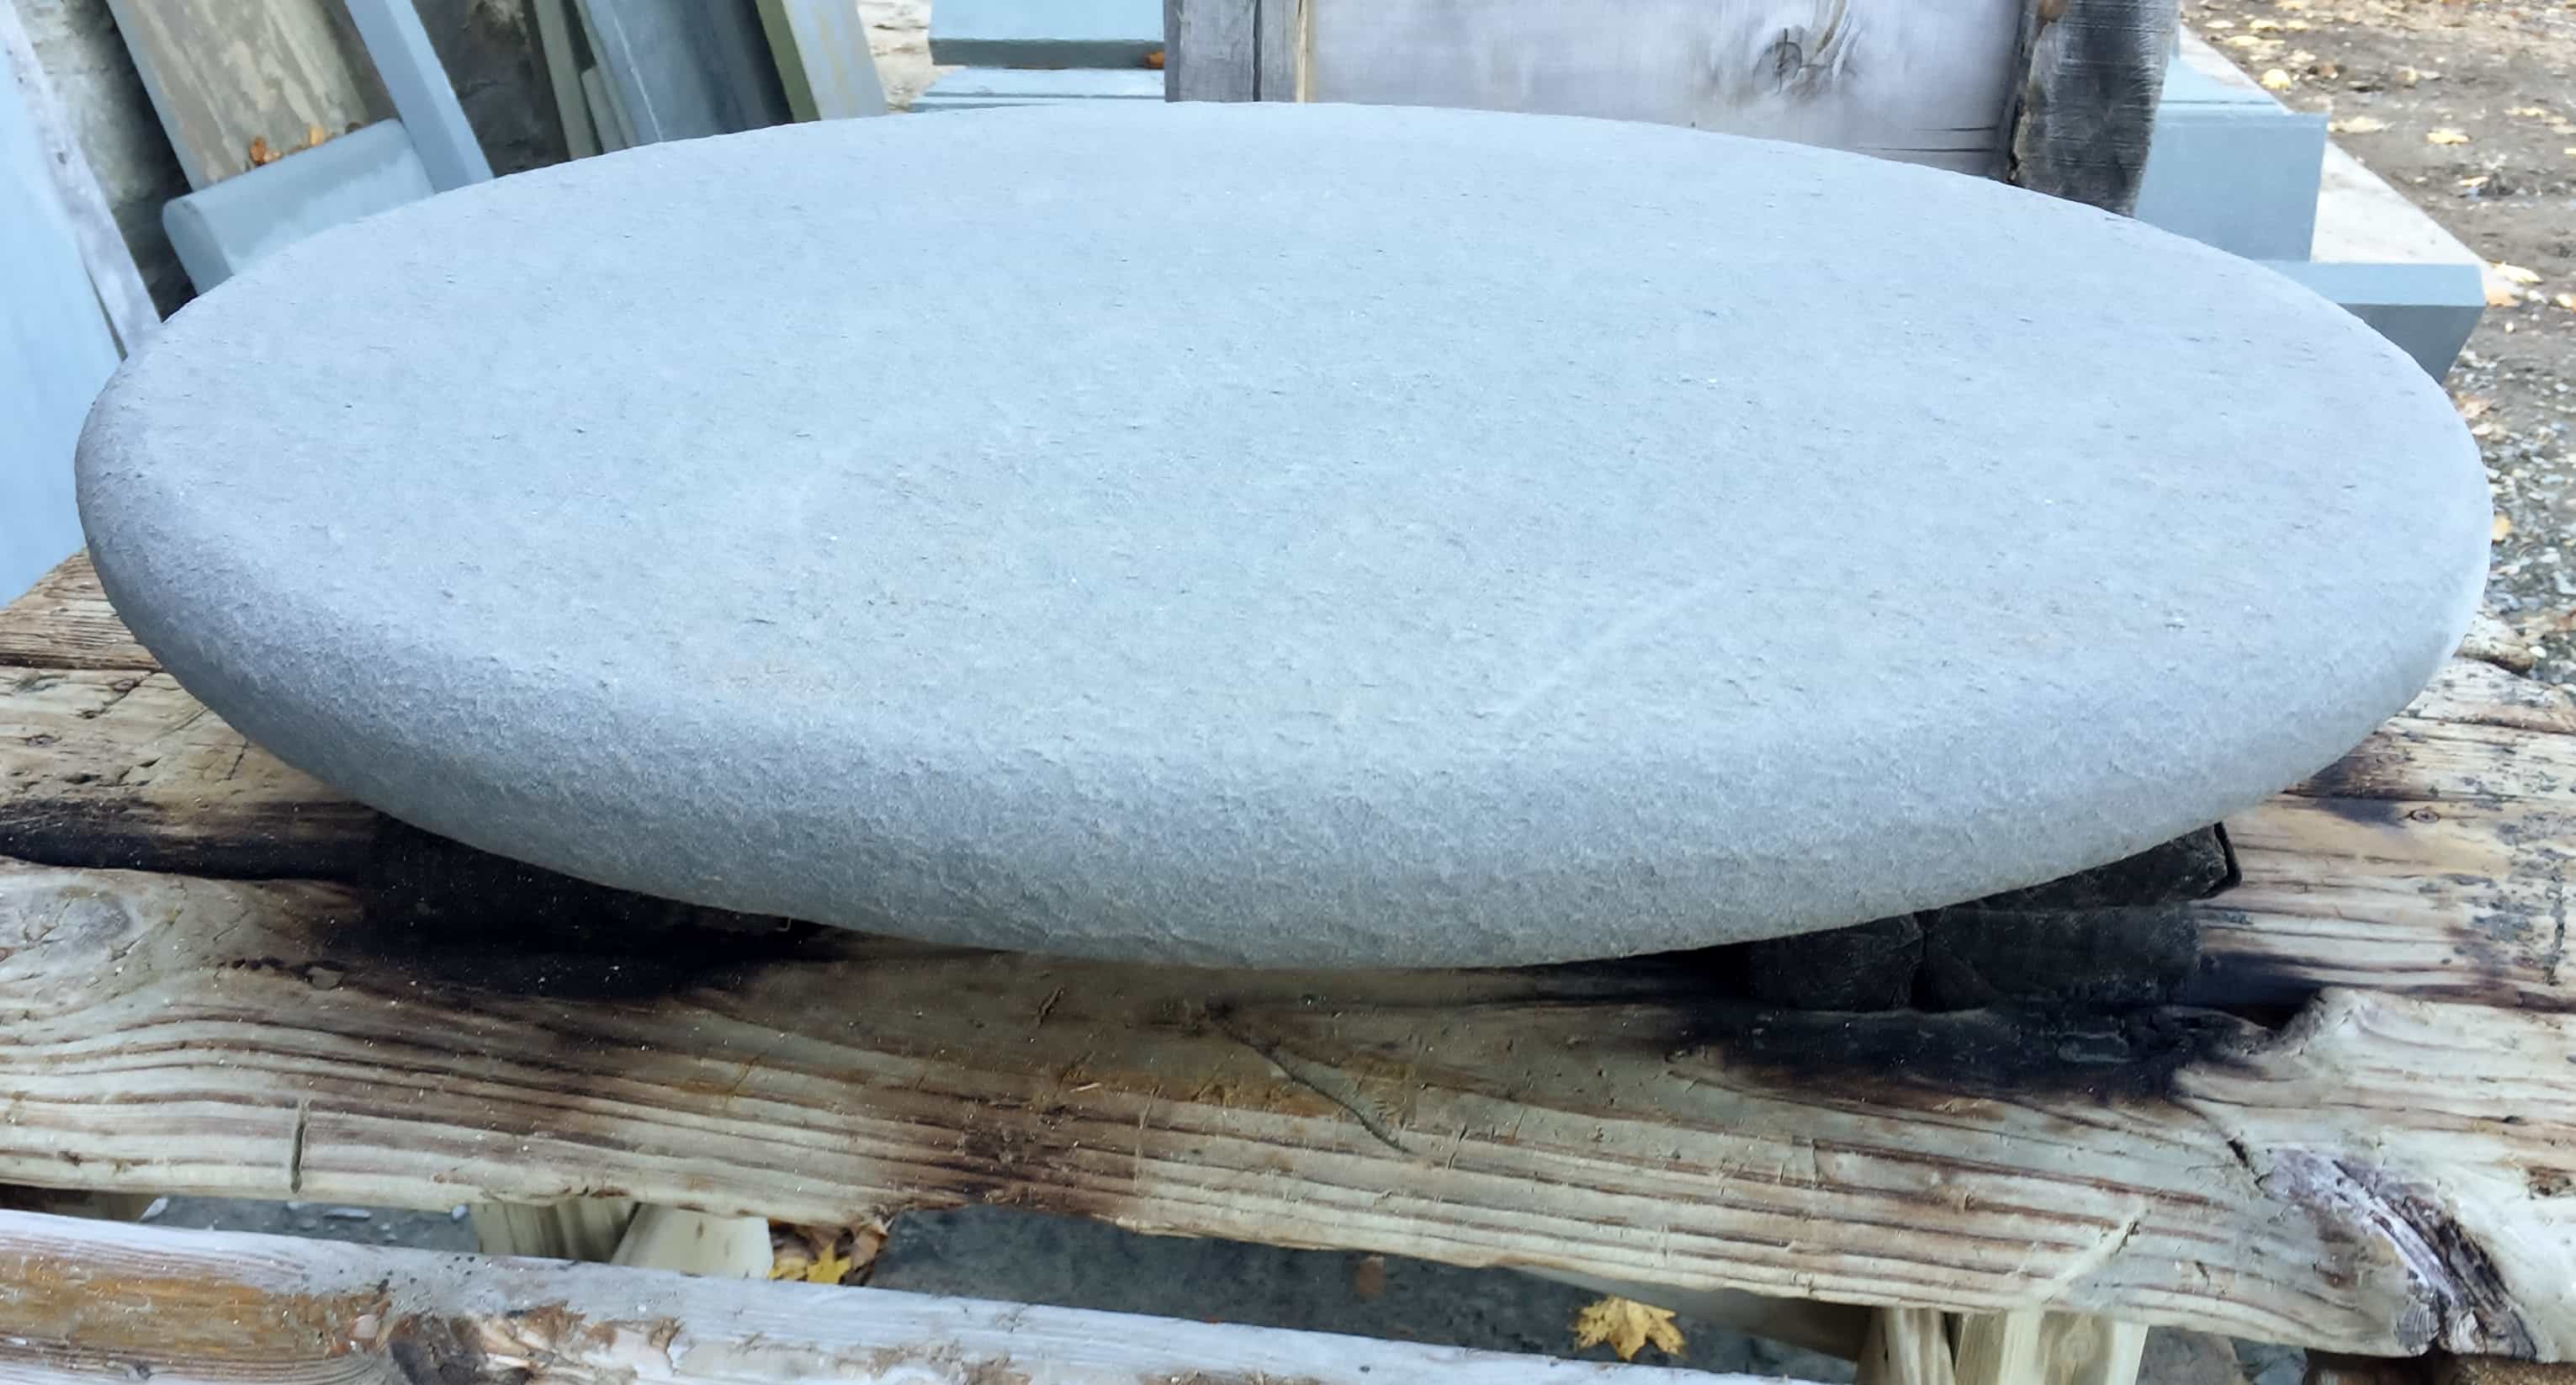
We recently fabricated some 30″ wide diameter round bluestone caps for a local customer. The rounds were used to cap piers outside of an entryway into a house.
The caps came out great, and we wanted to show some of the techniques that were used to make these.
Bullnosing the bluestone caps with the routing machine
Bullnosing the bluestone cap with the routing machine
Roughly bullnosed cap WITHOUT flamed edges
Flaming the bullnosed edge
More Flaming/ Burning
The finished product
A closer look at the bullnosed edge
https://robinsonflagstone.com/wp-content/uploads/2023/02/Logo-3-300x300.png00Tom Ruanehttps://robinsonflagstone.com/wp-content/uploads/2023/02/Logo-3-300x300.pngTom Ruane2015-12-04 20:35:532015-12-29 20:45:06Round Bluestone Caps with Bullnosed Edges
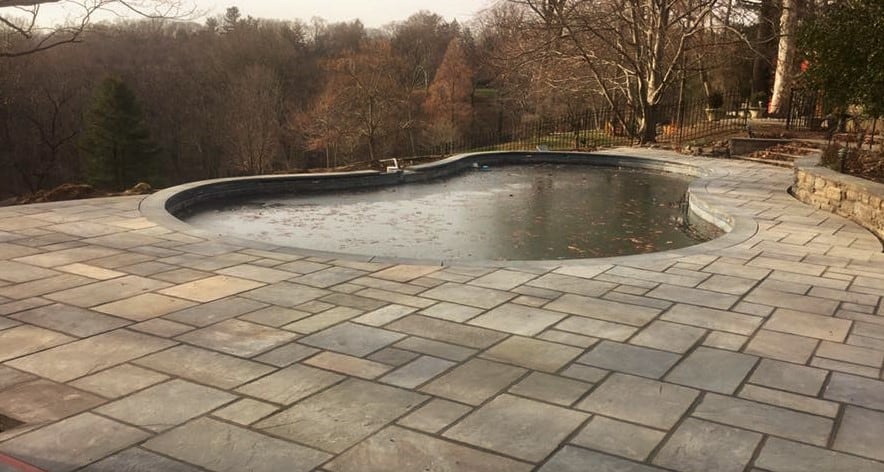
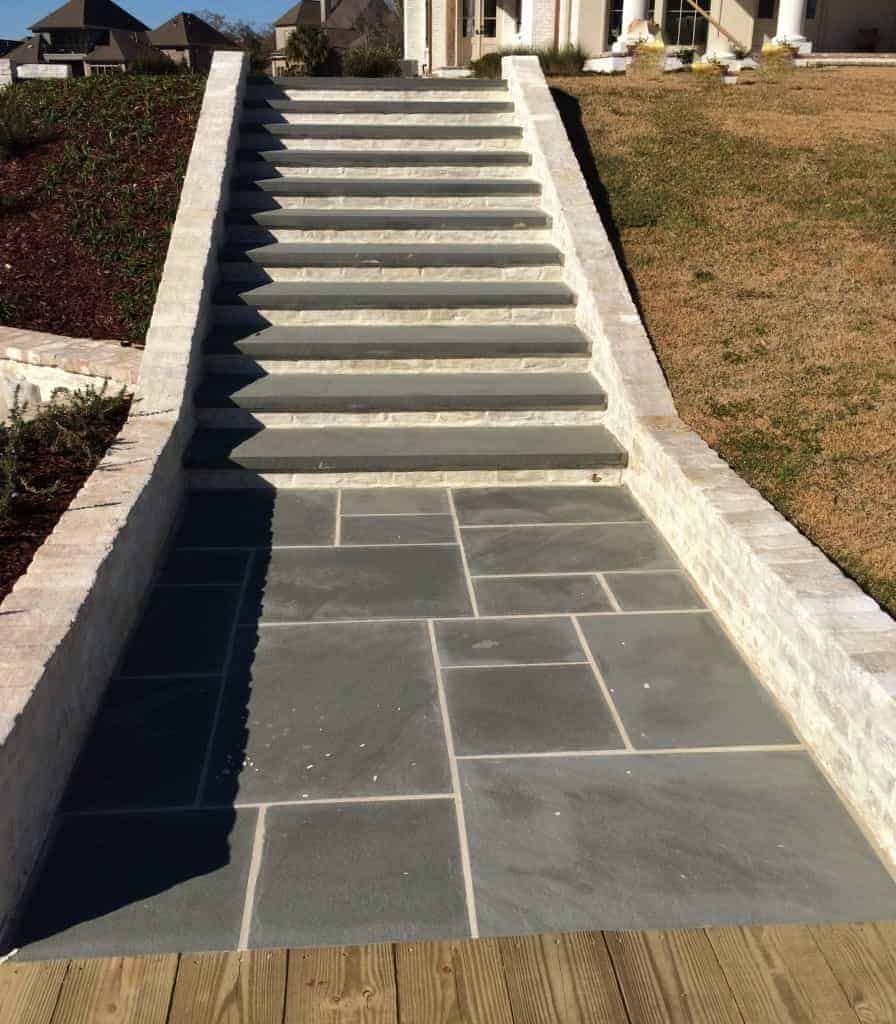
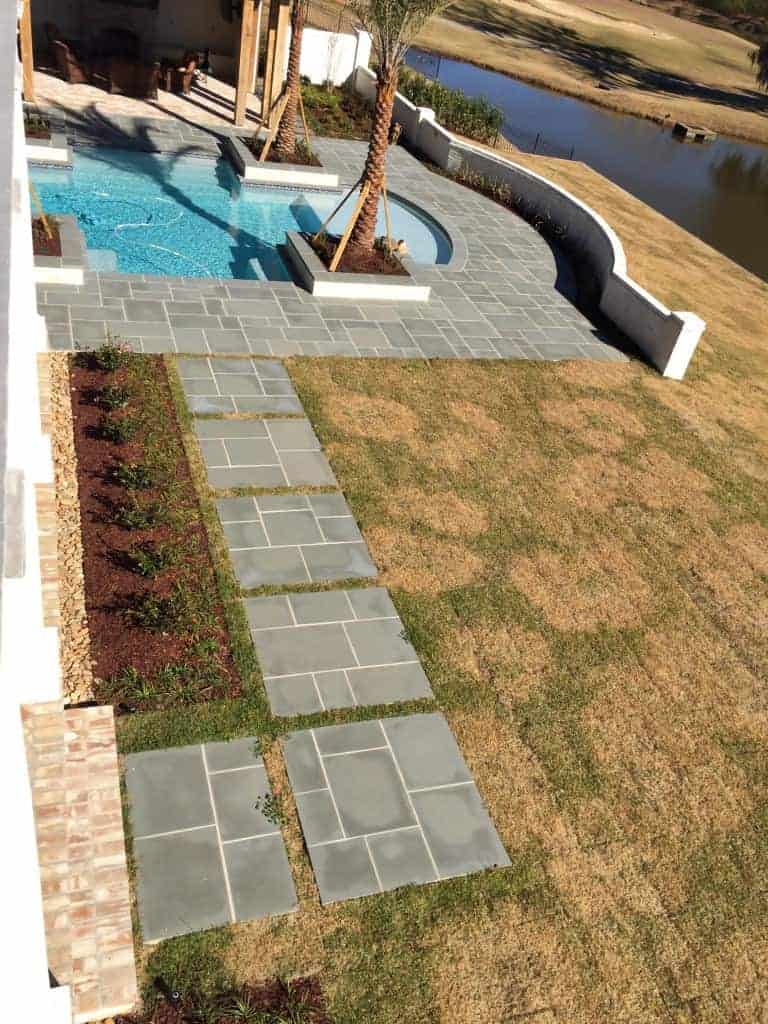
Below are pictures of a recent job at a private residence that just wrapped up in Baton Rouge, Louisiana. The landscape architect’s specifications called for 1″ thick thermal bluestone paving to be used for the walkways and pool deck, and 2″ thick thermal bluestone treads for the pool coping, planter caps , and steps. We provided our customer with a custom setting sketch which illustrated the location of each piece of stone to assist with the setting process. This was the first of a hand-full of jobs we supplied to in Baton Rouge.
We’ve added some new photos to the website for your viewing pleasure, and there will be more added in the coming weeks. The pictures were taken of jobs that were completed in 2014, and were submitted by our customers (whom we thank deeply).


