Tag Archive for: pa bluestone

Custom Bluestone Pool Coping in Portland, Oregon

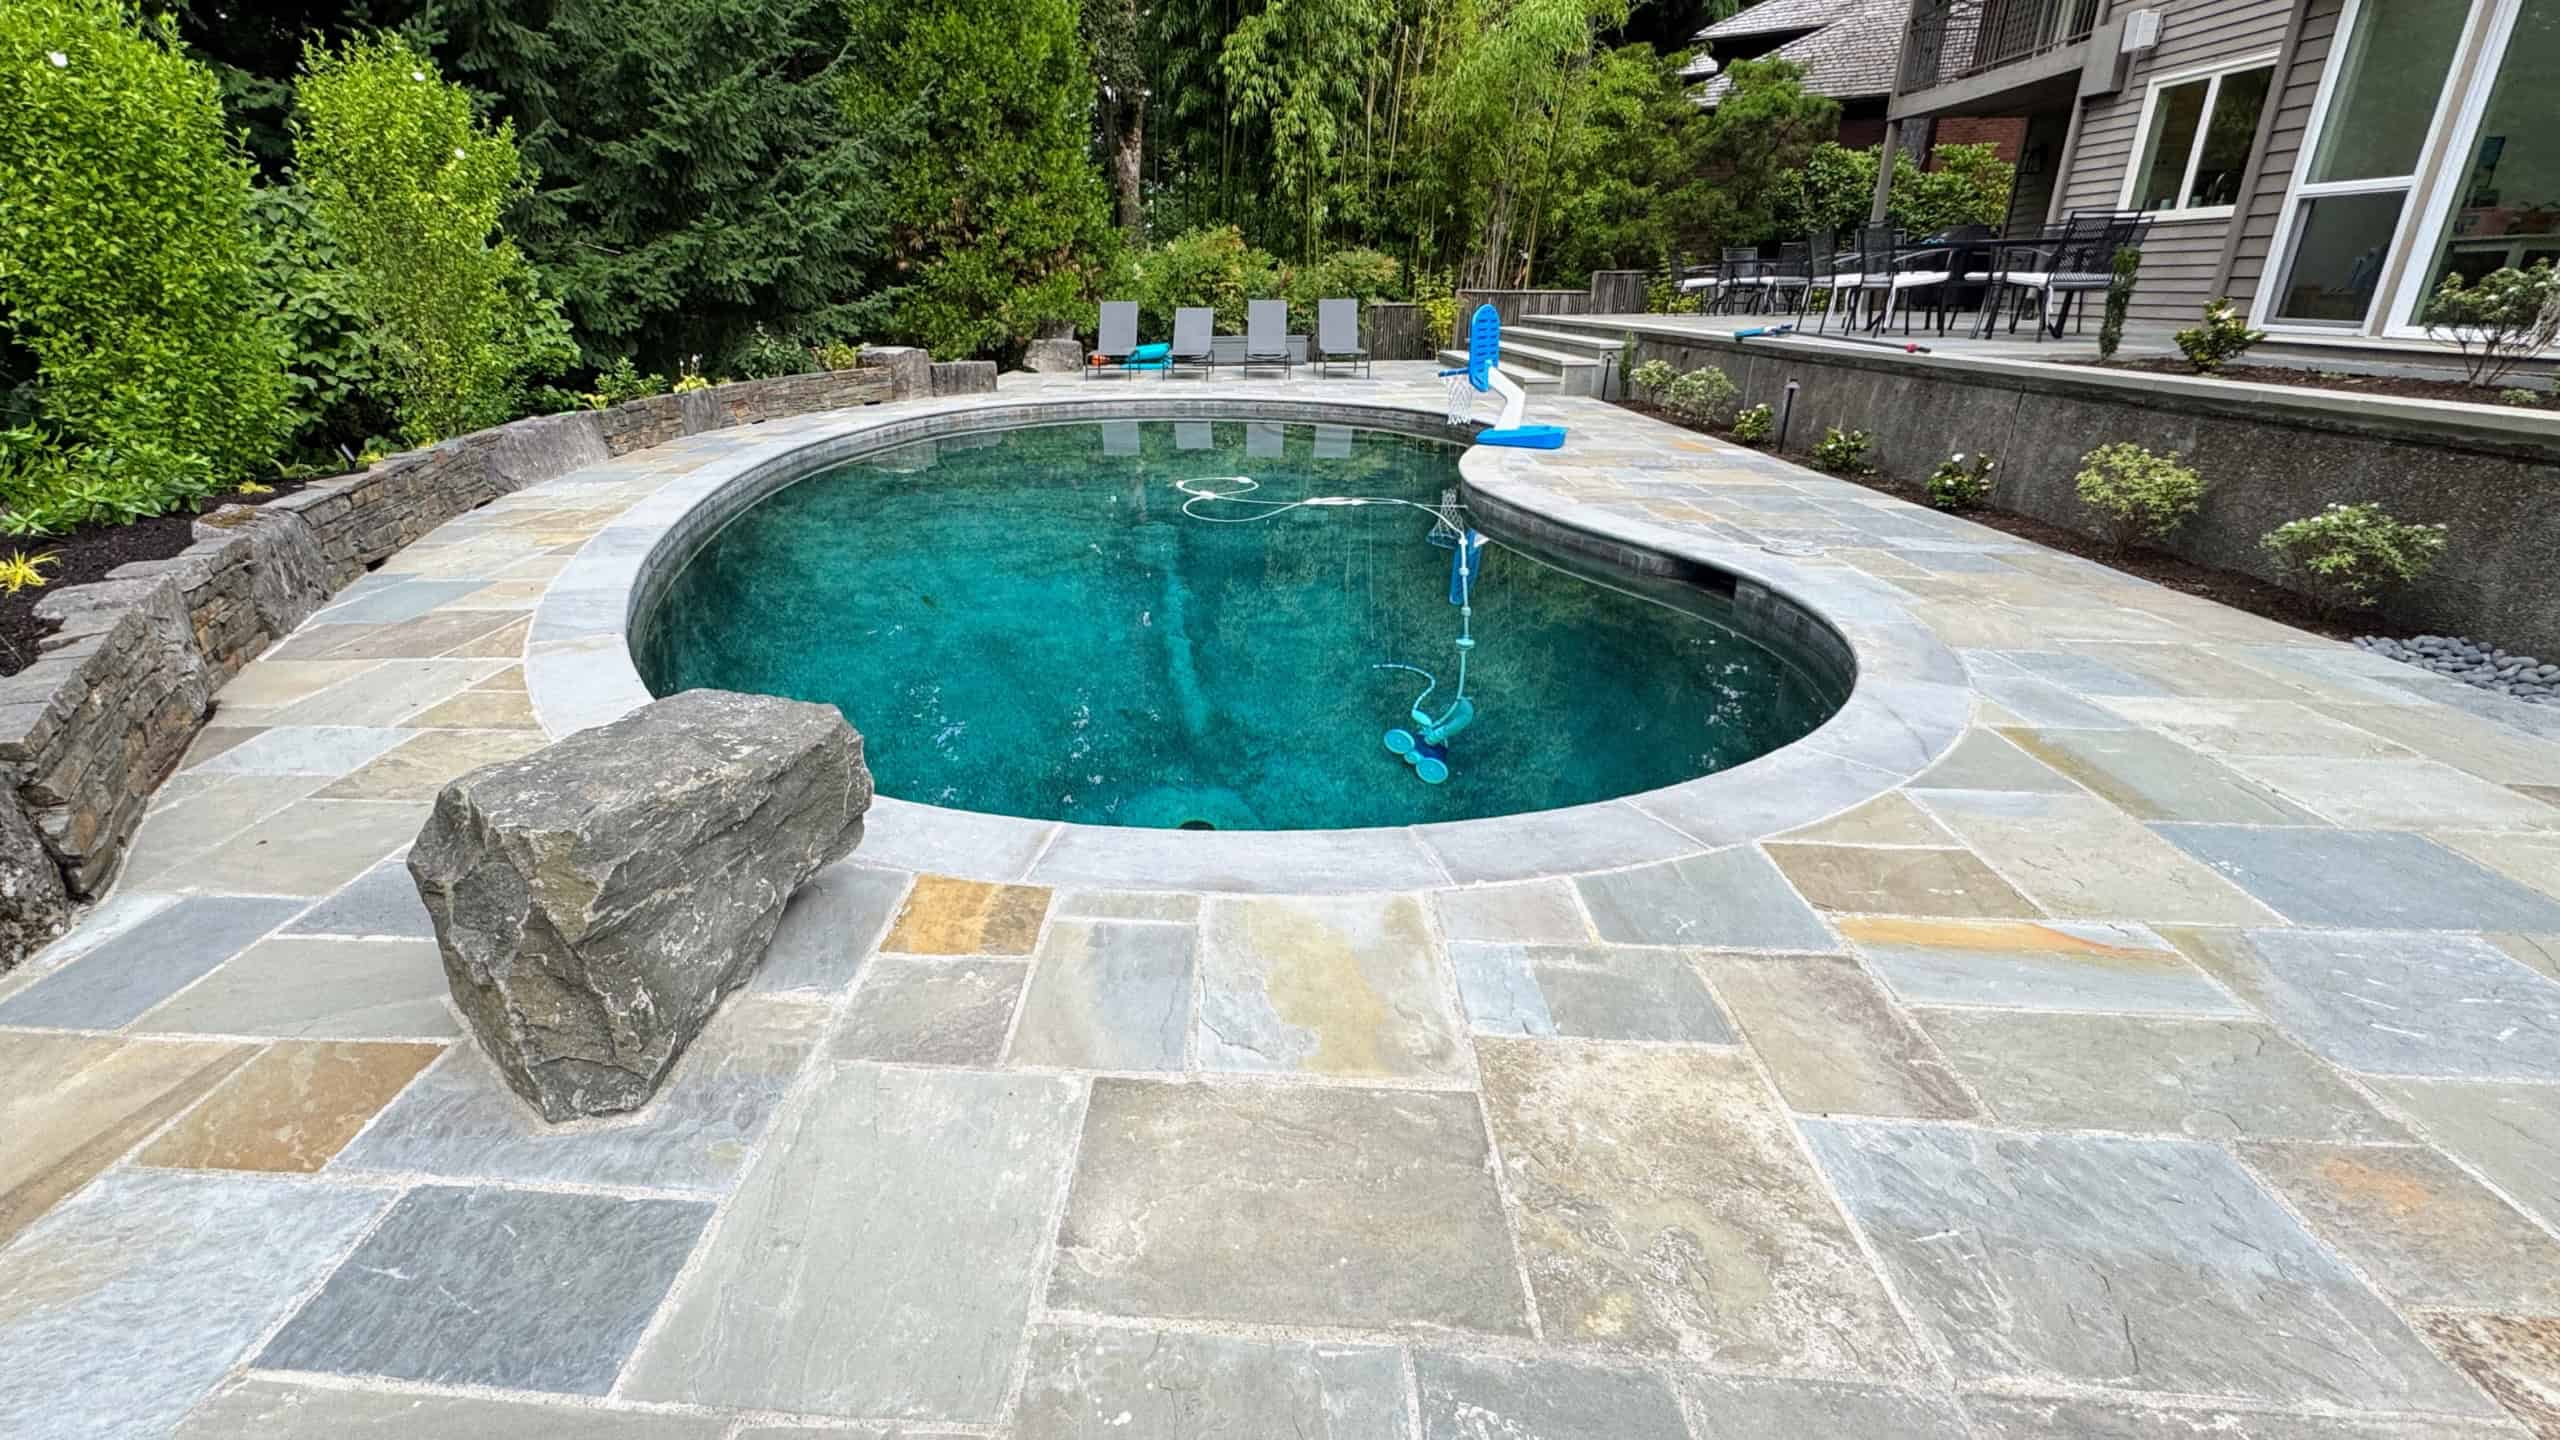
Earlier this year, the team at Ross NW Watergardens in Portland, Oregon reached out to us about a unique custom pool renovation. Their client wanted custom, radius-cut bluestone pool coping installed along the curves of an existing kidney-shaped pool.

Whether local or coast-to-coast, we love tackling custom stone fabrication projects—and this West Coast renovation was no exception.


Overcoming the Renovation Challenge: Precise LiDAR Mapping

Renovating an older gunite pool often presents unique dimensional challenges. Typically, we rely on the original architectural drawings to determine the exact inside and outside radius points needed to cut custom curved coping. However, for this project, the original blueprints were unavailable.

Without precise radius measurements, fabricating custom-fit stone coping isn’t possible. But where there’s a will, there’s a way.

To solve the issue, Maven Mapping Solutions out of Beaverton, Oregon stepped in. Using high-precision LiDAR 3D mapping, they scanned the pool and generated an accurate digital sketch complete with every dimension and radius point required for exact stone fabrication.

Seamless Collaboration Across the Country

Thanks to great communication between Robinson Flagstone, Ross NW Watergardens, and Maven Mapping Solutions, the project moved forward without a hitch. Maven’s precise LiDAR scan gave us the exact geometric data needed to map out and fabricate each individual piece of curved bluestone coping.
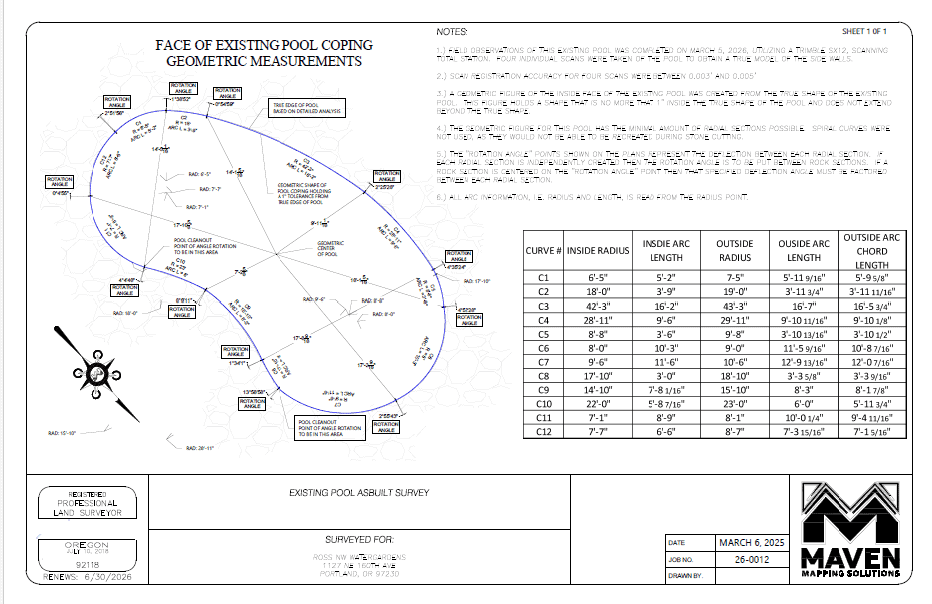
Freeform pool coping geometric measurement site plan and radius data table.

Custom Bluestone Fabrication & Coast-to-Coast Shipping

Once the geometry was finalized, our shop created physical templates to guide the stone cutting process. To enhance both safety and aesthetics, the client chose a full bullnose edge profile—a classic, rounded finish that softens stone edges and creates a smooth, comfortable surface around the water.

After fabrication, each piece of bluestone coping was carefully inspected, securely palletized, and custom-crated to ensure a safe cross-country trip to Oregon.
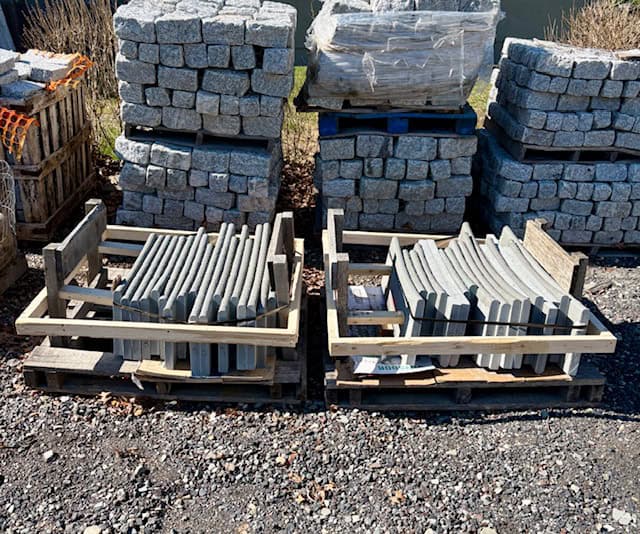
Pallets of custom-cut curved bluestone pool coping stones securely crated for delivery.

The Finished Result

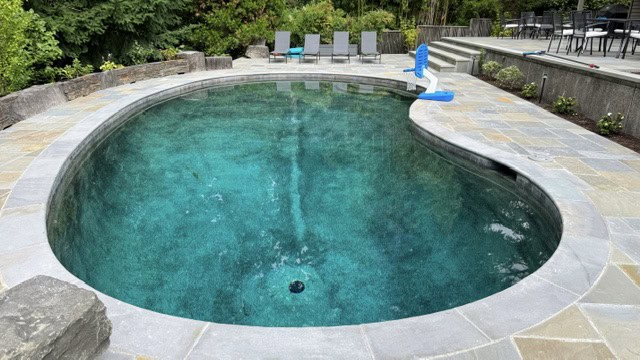
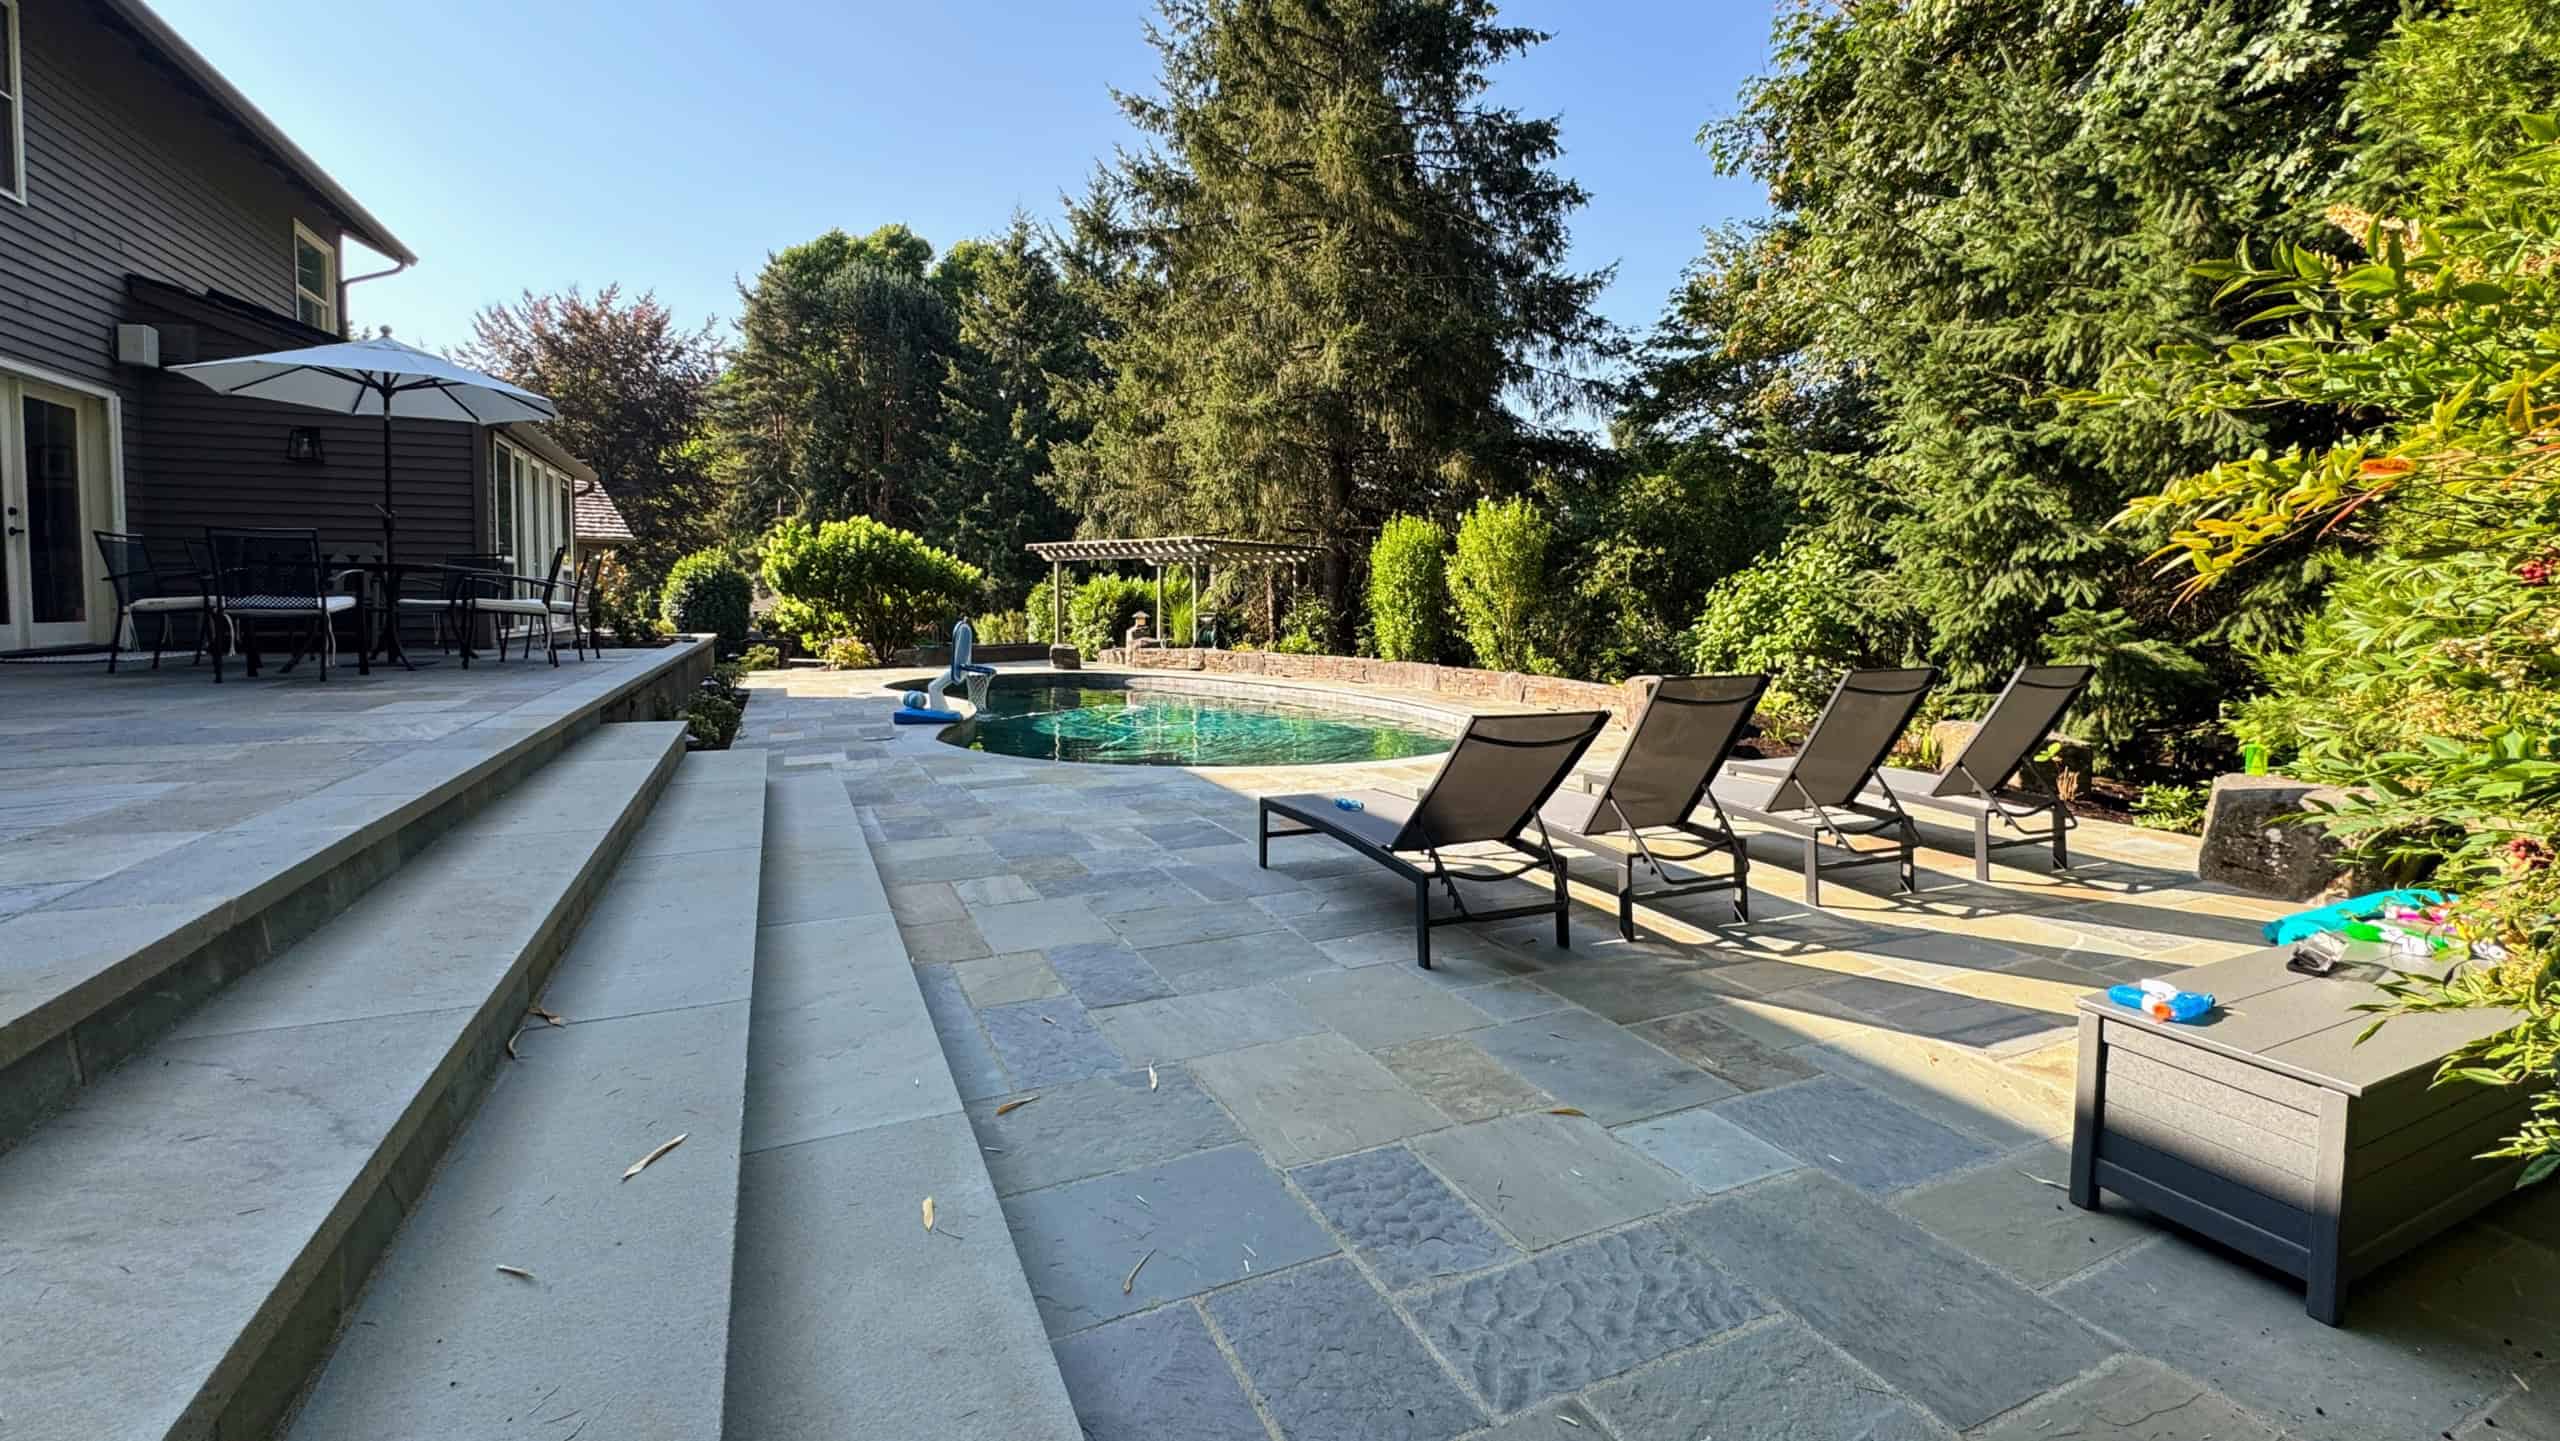
The finished installation speaks for itself—a seamless, beautifully fitted bluestone edge that elevates the entire backyard landscape.
Have a Custom Stone Project Coming Up?

No matter where your job site is located, Robinson Flagstone delivers premium Pennsylvania bluestone and custom stone fabrication directly to you nationwide.

Whether you need radius-cut pool coping, custom tread profiles, or natural flagstone for your next project, our team is ready to help bring your design to life.

Contact Us Today for a Quote or call us to discuss your custom stone specifications!
How to Install a Flagstone Patio: The “Dry-Set” Method

Installing a flagstone patio is a rewarding project that adds timeless value to your home. In this guide, I’ll walk you through a “Dry-Set” installation. I use quotation marks because, while this is a dry-laying method, we use a touch of Portland cement and water to ensure the stones stay exactly where you put them.

Project Overview & Materials

Average 1 1/2″ Thick FlagstoneLevel
Concrete SandWheelbarrow
2A Modified Crushed Stone5 Gallon Buckets (multiple)
ShovelsPortland Cement
Garden HoeSponges
Brick & Block TrowelGrinder with Diamond Wheel
Rubber MalletPolymeric Sand
TamperBroom

Step 1: Planning and Excavation

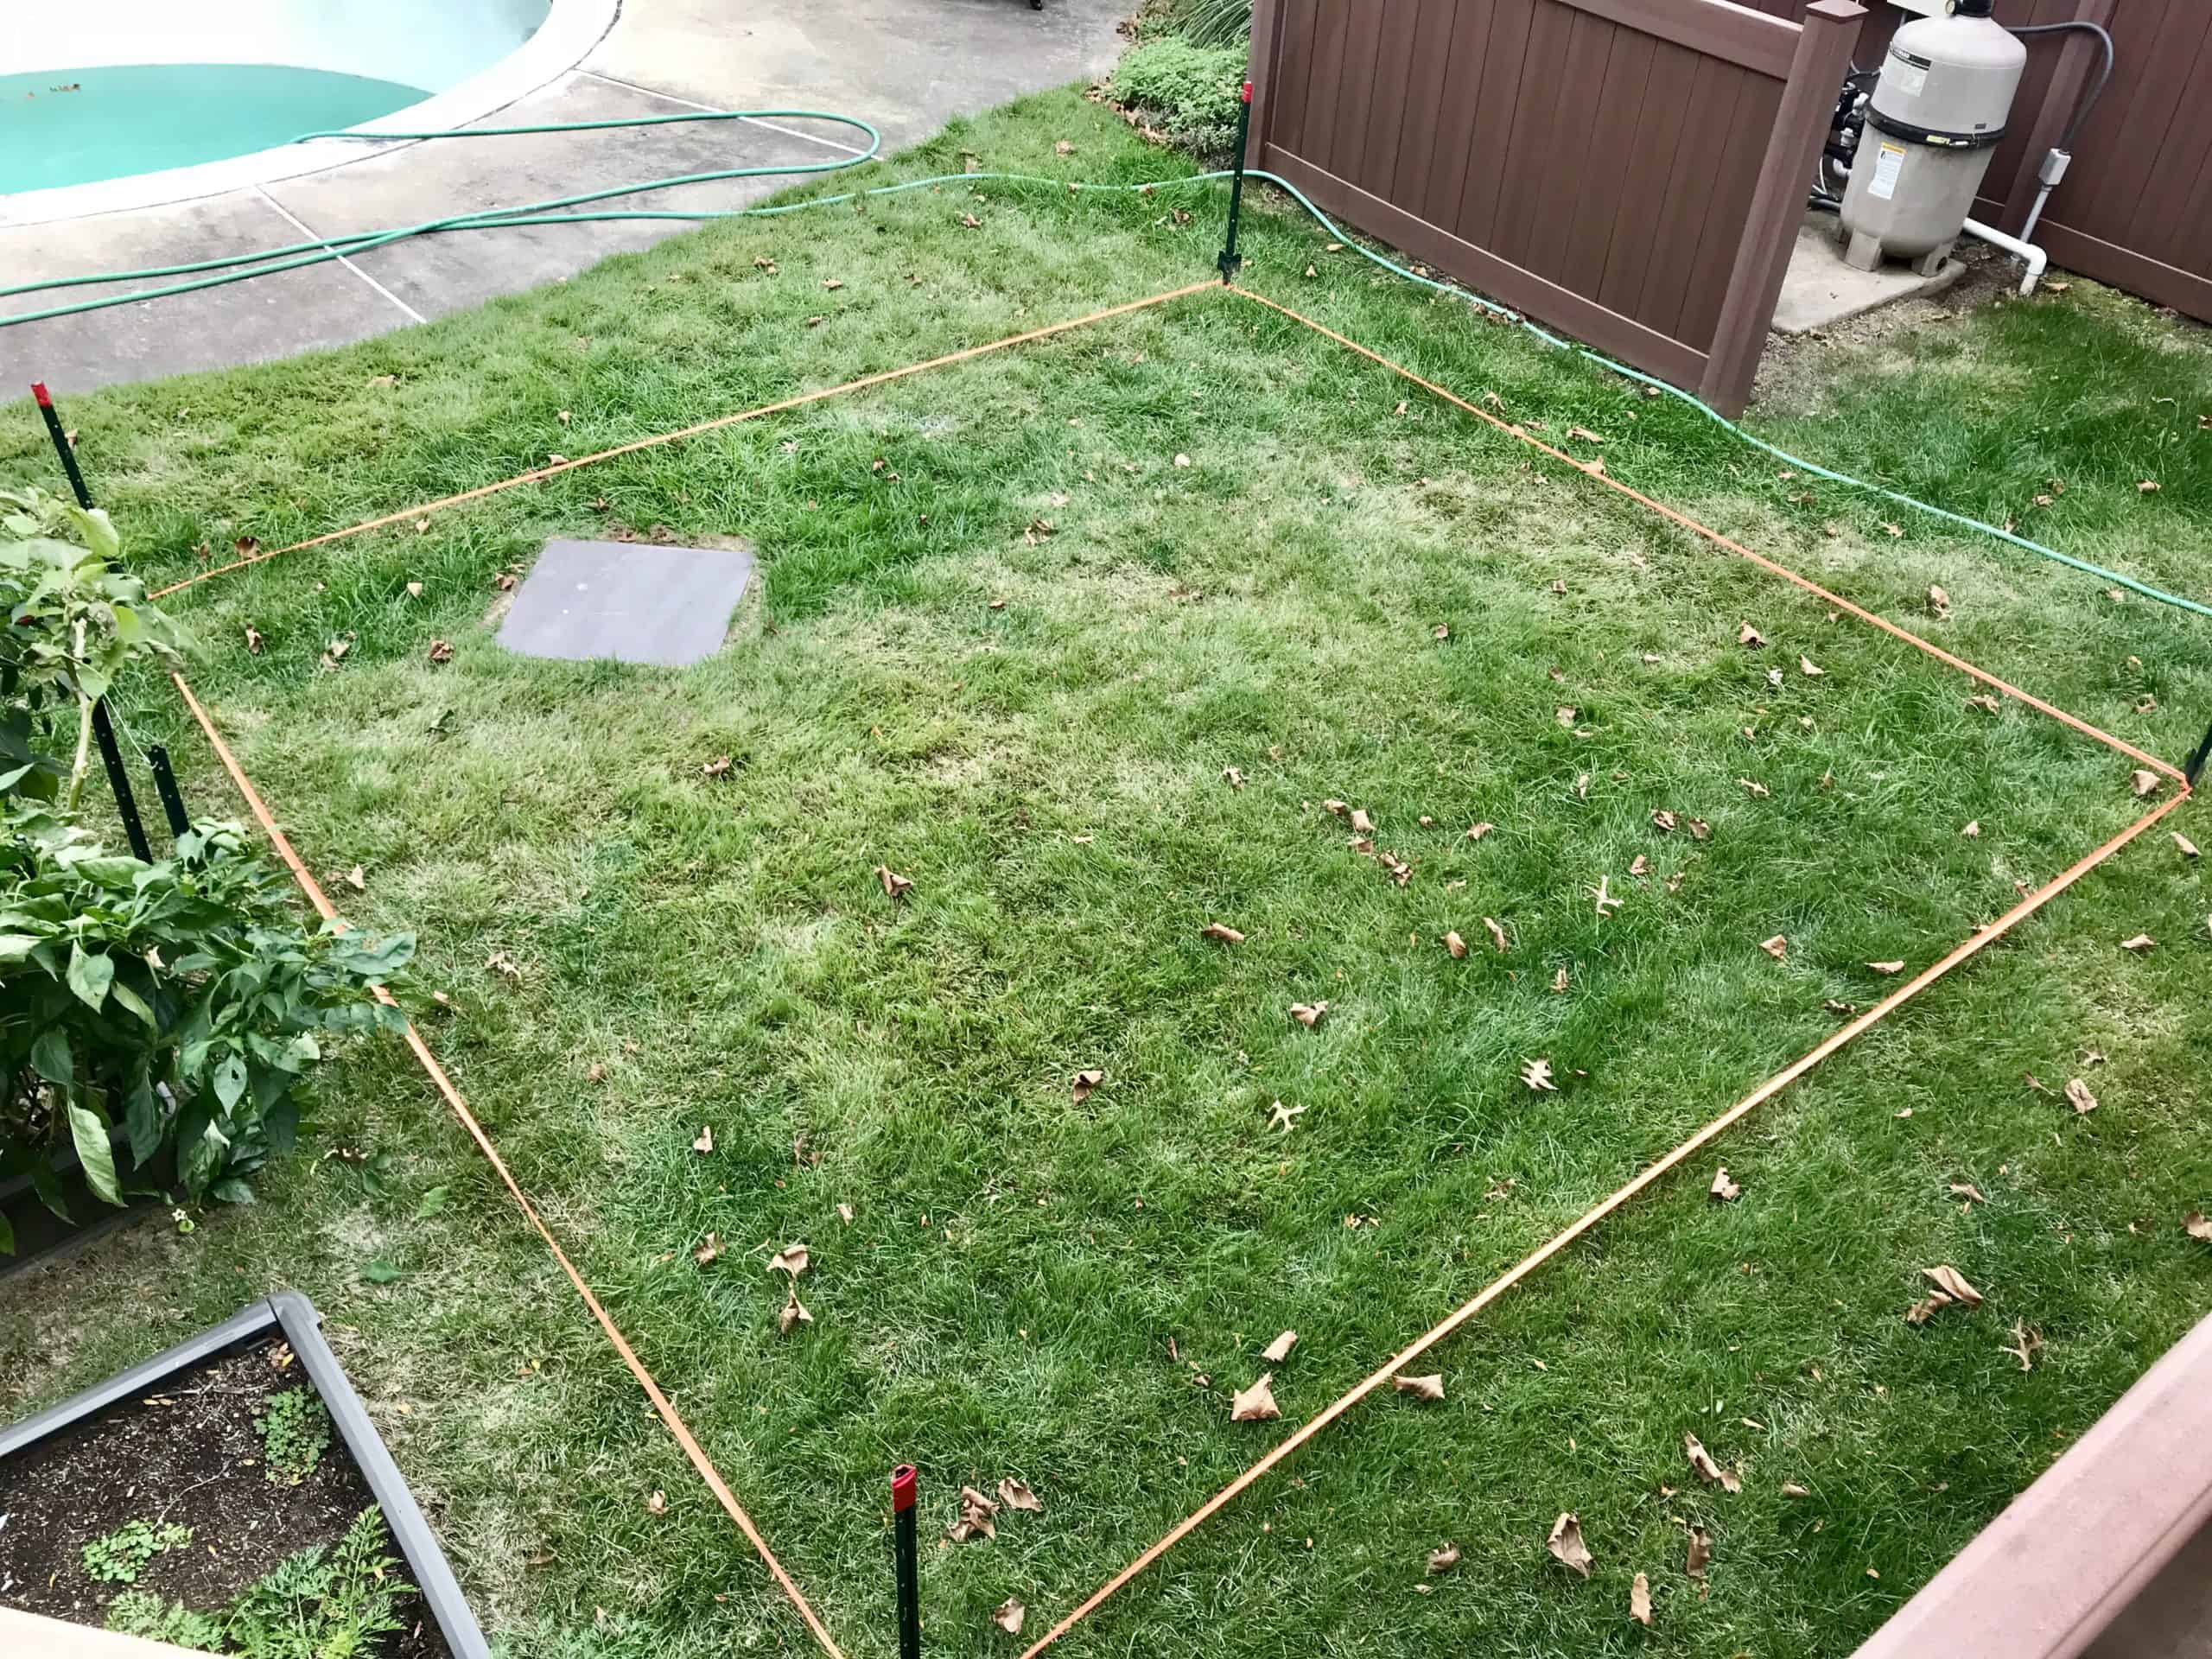
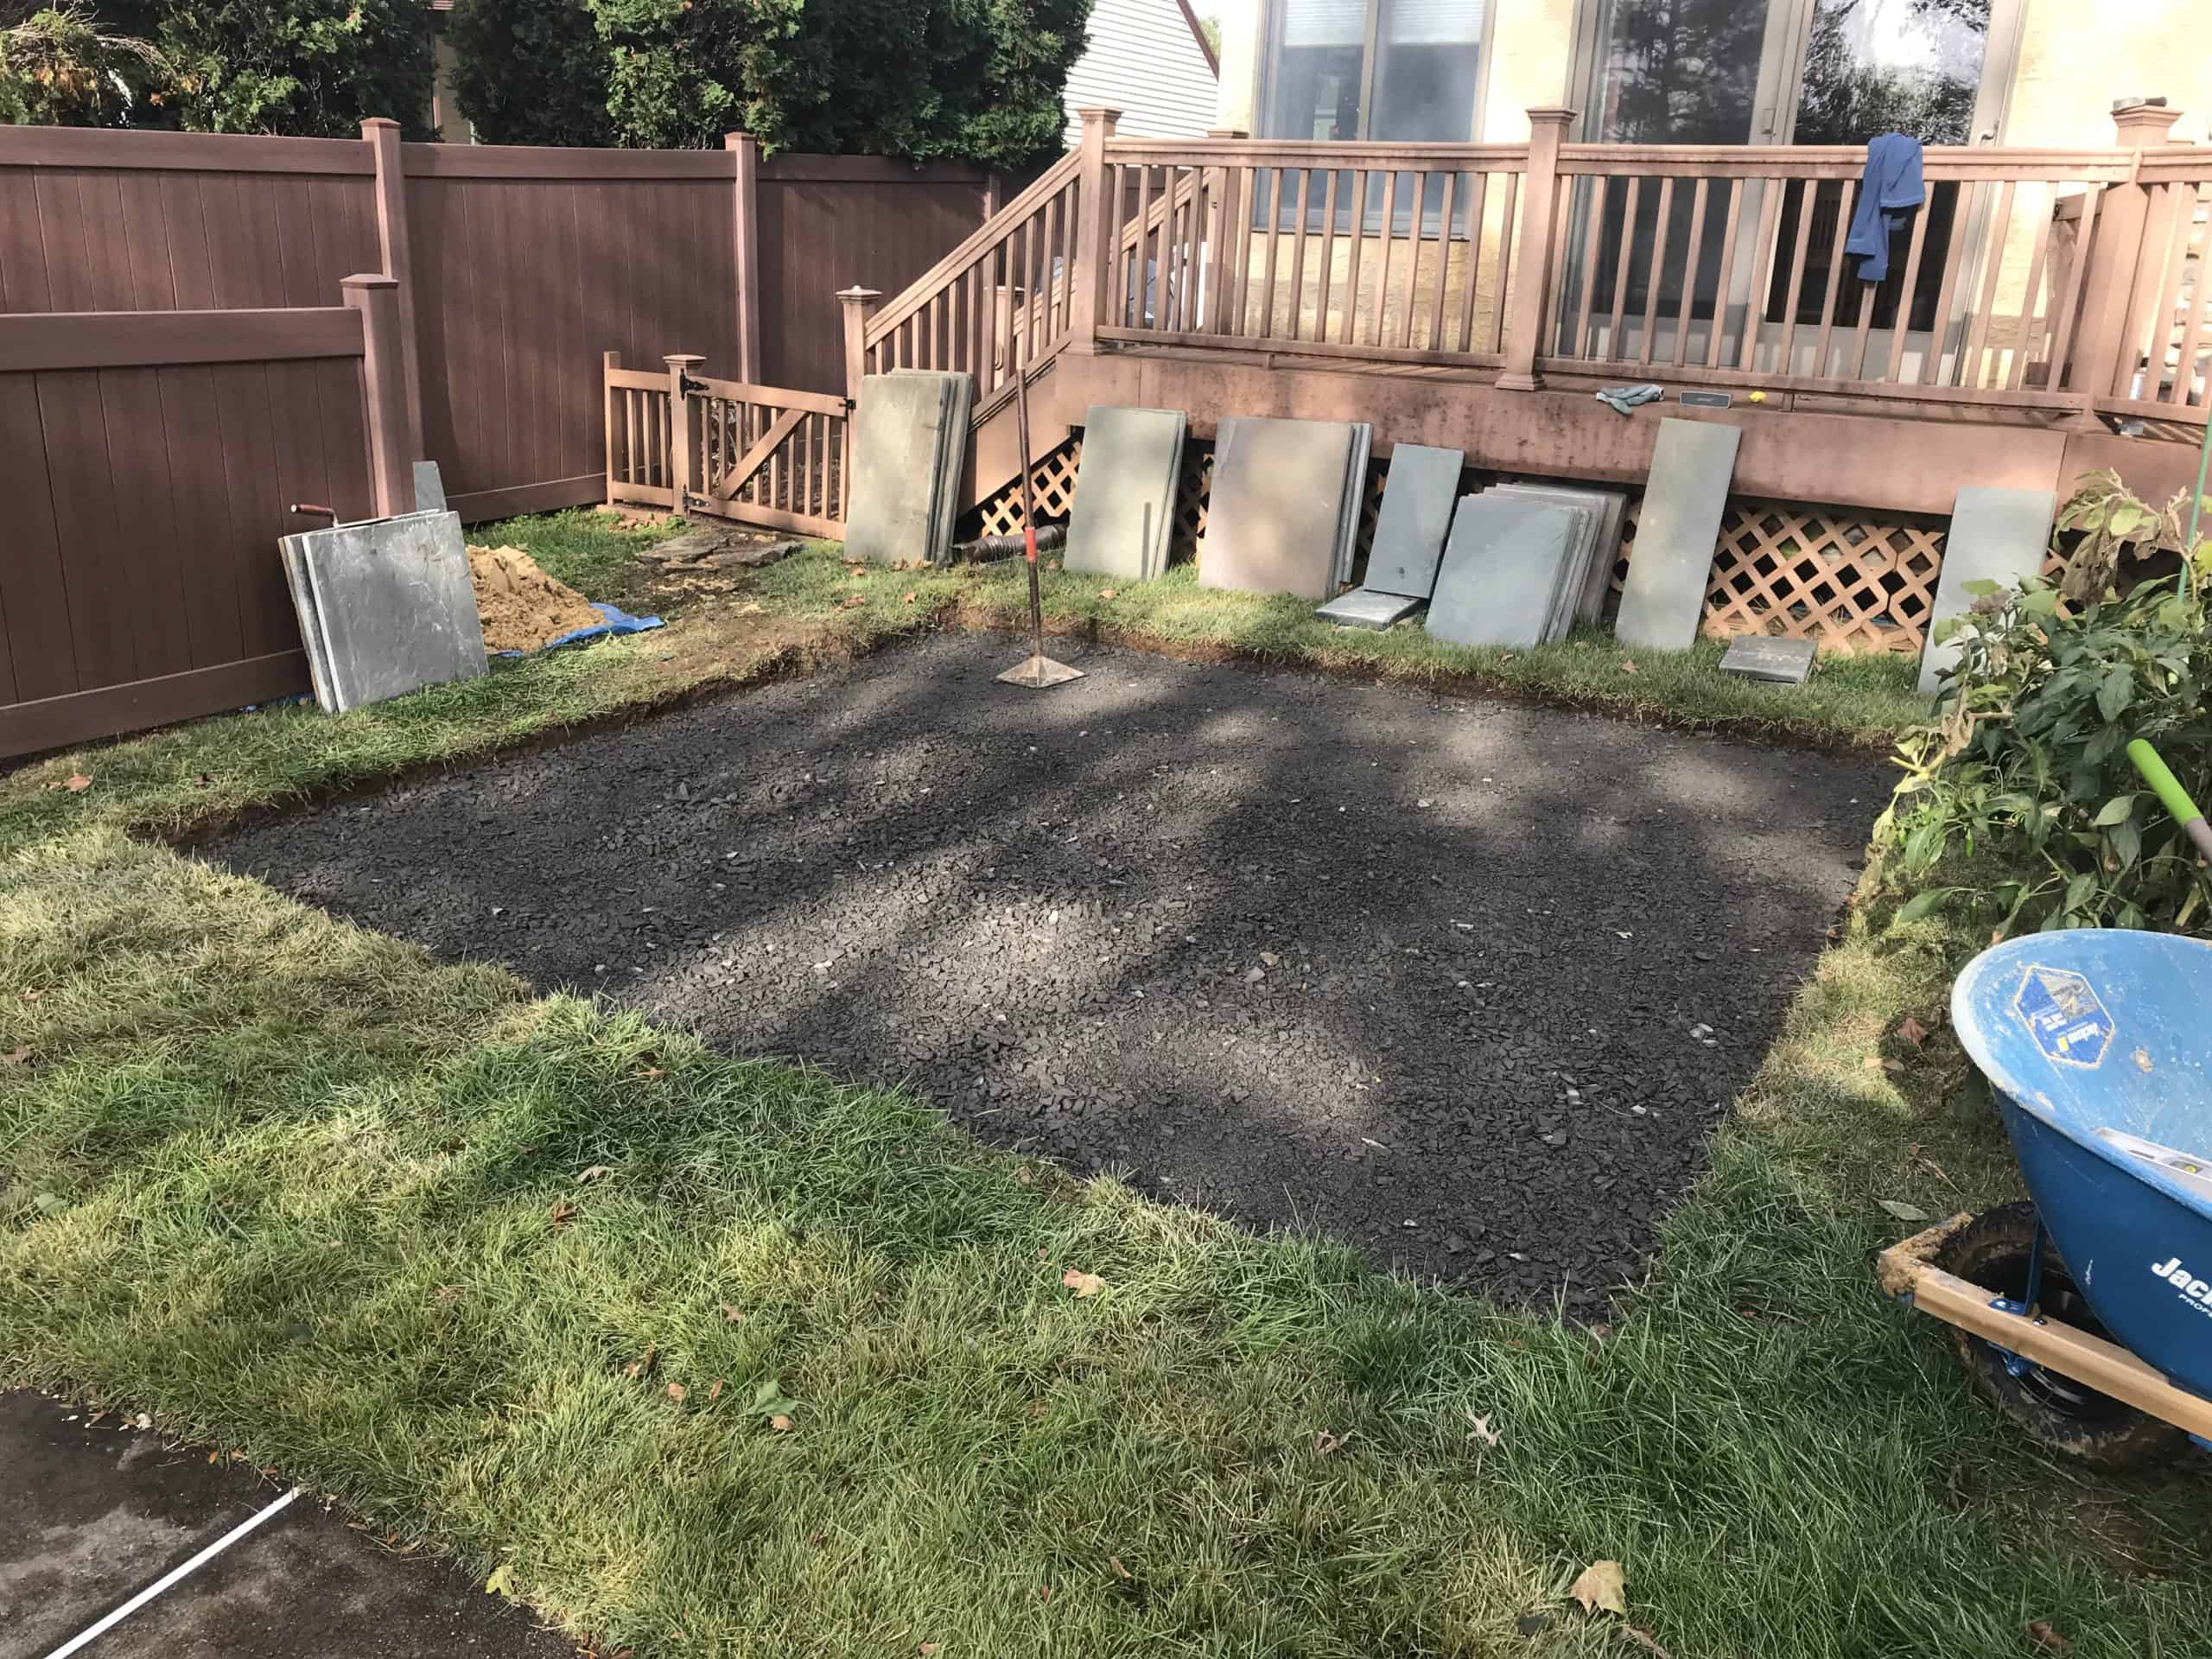
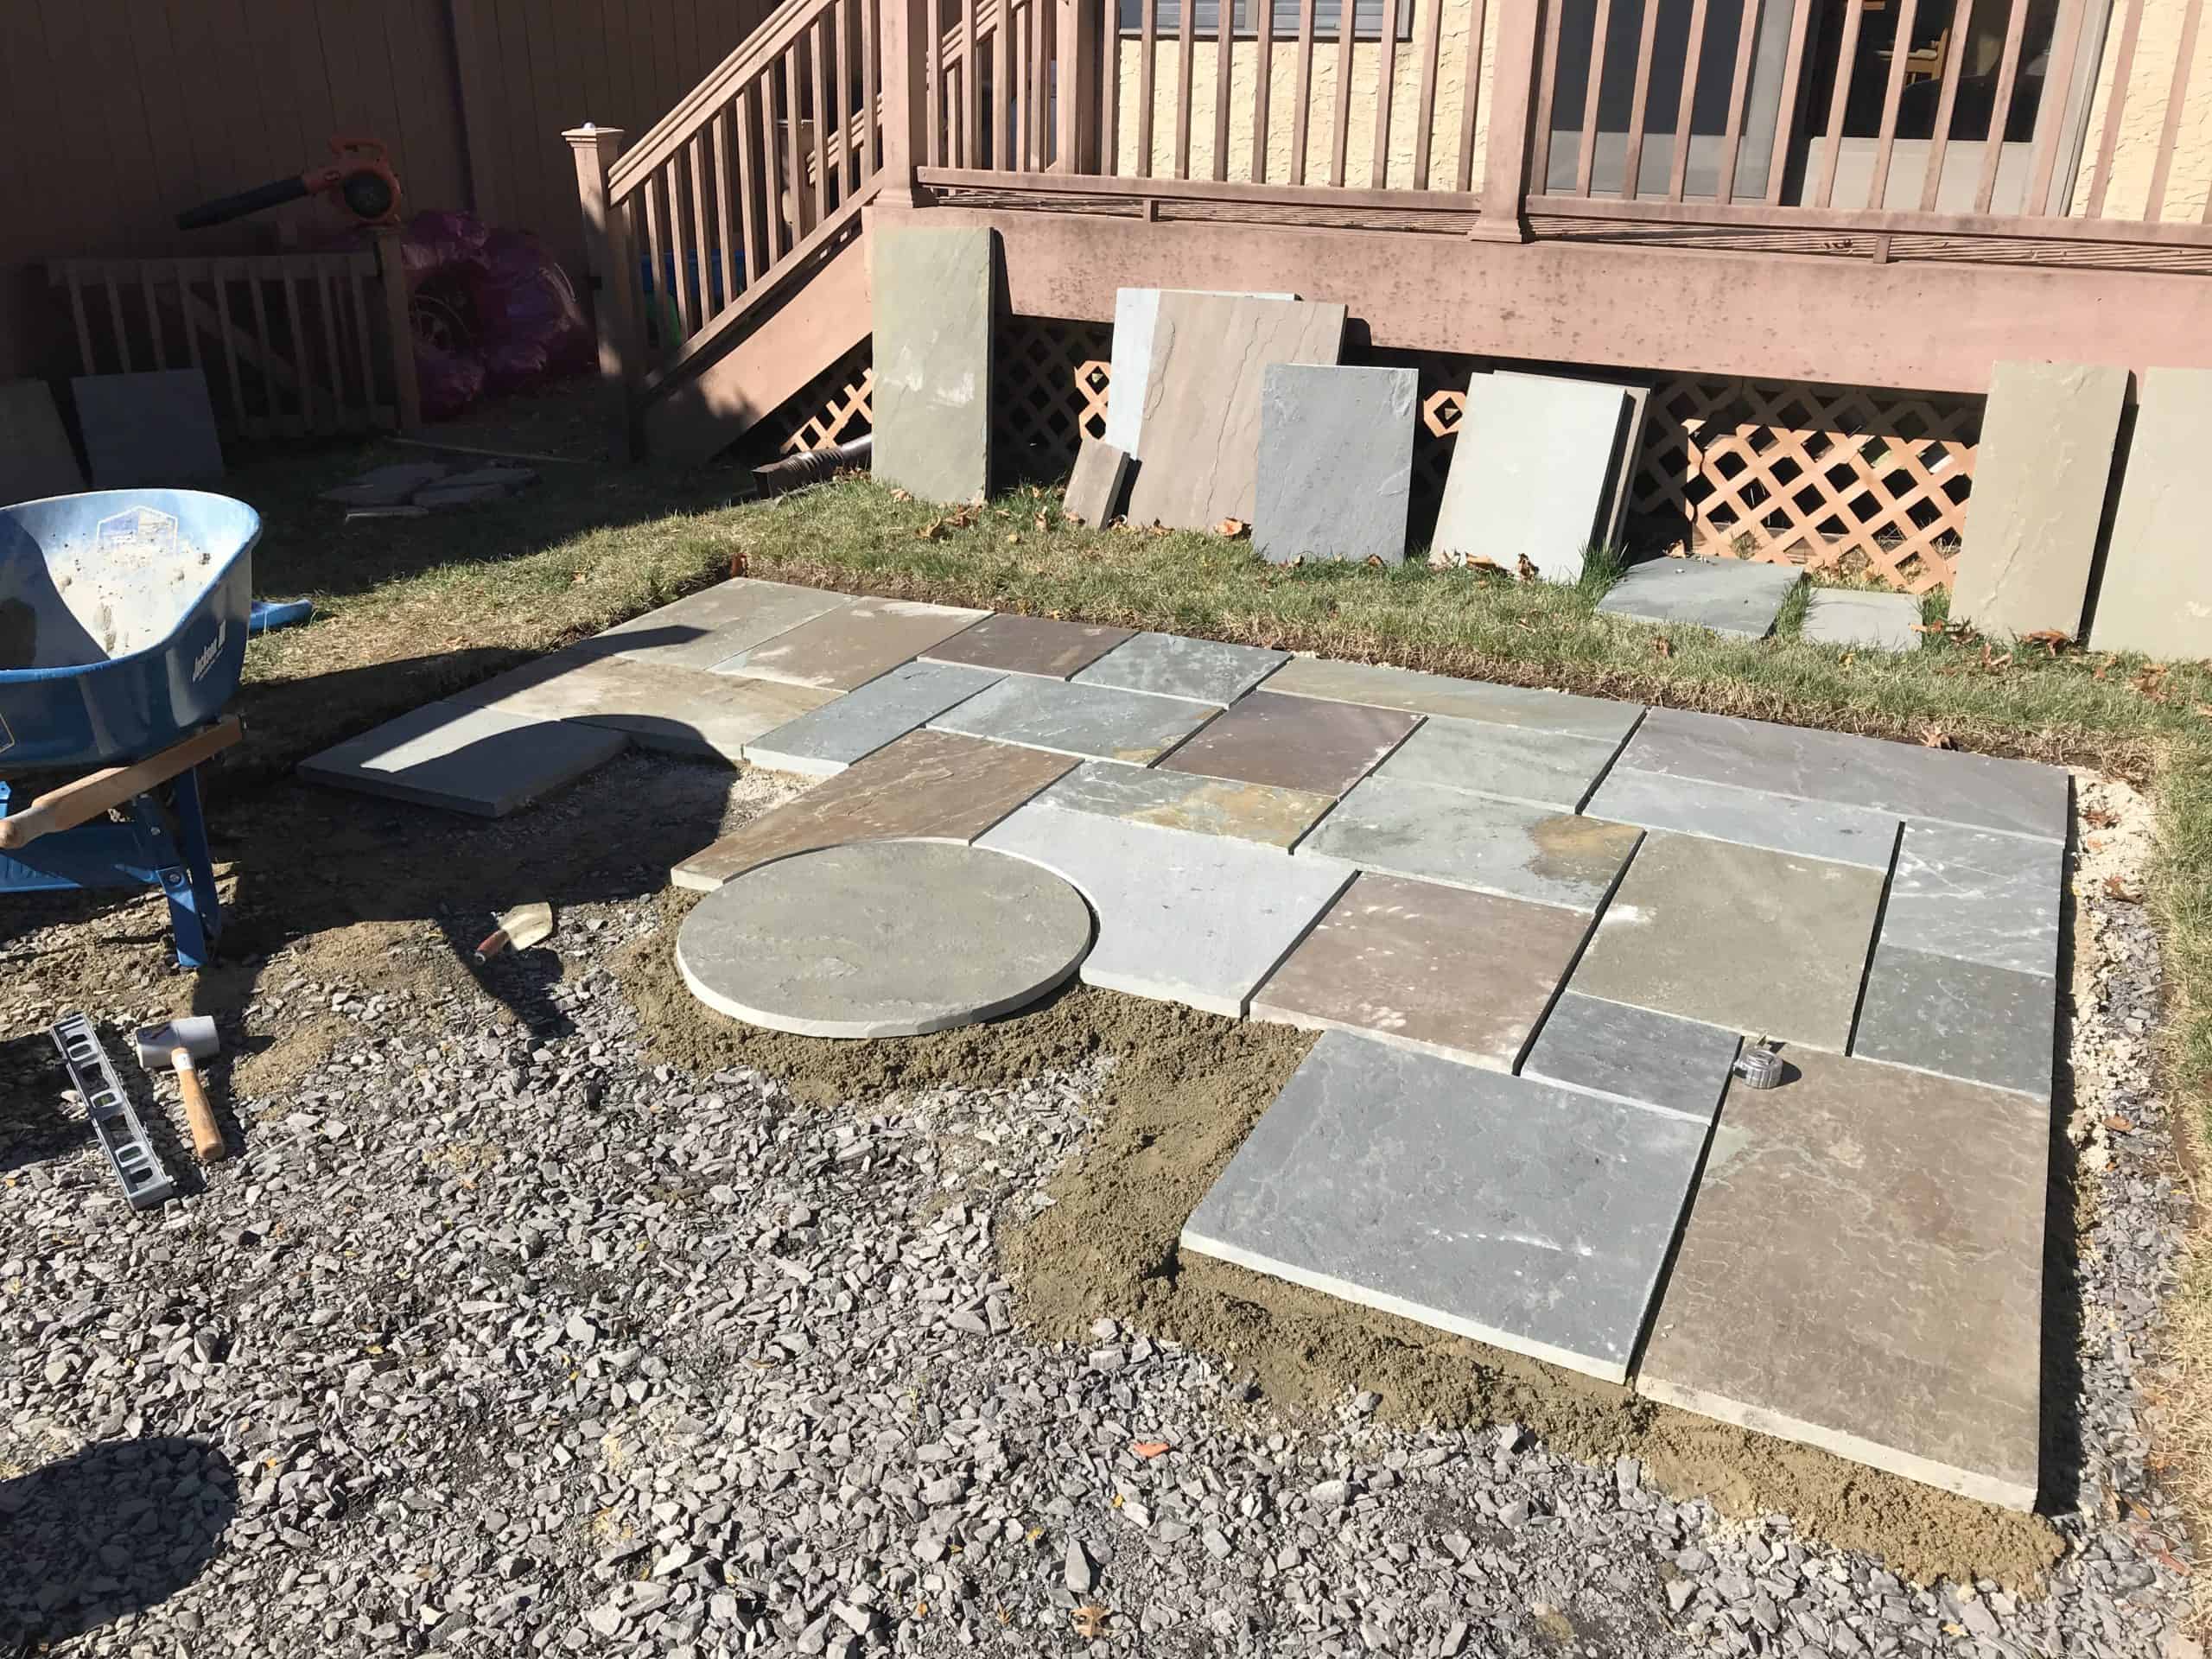
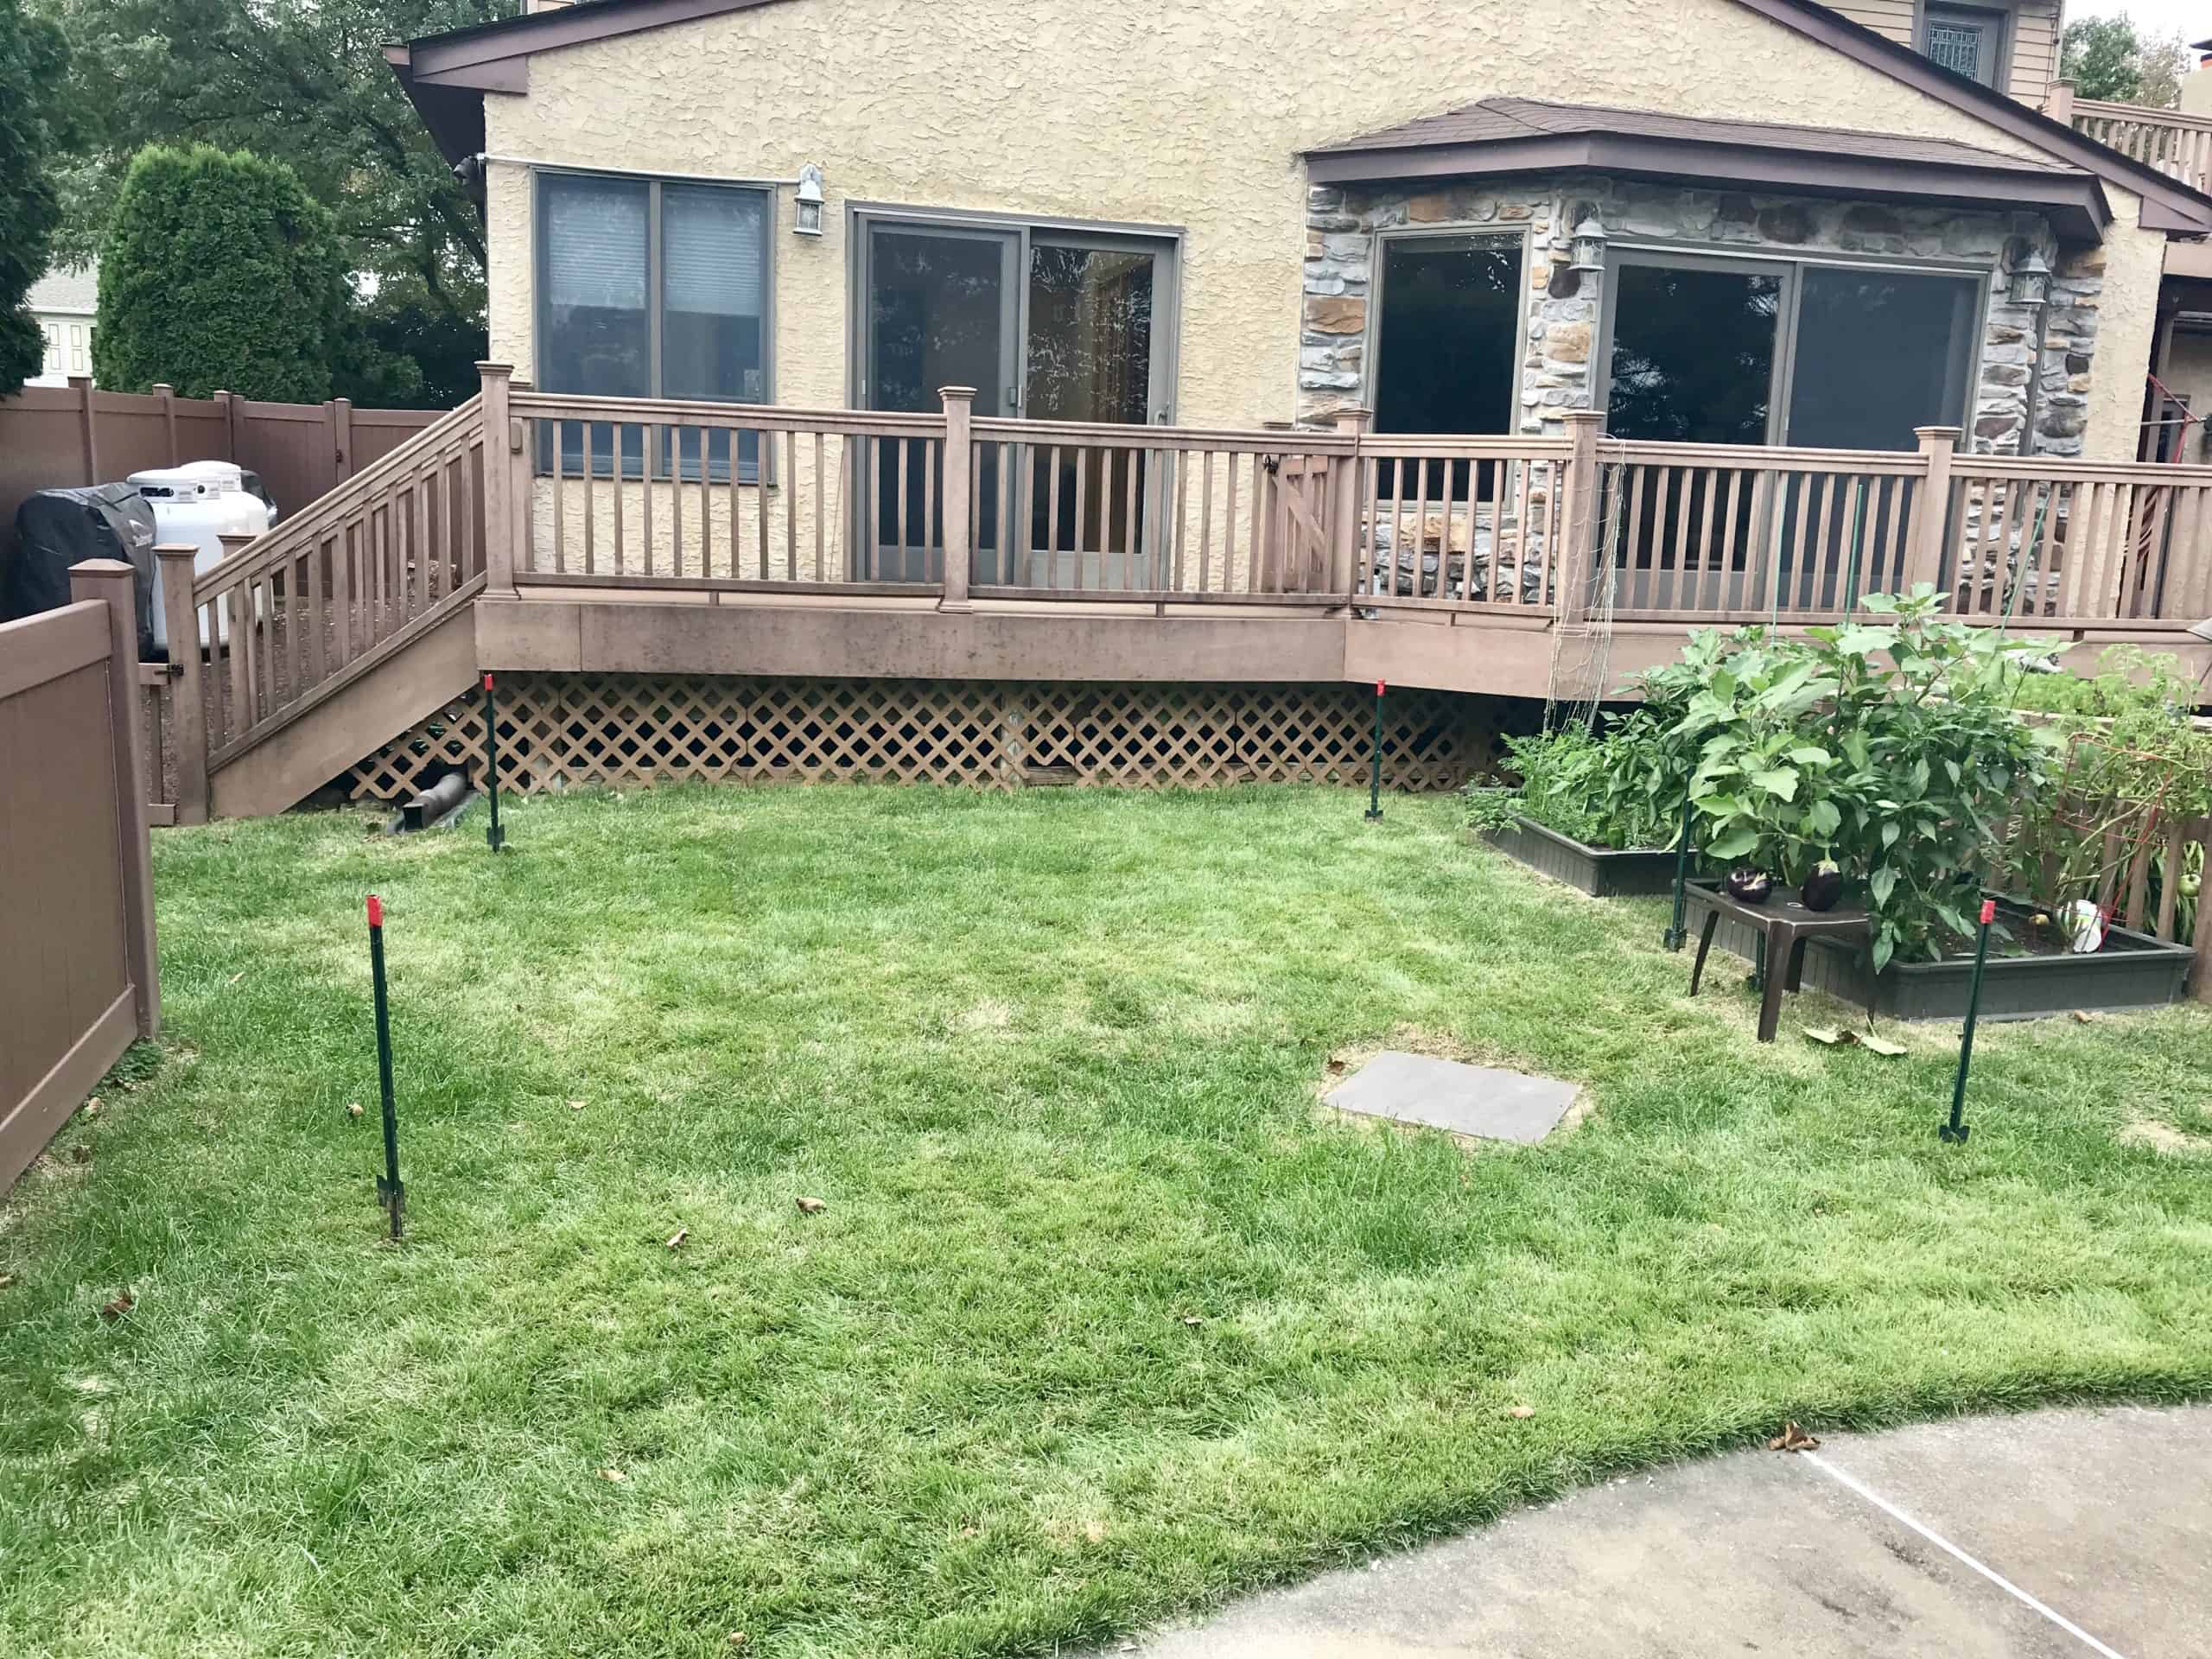
First, identify your patio area. For this project, I staked off a 12’-6” x 12’-6” square. While the finished patio is a nominal 12’ x 12’, that extra 6 inches of excavation gives you much-needed “elbow room” for setting the perimeter stones.

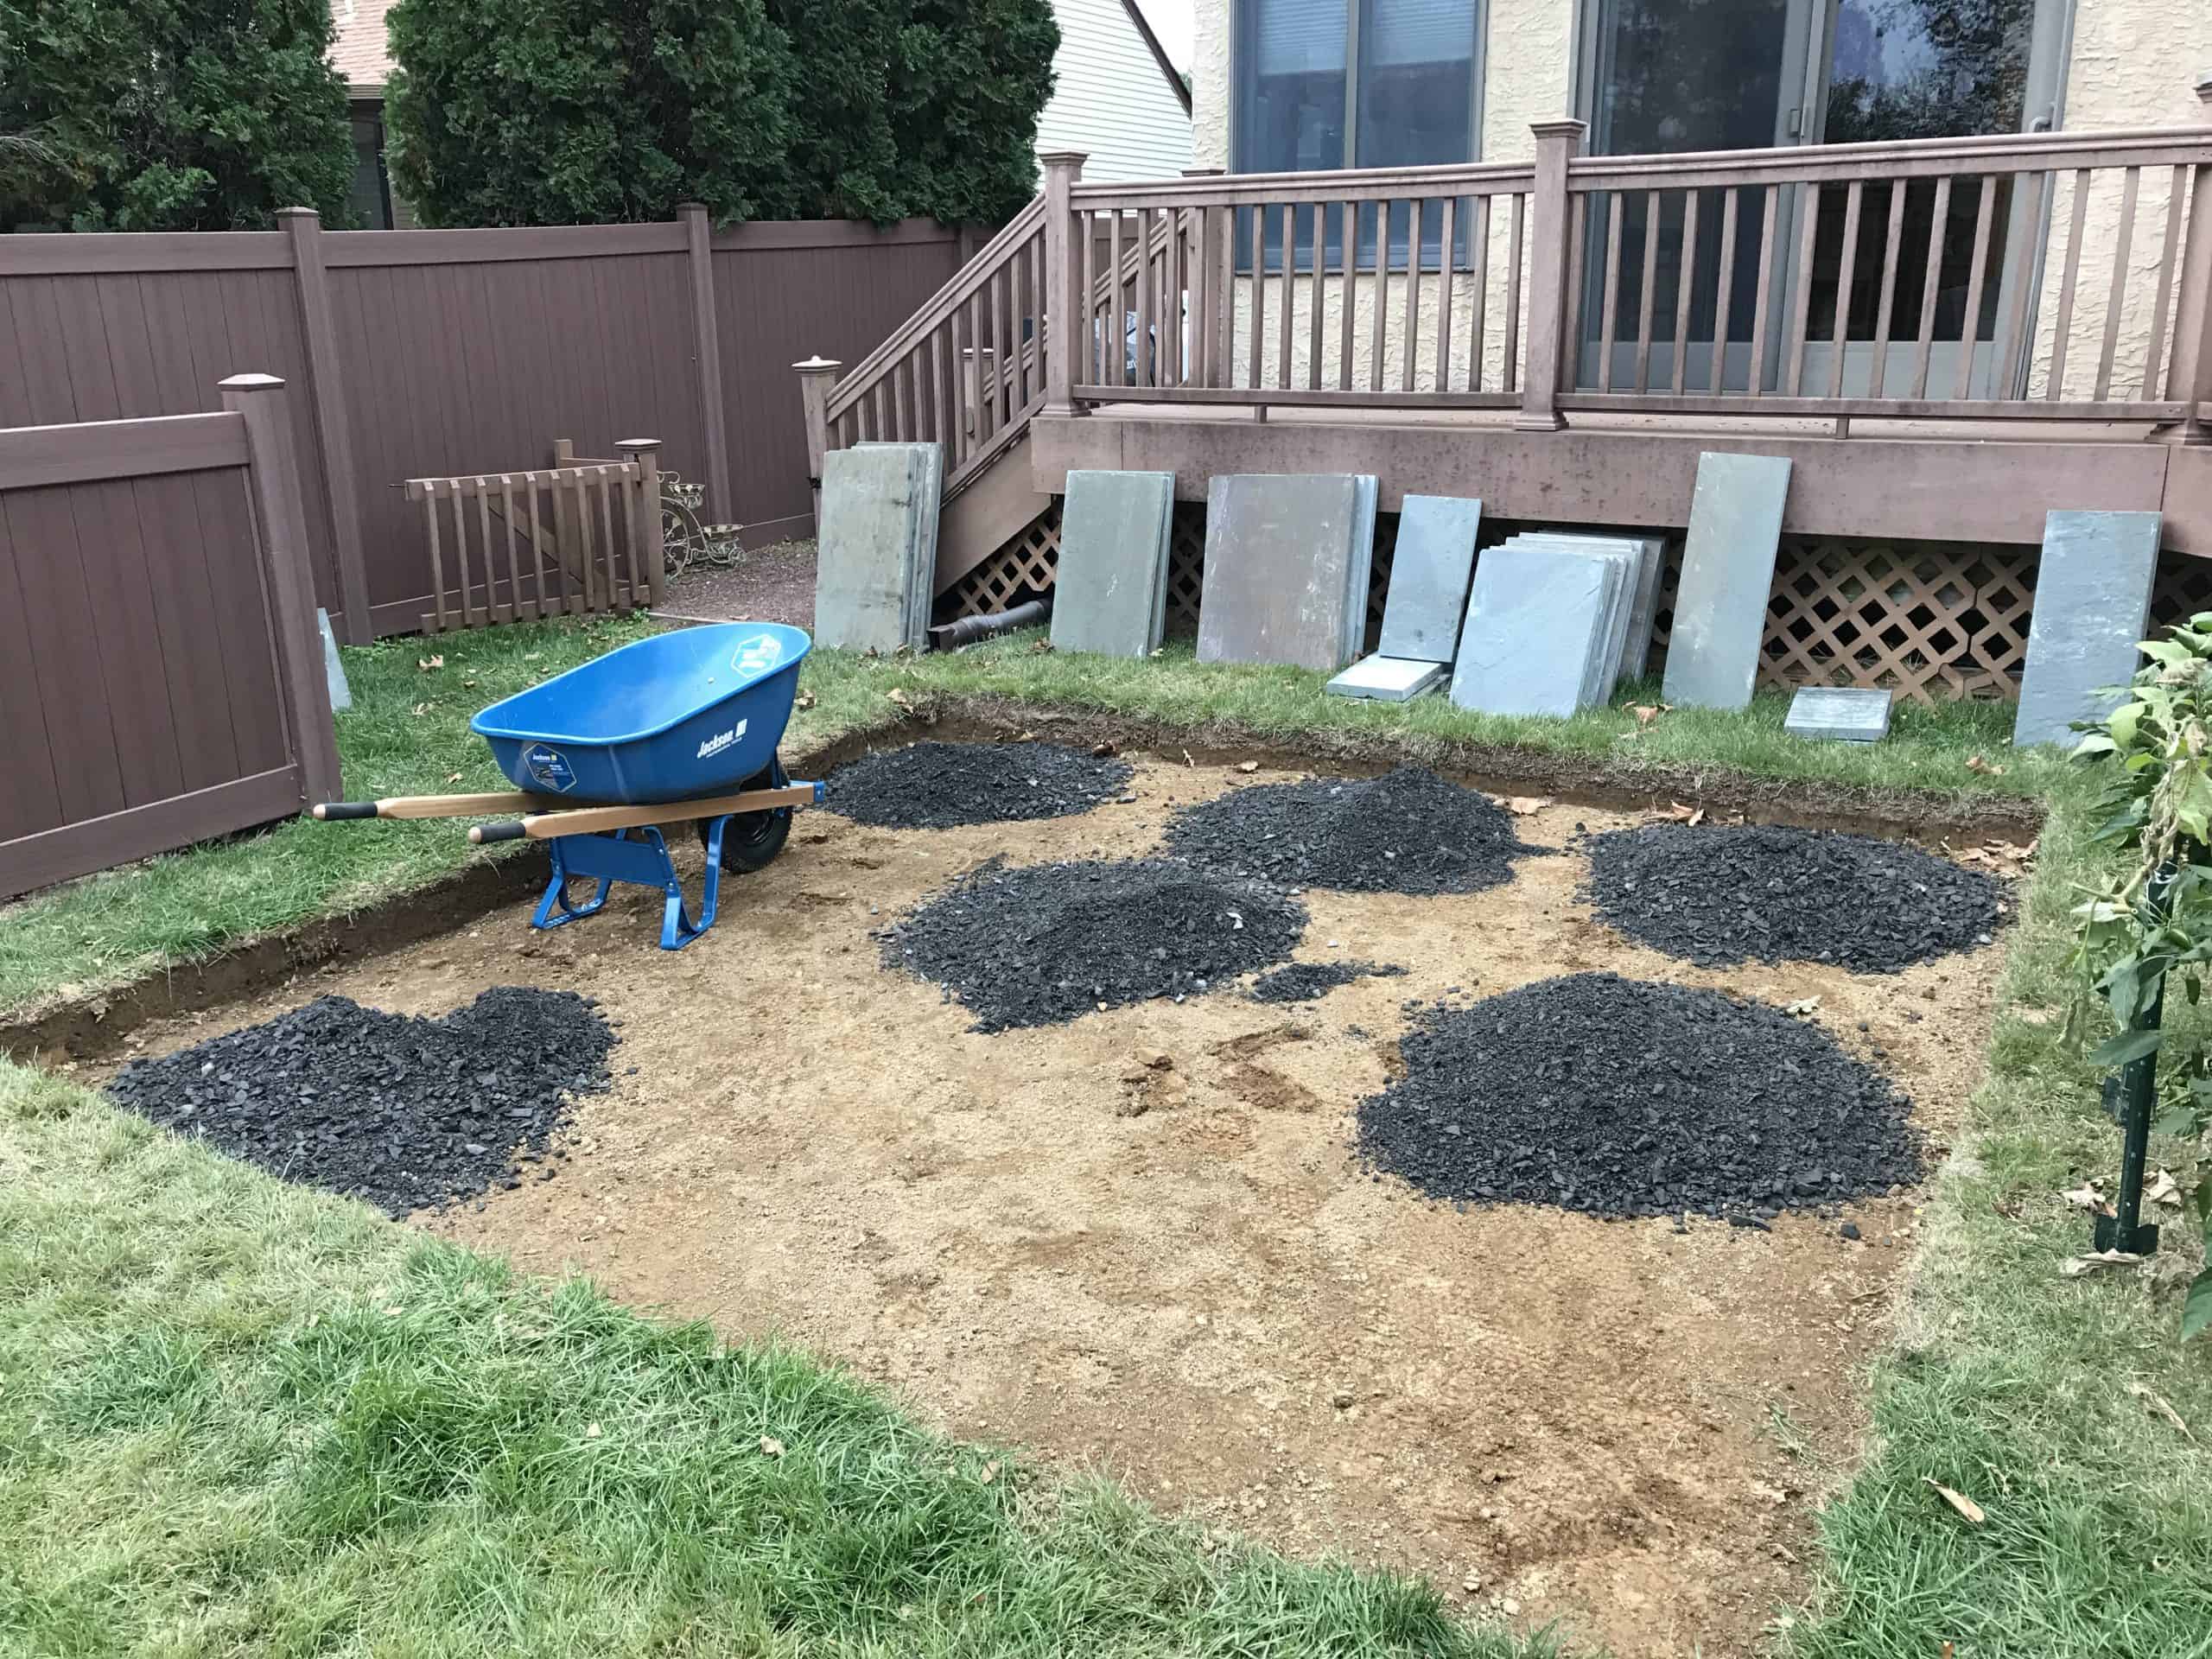
The Dig: To accommodate the base, setting bed, and stone, I excavated to a 7” depth. This allows for:

  • 4” Layer: 2A Modified Crushed Stone (tamped in 2” increments).
  • 1 ½” Layer: Setting bed (sand/cement mix).
  • 1 ½” Layer: Average flagstone thickness.

Pro Tip: When ordering, give your local supplier your dimensions (L x W x D), and they can calculate the exact tons of stone and bags of cement you’ll need.


Step 2: Preparing the Sub-Base

The longevity of your patio depends on the base. Lay down your 2A modified crushed stone in two 2” layers. It is vital to firmly tamp and compact each layer tight before moving to the next. A solid base prevents the stones from shifting or sinking over time.


Step 3: Mixing the “Dry-Pack” Setting Bed

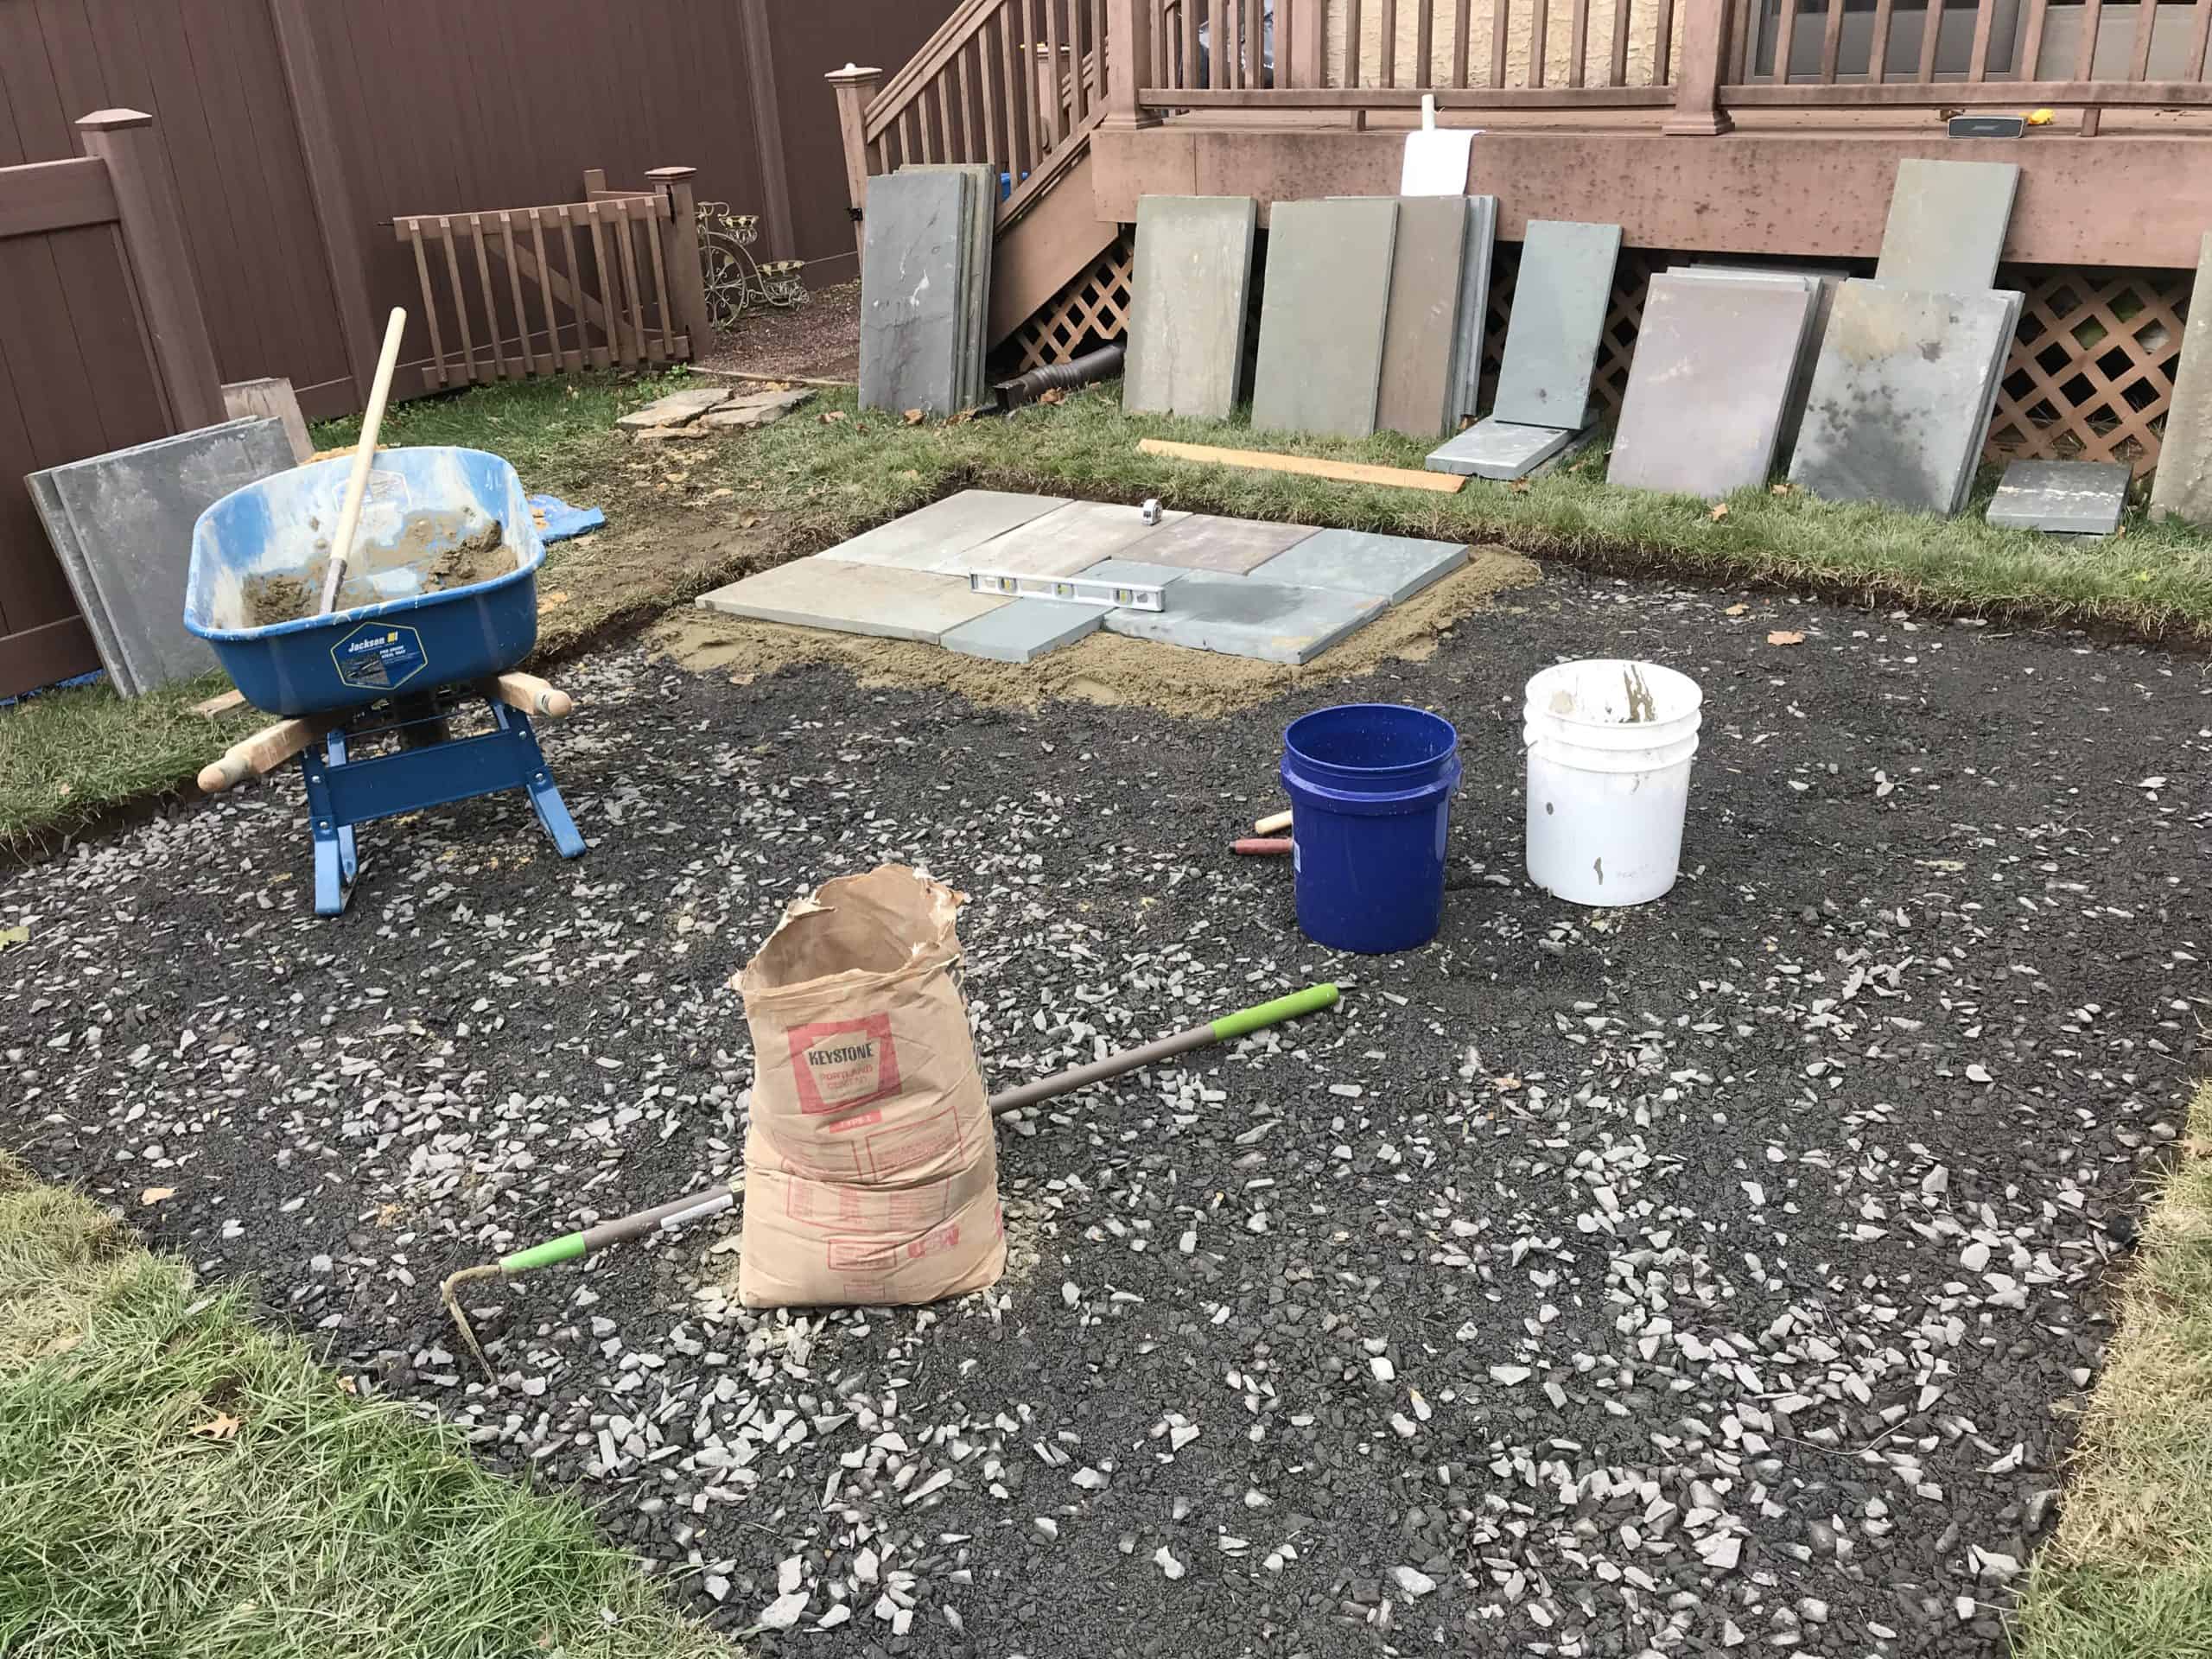
The setting bed consists of 4 parts concrete sand to 1 part Portland cement.

  1. Mix 4 shovelfuls of sand and 1 shovelful of Portland in a wheelbarrow using a garden hoe.
  2. Add water sparingly. You want the mix to be slightly damp—not dripping or oozing.
  3. Warning: Do NOT use lime or pre-mixed concrete bags. Lime can seep through the stone and create white “halos” (efflorescence) on your beautiful flagstone.

Step 4: Setting the Stone

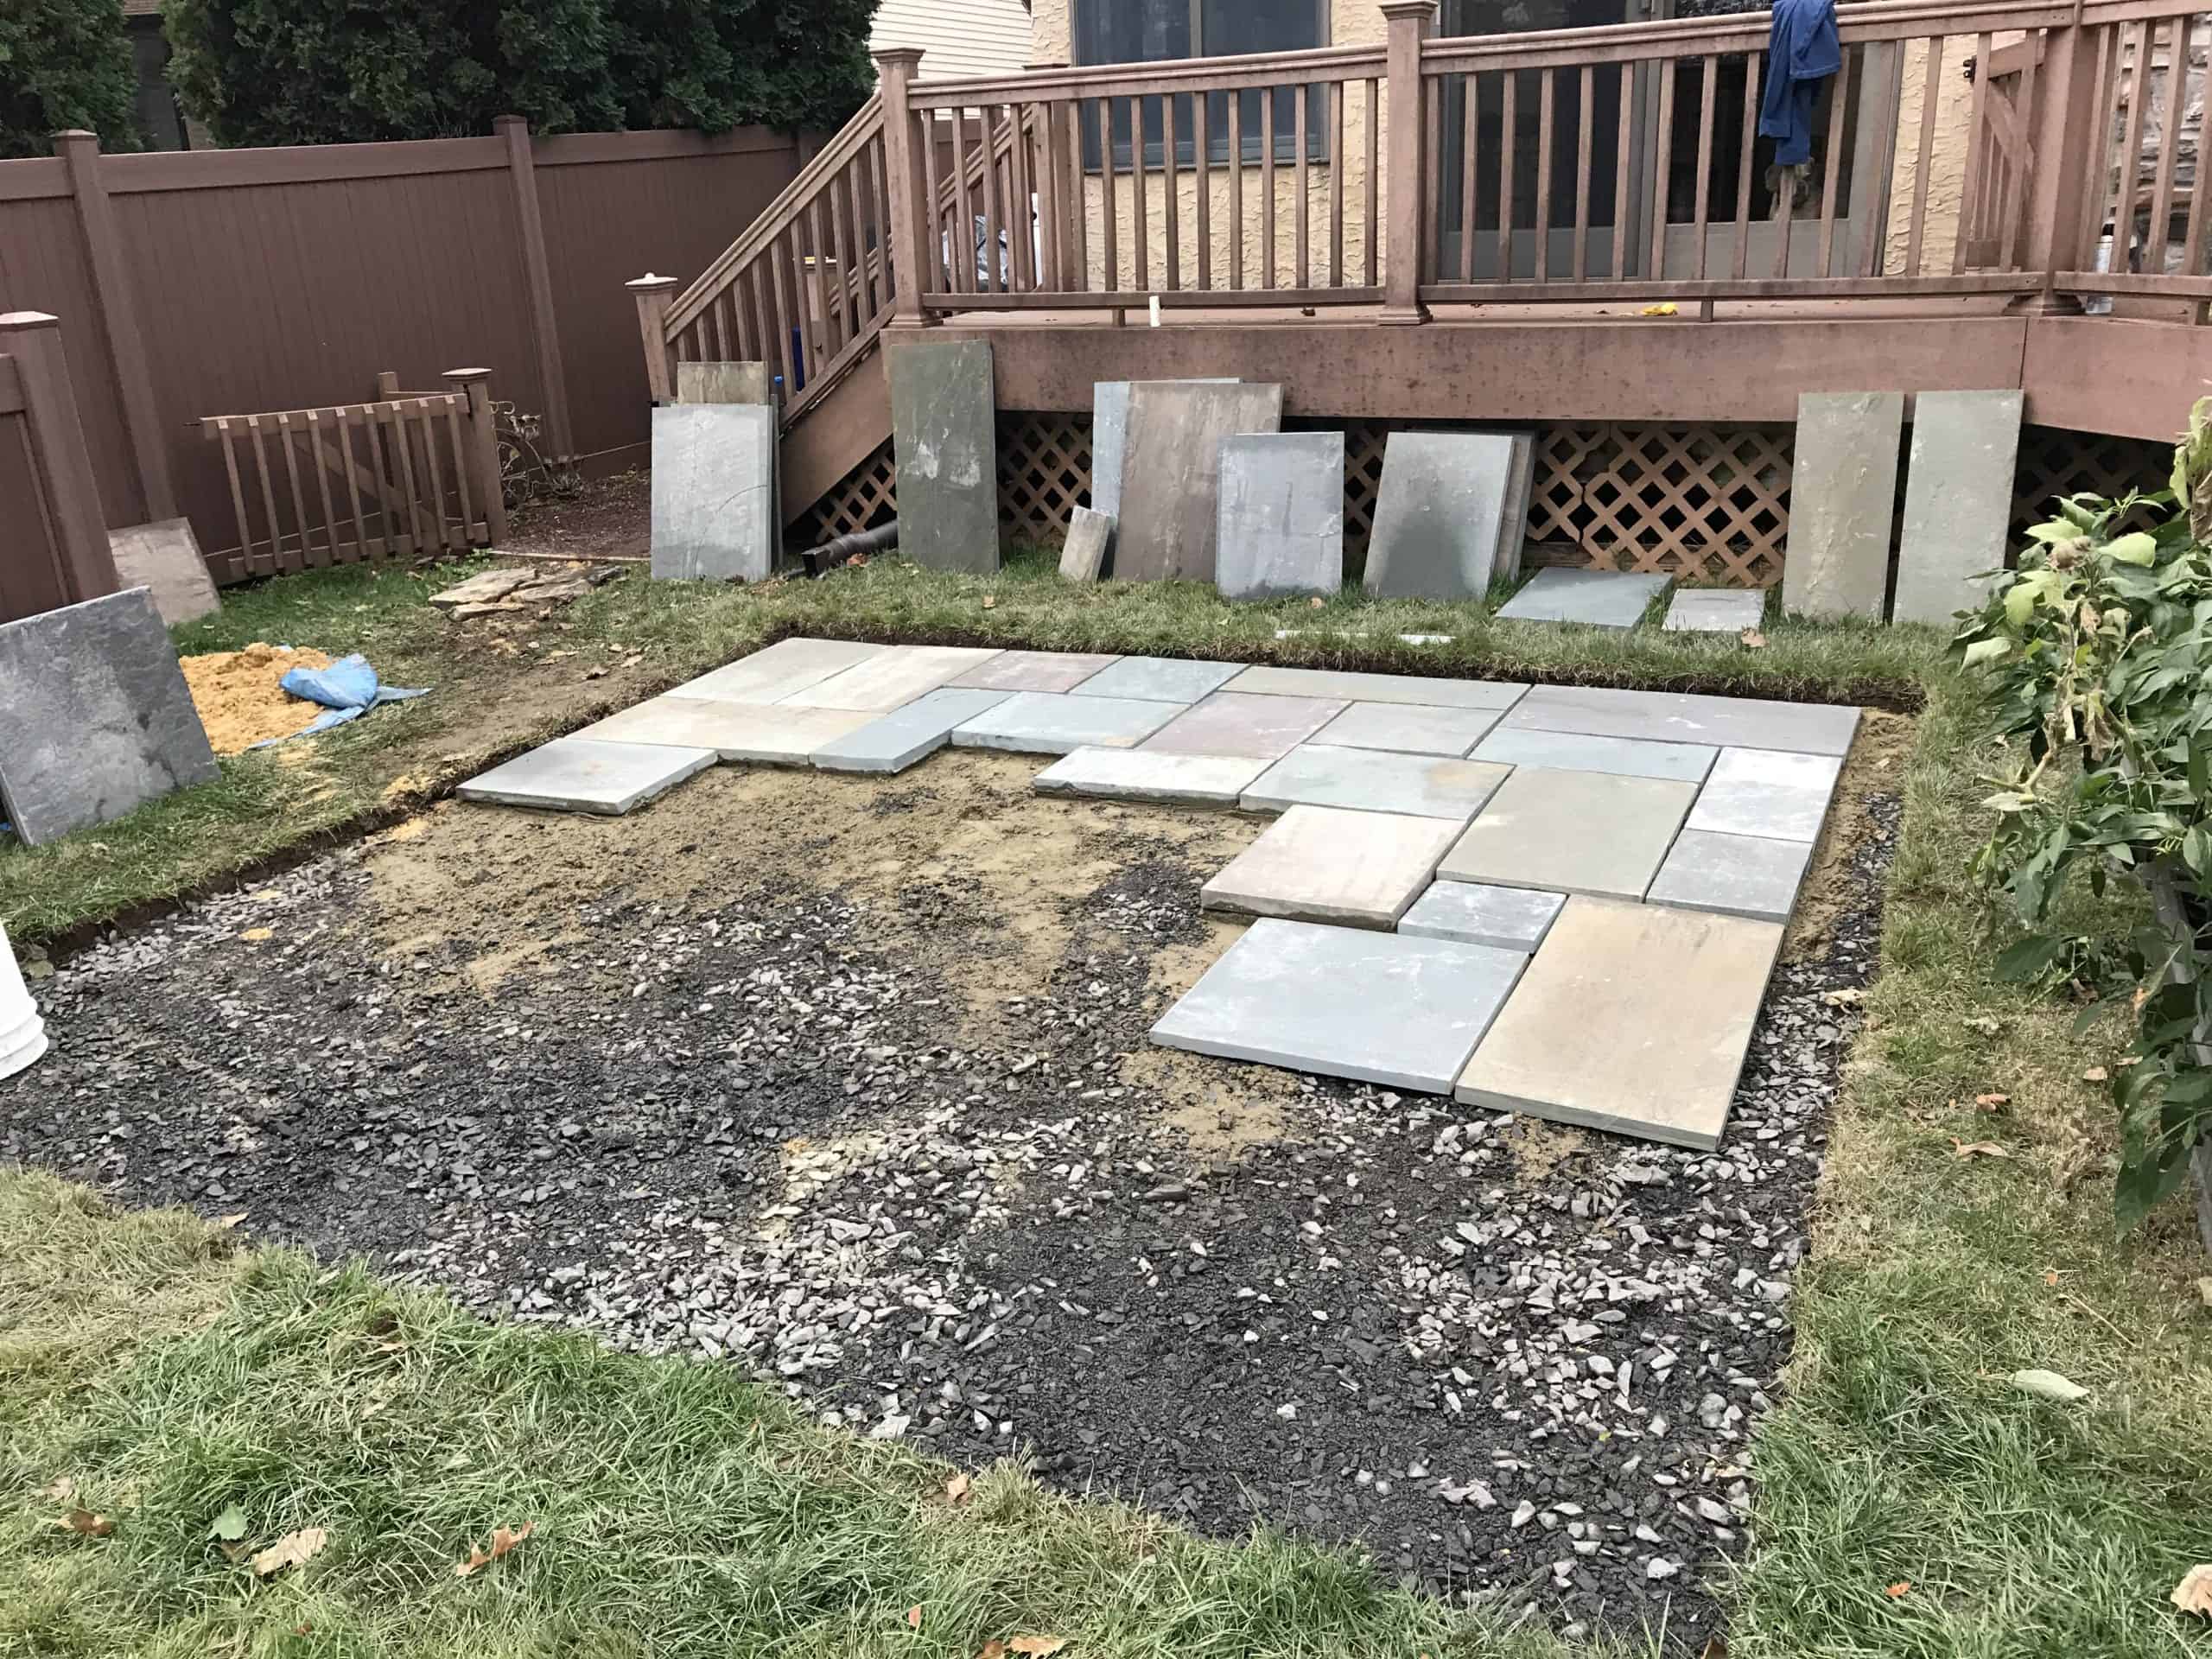
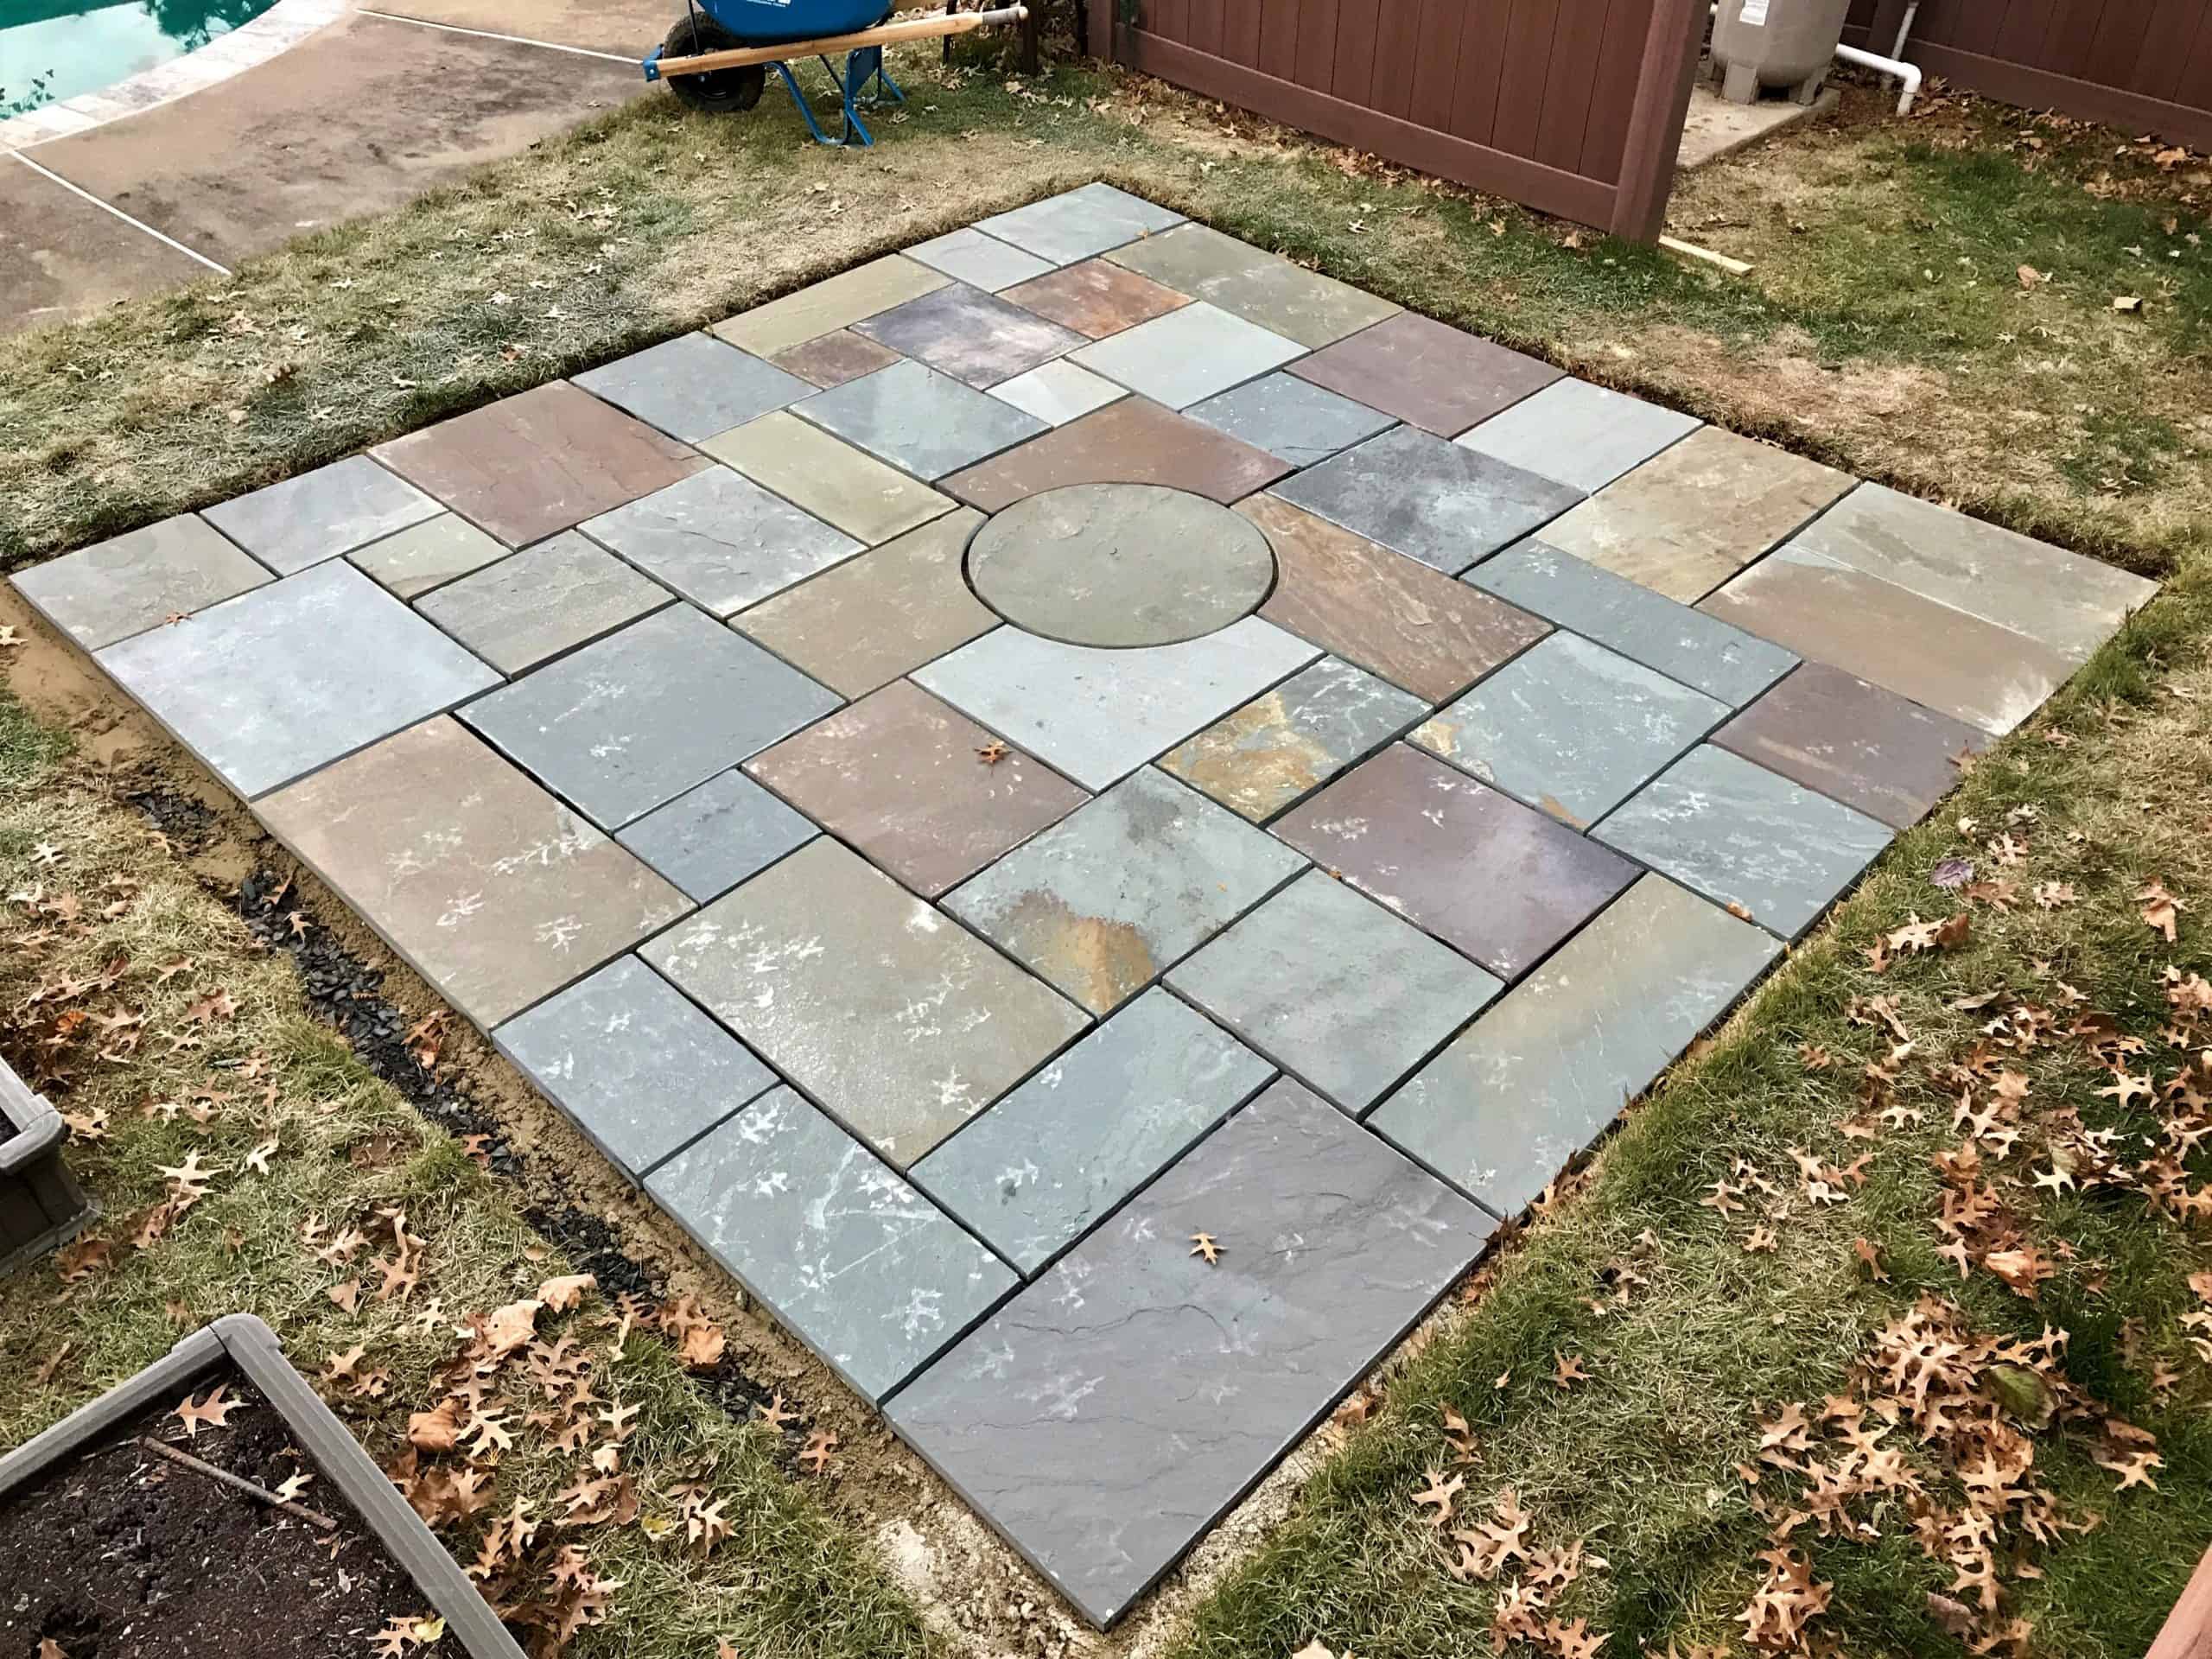
I highly recommend using a numbered setting sketch. Knowing exactly where each stone goes saves “brain power” in the field and keeps the project moving.

  1. Lay the Bed: Spread a 1 ½” thick layer of your setting mix in your starting area.
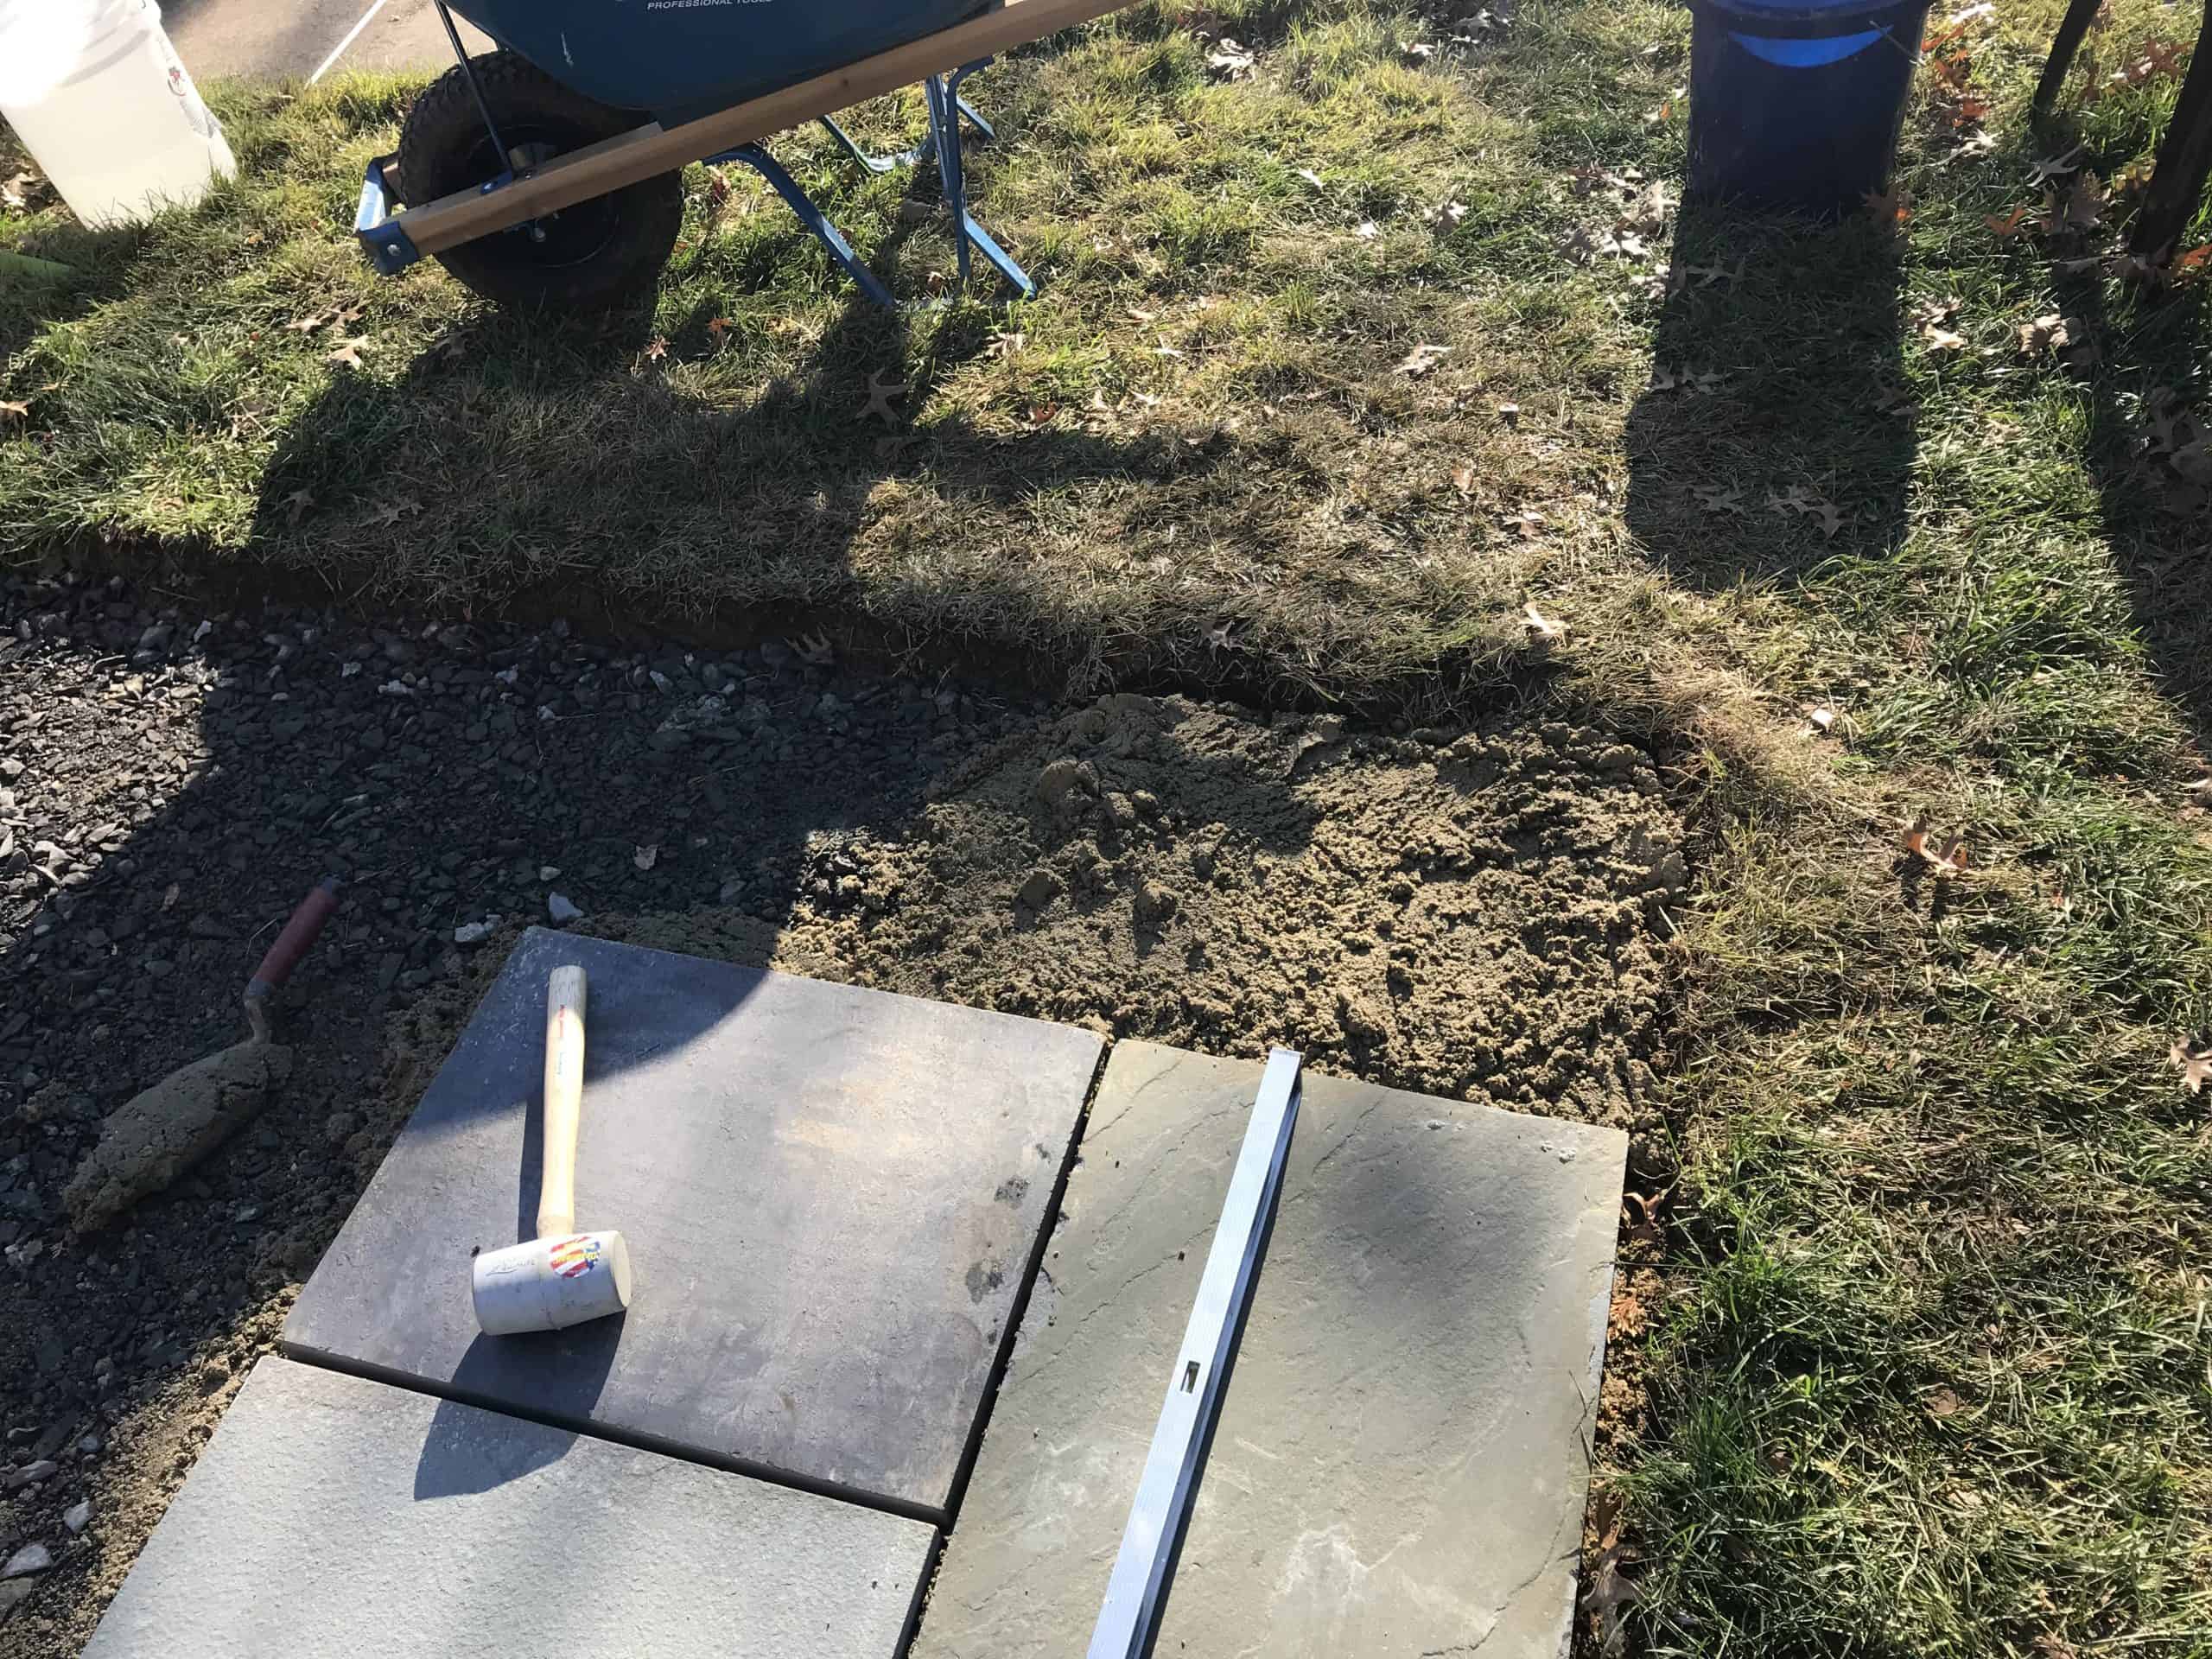
  2. Check the Pitch: Lay your first piece of Full Color Range Natural Cleft Flagstone. Use a level to ensure the patio pitches away from the house (aim for ¼” of pitch for every 10 feet).
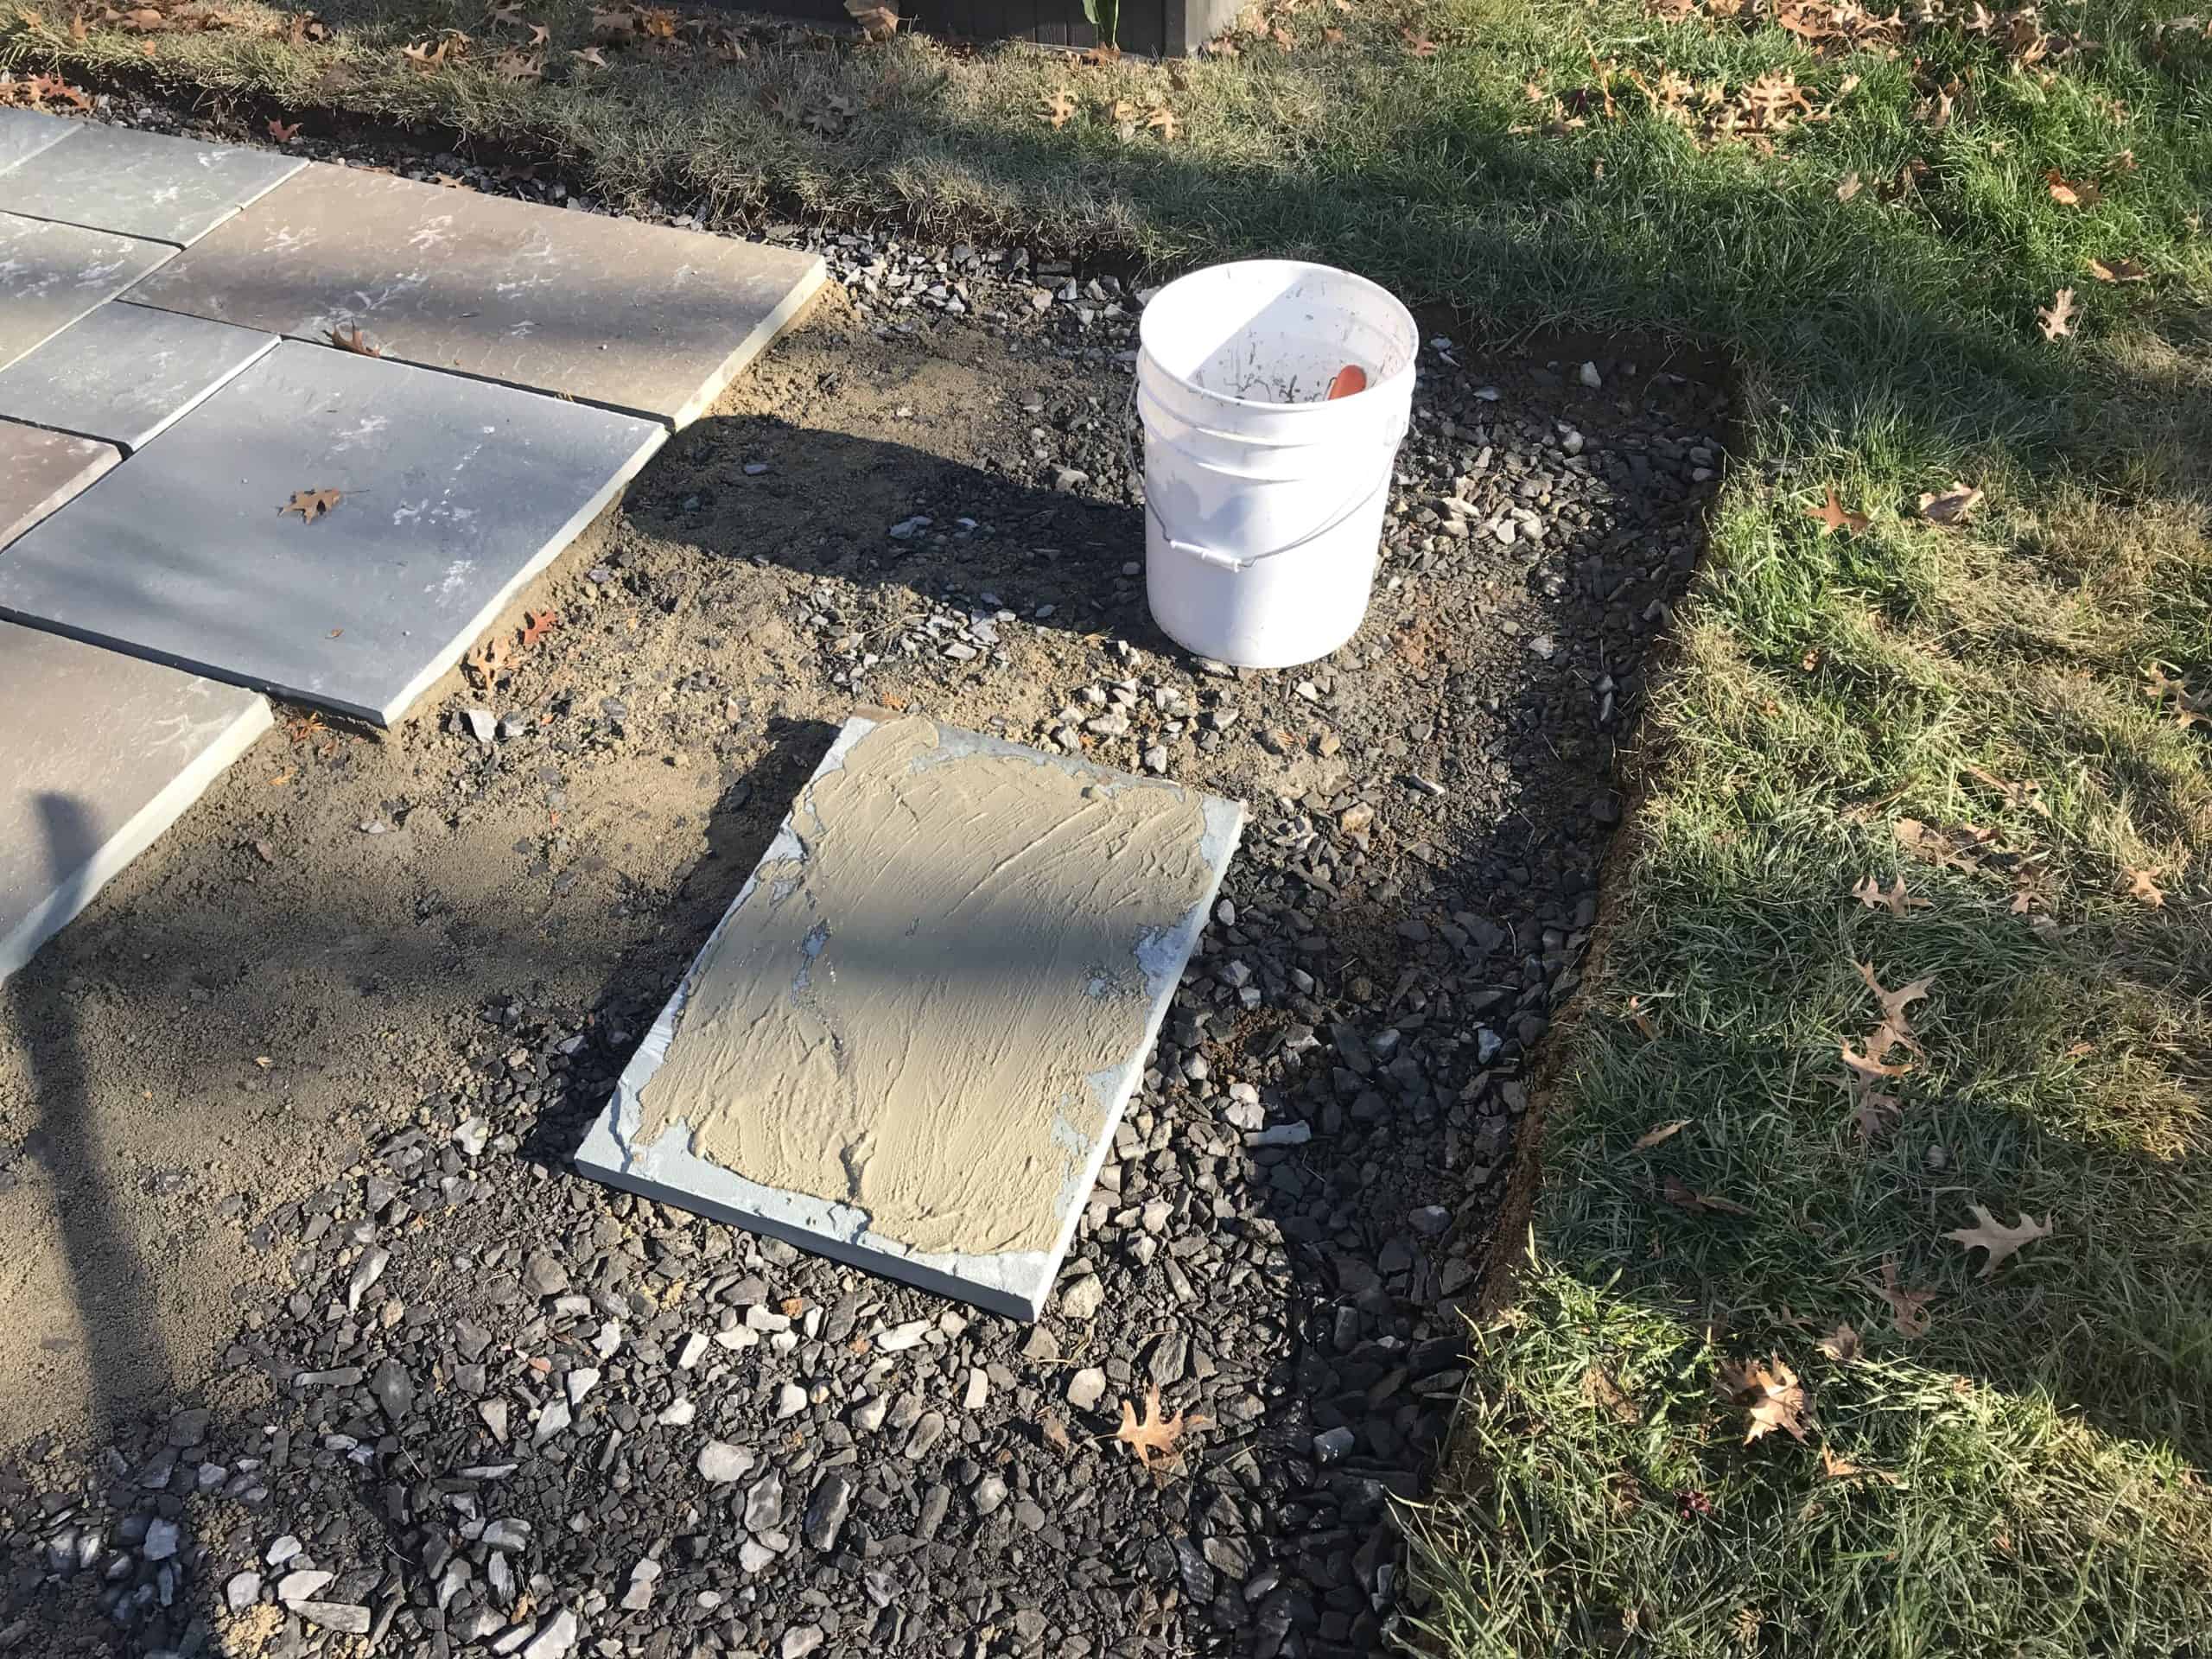
  3. The Slurry “Butter”: In a bucket, mix pure Portland cement with a little water to create a “mayonnaise” consistency. Using a trowel or old brush, coat the entire back of the stone with this slurry. This creates a permanent bond between the stone and the setting bed.
  4. The Beat Down: Once level and buttered, use your rubber mallet to beat the stone into place. This is great for adhesion—and a bit of stress relief!

Step 5: Refining the Joints

Natural cleft flagstone is rarely perfectly square. We aim for ½” wide joints. If a joint looks “out of whack,” use a grinder with a diamond wheel to carefully trim the top, inside portion of the stone to correct the width.

Keep a bucket of clean water and a sponge handy to wash off any stray cement or slurry from the face of the stone immediately.


Step 6: Finishing with Polymeric Sand

Once all the stone is set, it’s time for the finishing touch. I used HP NextGel Polymeric Sand in gray to match the natural tones of the Pennsylvania stone.

  • Wait for a dry day. Polymeric sand must be swept into joints when the stone is completely dry.
  • Sweep the sand into the joints, vibrating the stones slightly to ensure it settles.
  • Follow the manufacturer’s instructions for misting with water to activate the binding agent.

The Finished Result

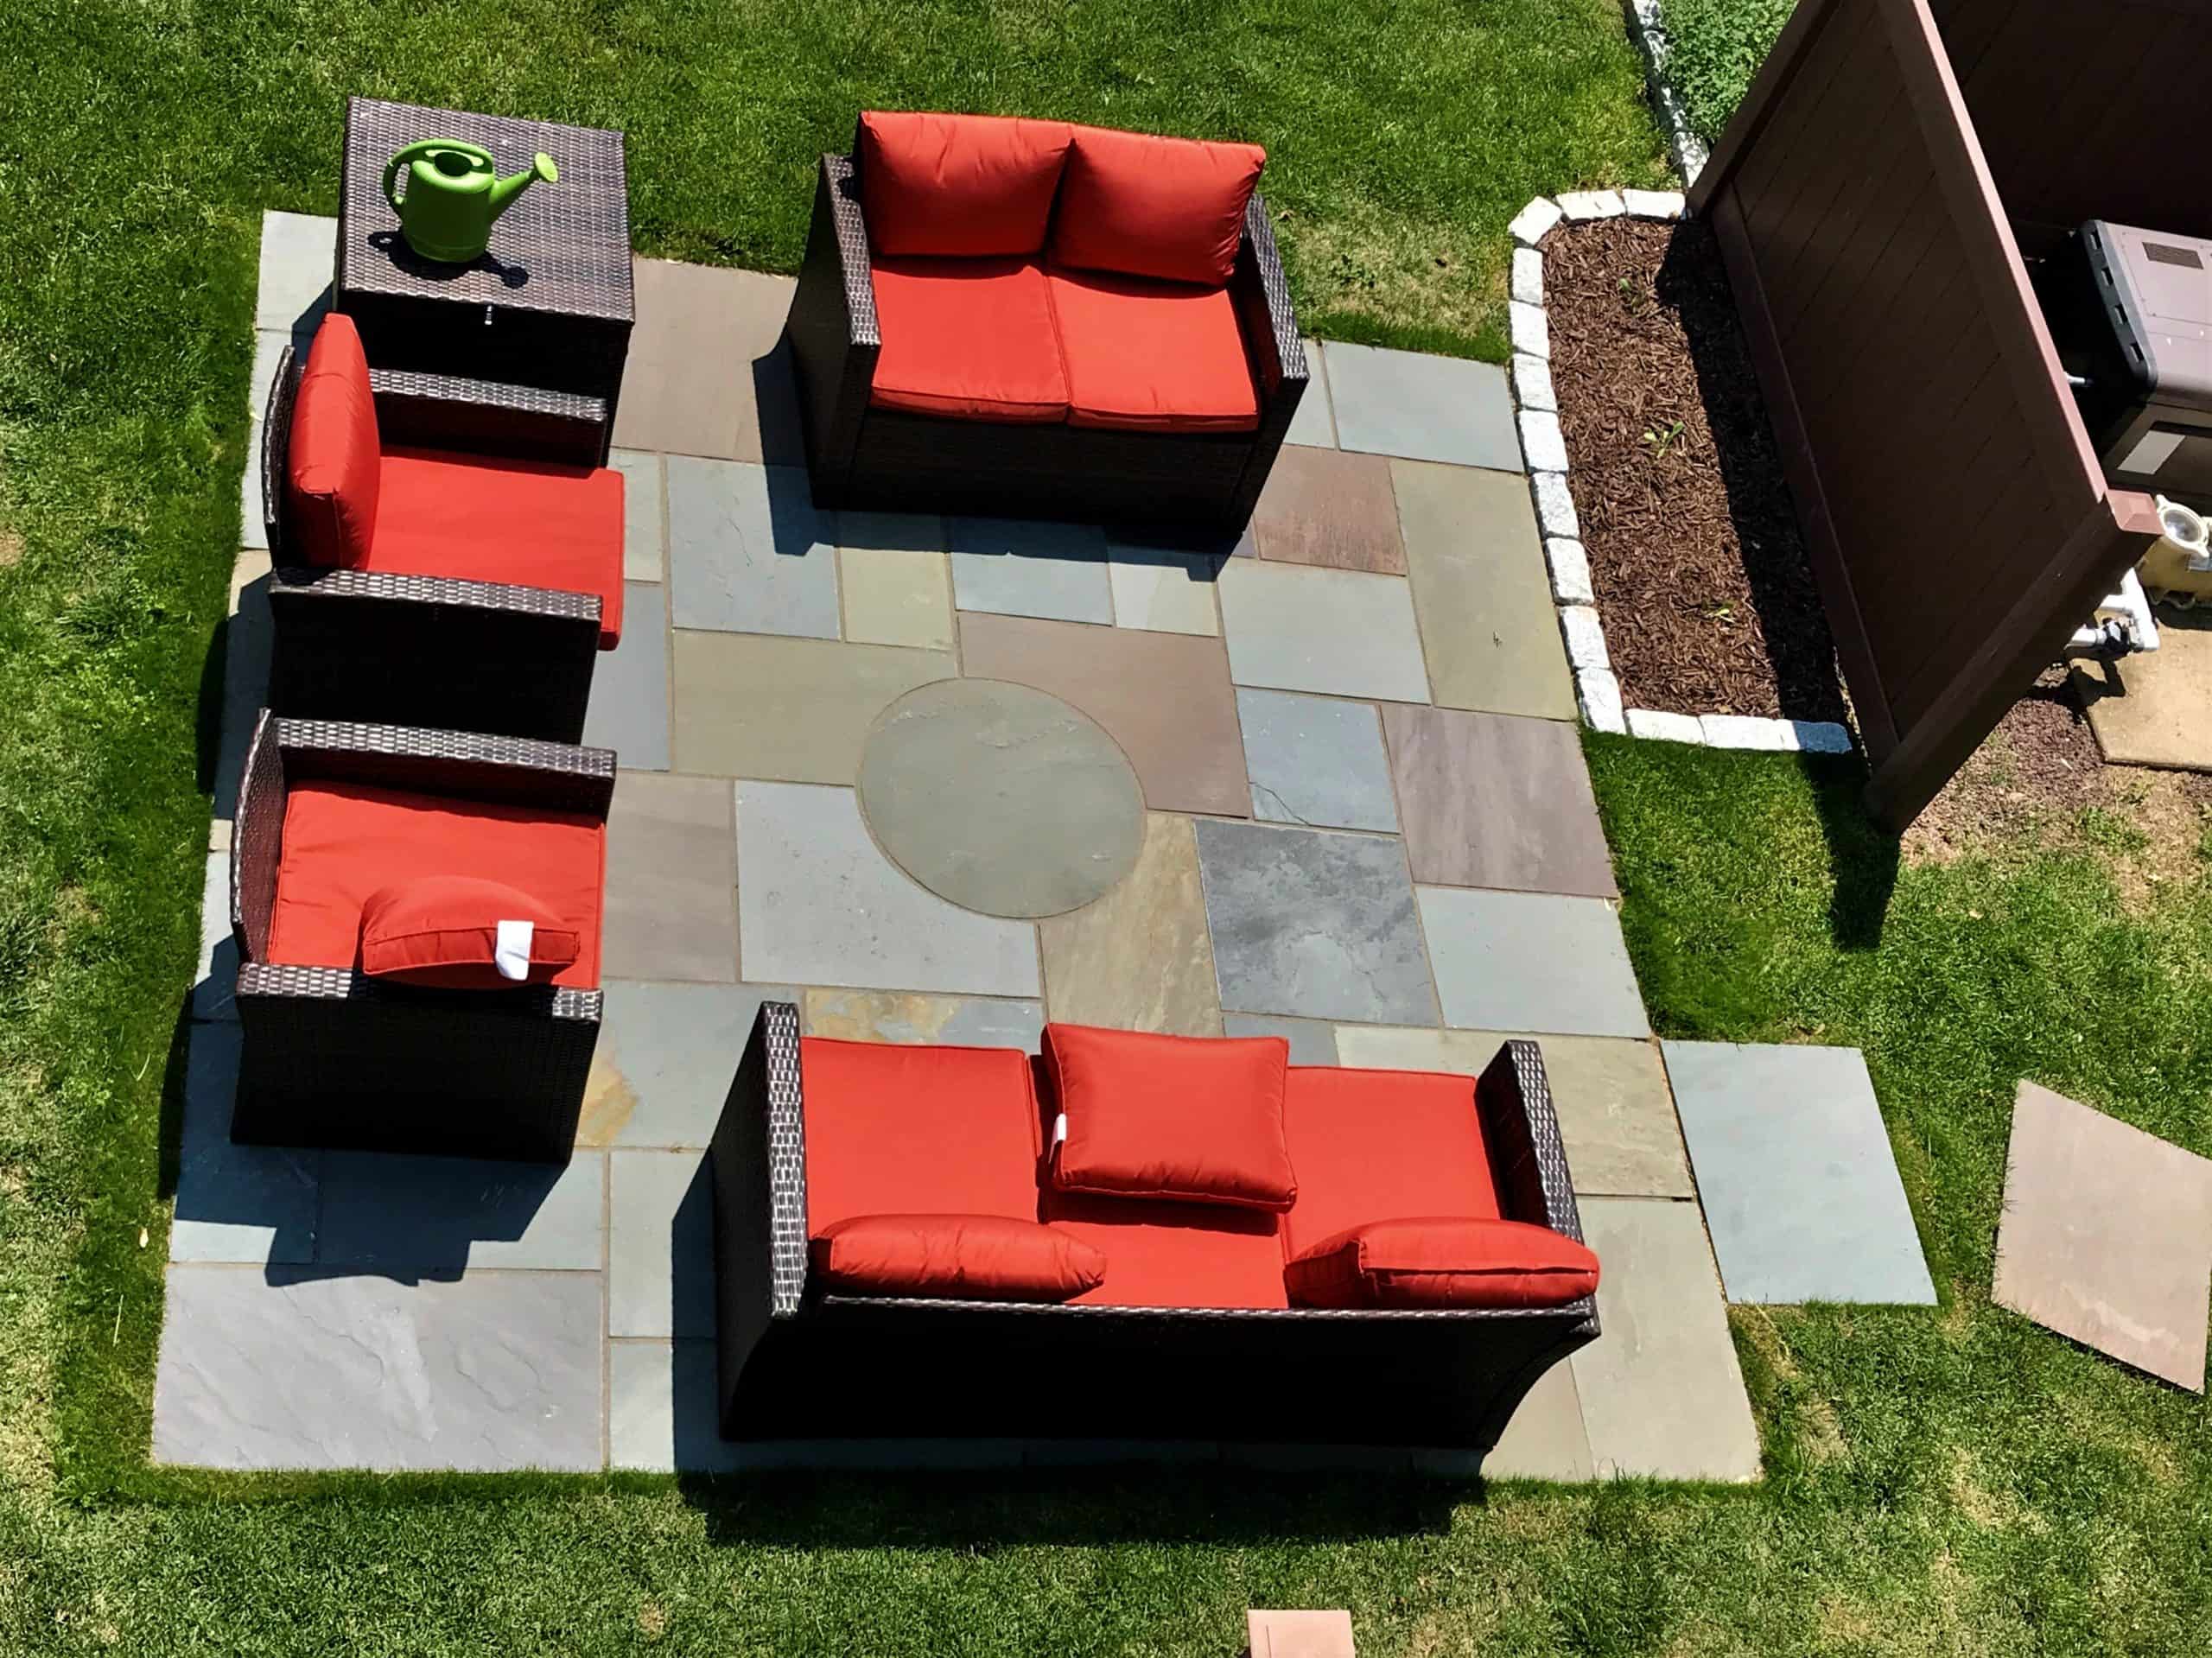
To complete the look, we added a few stepping stones and a small Belgian Block lined flower bed. The contrast of the stone against the landscaping creates a professional, high-end aesthetic that will last for decades.

Ready to start your own project?

If you’re looking for premium materials or need design advice for your next masonry project, feel free to call or email us at Robinson Flagstone. We’ve been helping homeowners and contractors pick the perfect stone for over a century.


Blue/ Gray Thermal Job in Baton Rouge, La


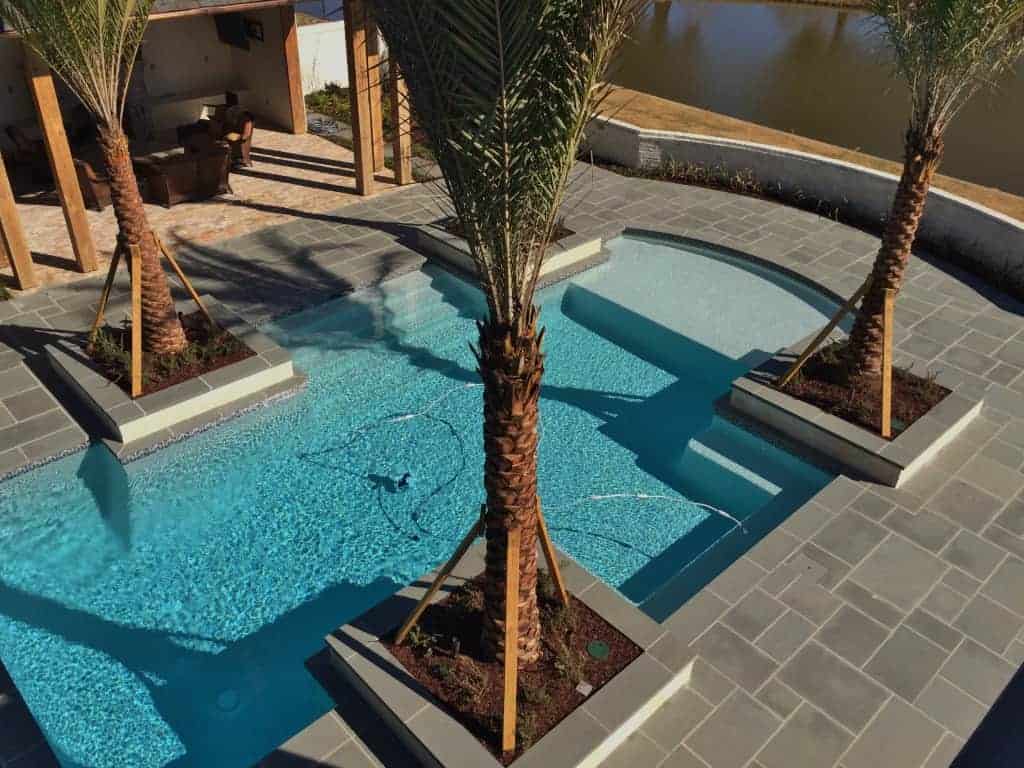
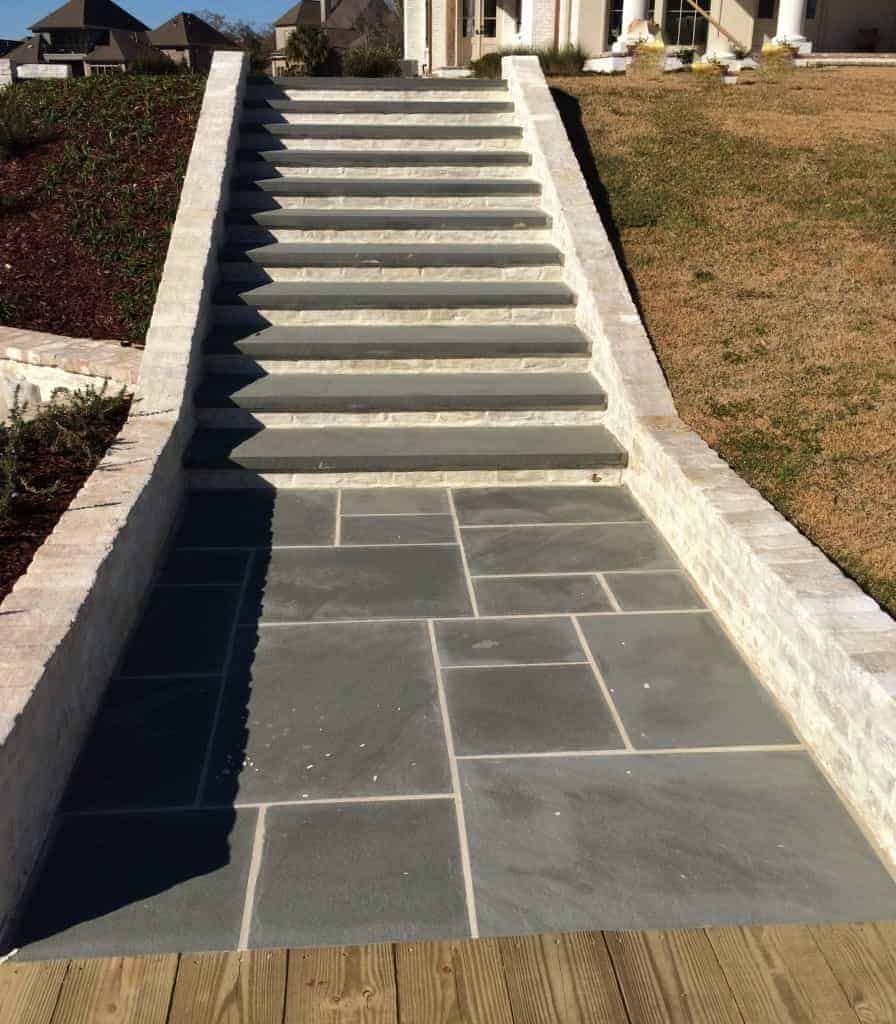
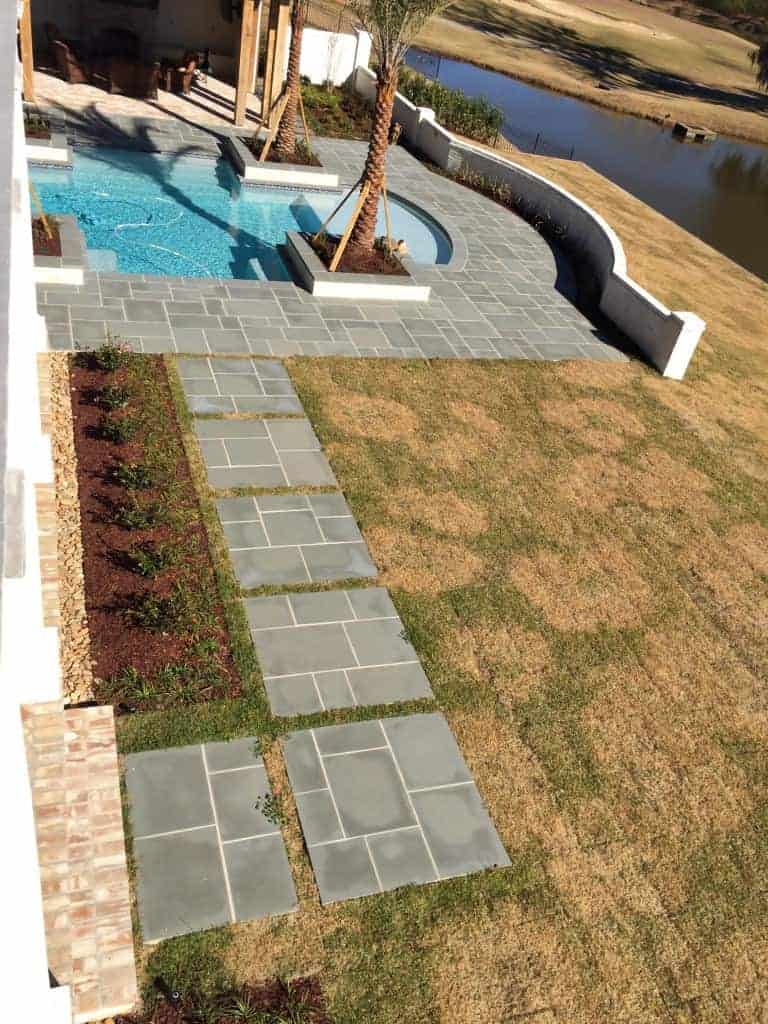
Below are pictures of a recent job at a private residence that just wrapped up in Baton Rouge, Louisiana. The landscape architect’s specifications called for 1″ thick thermal bluestone paving to be used for the walkways and pool deck, and 2″ thick thermal bluestone treads for the pool coping, planter caps , and steps. We provided our customer with a custom setting sketch which illustrated the location of each piece of stone to assist with the setting process.  This was the first of a hand-full of jobs we supplied to in Baton Rouge.